Tailscale on Heroku
Last validated:
Heroku is a popular cloud-hosting platform for running applications without managing servers yourself. However, it can be difficult to use Tailscale on Heroku, since it doesn't provide a /dev/net/tun device that Tailscale needs.
You can use Tailscale's userspace networking mode to connect your apps to your Tailscale network.
Step 1: Generate an auth key to authenticate your Heroku apps
First, we'll generate an auth key to allow Heroku to authenticate our app to join our network.
Go to Keys of the admin console and create an auth key. We recommend using an ephemeral key for this purpose, since it will automatically clean up devices after they shut down.
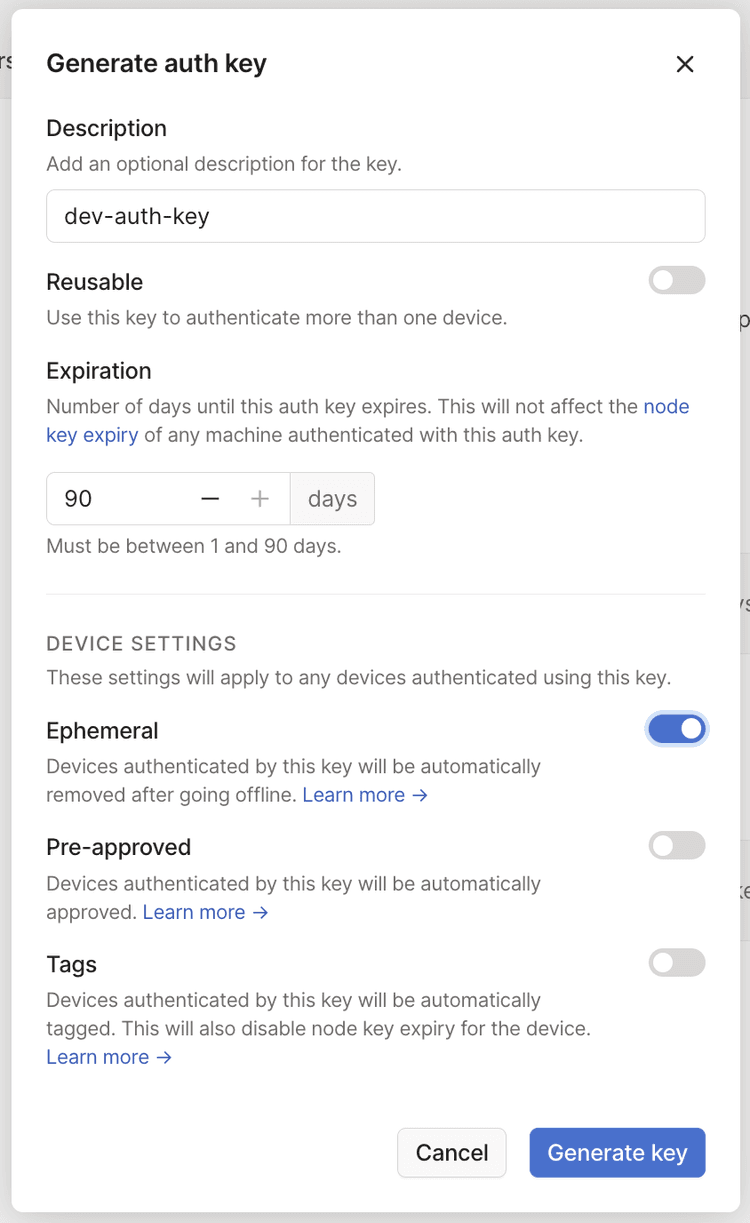
The Pre-approved option will only display in the dialog if device approval is enabled in your Tailscale network.
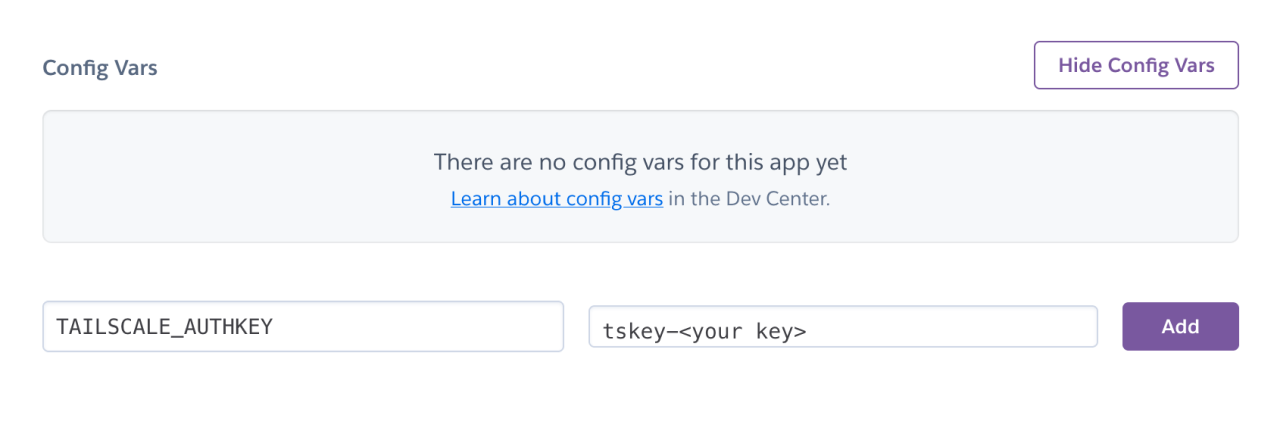
Next, go to your Heroku app's settings and then the configuration variables section. From here, add a new configuration variable named TAILSCALE_AUTHKEY, with the tskey-<key> value you just created.
Step 2: Configure your Dockerfile to install Tailscale
We recommend using a multistage Dockerfile where the first stage builds your application, and the second stage pulls application code and Tailscale into the final image to be uploaded to Heroku.
Create a Dockerfile at the root of your app. In that Dockerfile add something like:
FROM golang:1.16.2-alpine3.13 as builder
WORKDIR /app
COPY . ./
# This is where one could build the application code as well.
# https://docs.docker.com/develop/develop-images/multistage-build/#use-multi-stage-builds
FROM alpine:latest
RUN apk update && apk add ca-certificates && rm -rf /var/cache/apk/*
# Copy binary to production image.
COPY /app/start.sh /app/start.sh
# Copy Tailscale binaries from the tailscale image on Docker Hub.
COPY /usr/local/bin/tailscaled /app/tailscaled
COPY /usr/local/bin/tailscale /app/tailscale
RUN mkdir -p /var/run/tailscale /var/cache/tailscale /var/lib/tailscale
# Run on container startup.
CMD ["/app/start.sh"]
The Dockerfile specifies /app/start.sh as the initial process to run. This script needs to bring Tailscale up and then start the application binary. This is where we can use the TAILSCALE_AUTHKEY variable we defined earlier.
Then, create a file named start.sh at the root of your app:
#!/bin/sh

/app/tailscaled --tun=userspace-networking --socks5-server=localhost:1055 &
/app/tailscale up --auth-key=${TAILSCALE_AUTHKEY} --hostname=heroku-app
echo Tailscale started
ALL_PROXY=socks5://localhost:1055/ /app/my-app
The next time your Heroku app deploys, it will be able to connect to your private Tailscale network.
Remove ephemeral nodes from a tailnet
When an ephemeral node goes offline, it is automatically removed from your tailnet. You can also control ephemeral node removal using the tailscale logout command to either manually force the removal or incorporate the command into the tailscaled Tailscale daemon. For more information, refer to Ephemeral nodes.