Access Azure Windows VMs privately using Tailscale
Last validated:
Microsoft Azure is a cloud service provider offering Linux and Windows virtual machines, to which Tailscale can be used to provide secure connectivity. This topic covers Windows VMs running within Azure. For Linux VMs, refer to Access Azure Linux VMs privately using Tailscale.
Prerequisites
Before you begin this guide, you'll need a Tailscale network set up and configured with at least one existing device. Read our getting started guide if you need help with this.
Step 1: Set up the Tailscale client for Windows VMs
First, create a Virtual Machine running Windows Datacenter Edition.
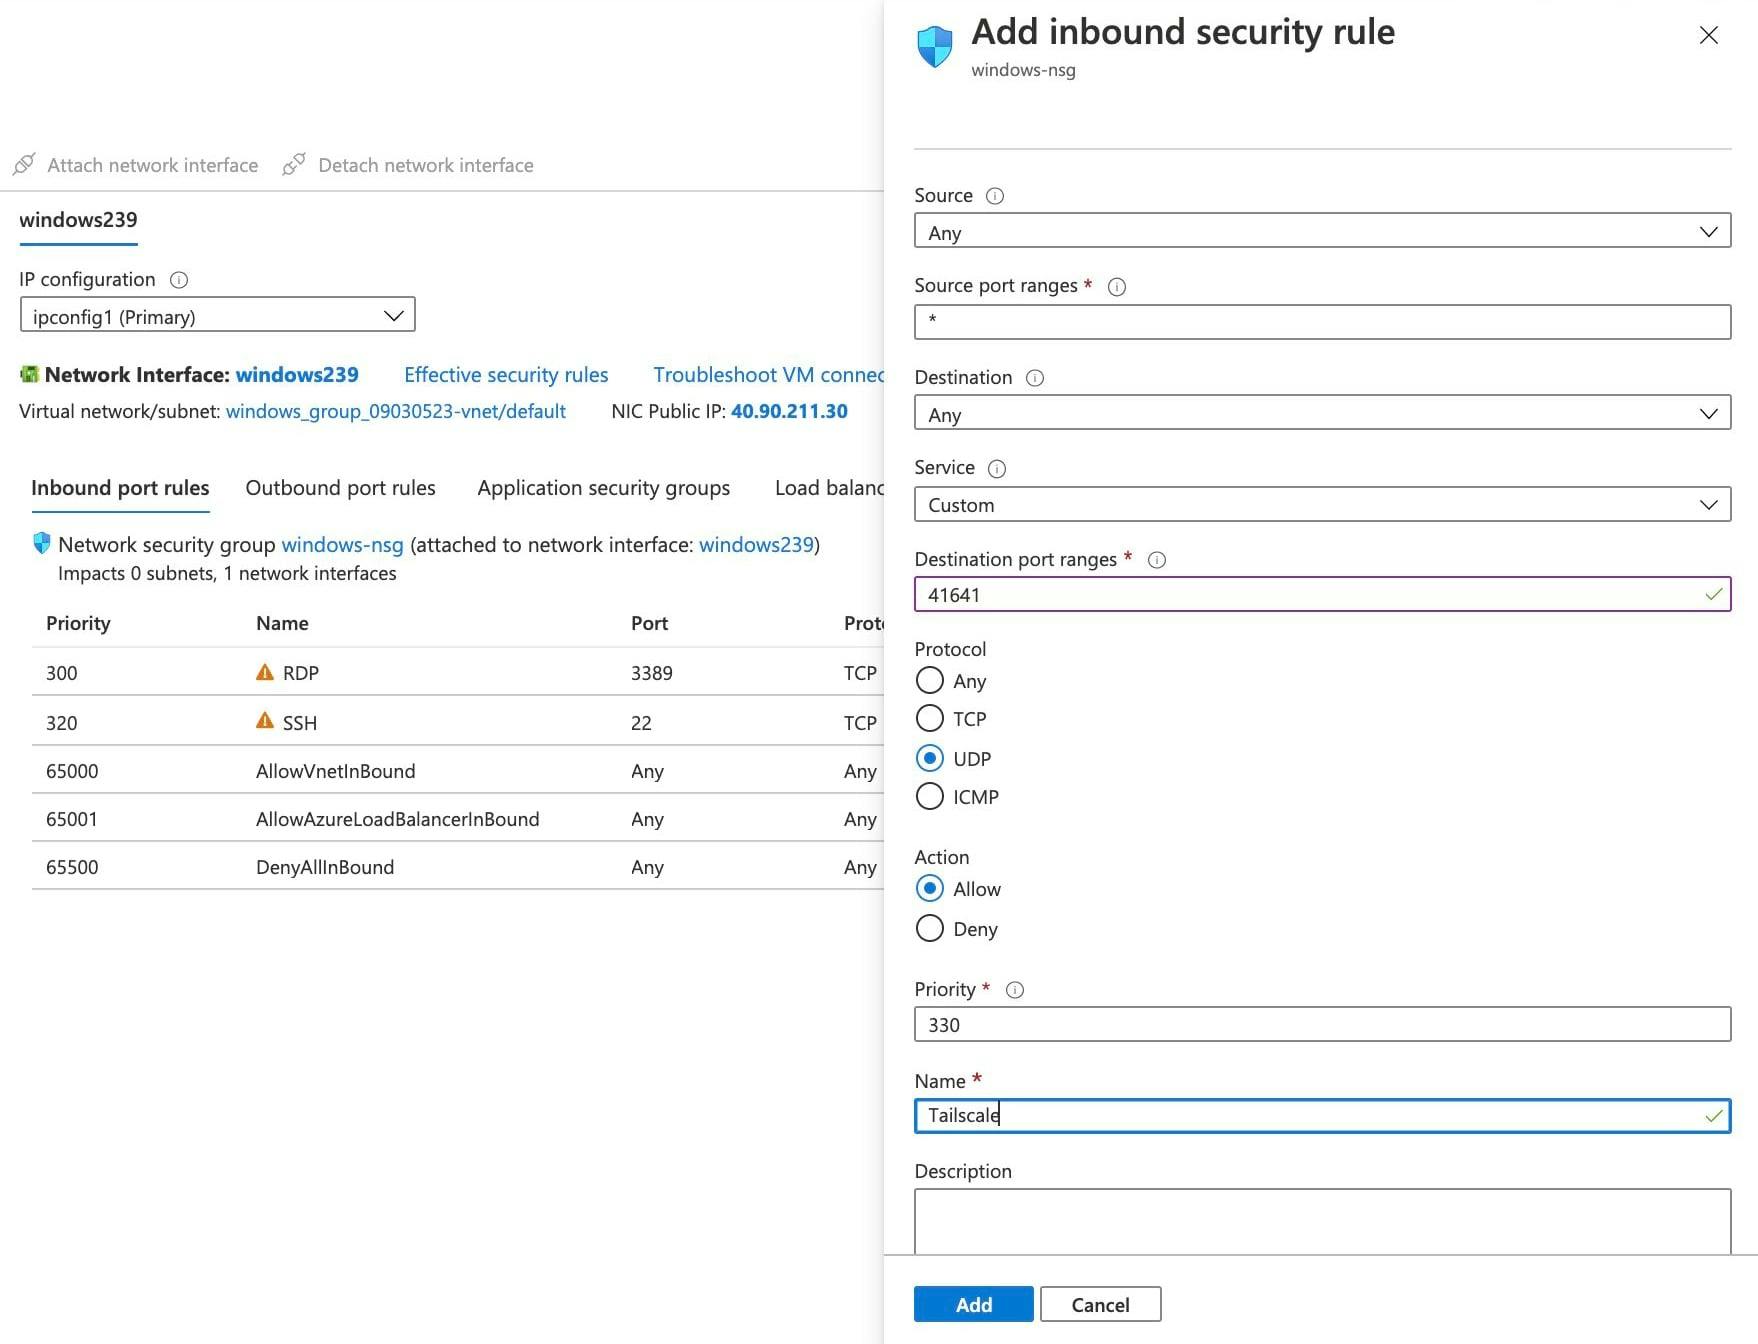
If at least one side of a tunnel has "easy NAT," where Tailscale can determine the UDP port number on the far side of the NAT device, then it will make direct connections to minimize latency. We ensure that the Azure nodes can make direct connections by allowing UDP port 41641 to ingress through the firewall.
In the Networking step while creating the VM choose Advanced for the NIC network security group, and create a network security policy to allow UDP port 41641 to ingress.
For the initial setup it is helpful to also allow RDP and/or SSH. Once Tailscale is installed, public access can be removed in favor of going through Tailscale.
Then RDP to the system, and download the latest Windows installer.
It is possible to log in using a browser as described in install Tailscale on Windows, as Windows Datacenter Edition does include a GUI and web browser.
However this tends not to work as well for a Cloud VM where one is likely not already logged in from the browser.
Alternately, one can use a cmd.exe shell to run the Tailscale CLI command and use an auth key:
tailscale up --accept-dns=false --auth-key=tskey-0123456789abcdef
For Azure VMs it is generally best to let Azure handle the DNS configuration,
not have Tailscale override it, so we added --accept-dns=false.
Step 2: Advertise routes from the VM
For the benefit of the other nodes in the tailnet we'll set up split DNS to allow use of the same DNS names as are used inside of Azure. The Azure DNS server address is 168.63.129.16, which is an anycast address that will go to the nearest DNS server within Azure.
We'll use cmd.exe to have our VM advertise routes for both the subnet it sits on as well as the
Azure DNS server. For example, if the subnet address range is 10.1.0.0/24, the command would be:
tailscale set --advertise-routes=10.1.0.0/24,168.63.129.16/32 --accept-dns=false
Step 3: Add Azure DNS for your tailnet
In the DNS page of the admin console we add a nameserver
restricted to the internal.cloudapp.net domain, pointing to the Azure DNS server which we
made available through our VM.
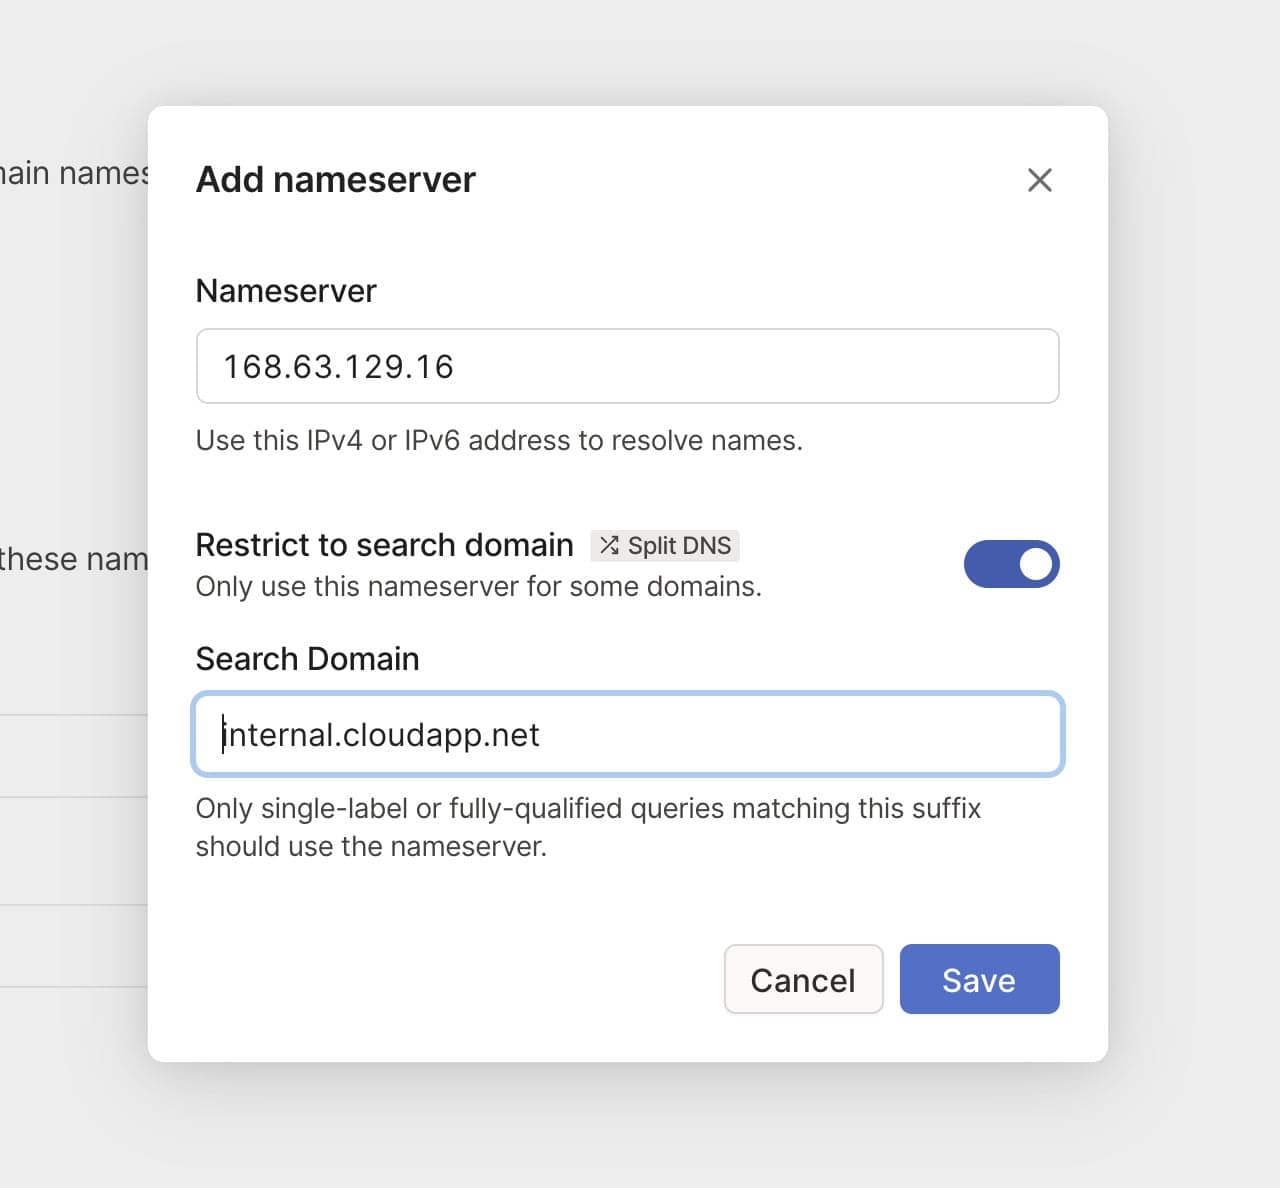
Now the same hostnames which work between nodes running within Azure will also be available to all nodes on our tailnet.
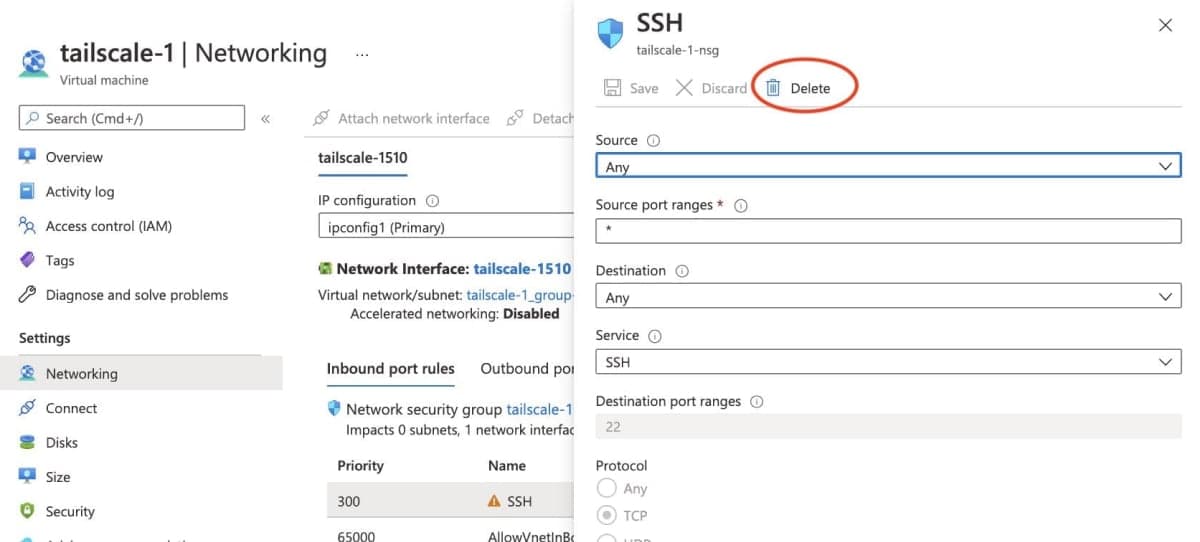
Step 4: Remove public SSH access
As we can now SSH to the system over the private Tailscale network, there is no reason to leave the SSH port open on a public IP address. In the Settings > Network tab select the ingress rule for "SSH" and delete it.
4via6 subnet routers
If your network has subnets with overlapping IPv4 addresses, you can use the 4via6 subnet routers feature to ensure traffic from each node in your tailnet is routed to the correct device.