Setting up Okta to work with Tailscale
Last validated:
To activate Okta for your domain, follow the instructions below.
Contents
Supported Features
- Single Sign-On (OpenID Connect) initiated by Okta
Requirements
- Install the Tailscale app from the Okta Integration Network.
Configuration Steps
-
On the Okta admin page, select the Tailscale application and select the Sign On tab.
- Copy the values of Client ID and Client secret.
- Copy the issuer published in the OpenID Provider Metadata. Typically, this is the Okta URL. To find this URL, select OpenID Provider Metadata, look for a line that contains
"issuer:", and then copy the URL listed on that line (without the quotes). For example, it will look likehttps://dev-123456.okta.comor similar.
-
Switch your Tailscale identity provider to Okta. For information on how to do that, refer to Switch identity provider. Note that the domain name used to log into Tailscale should match the email addresses of users assigned to this app.
-
Give users and/or groups access to the Tailscale app:
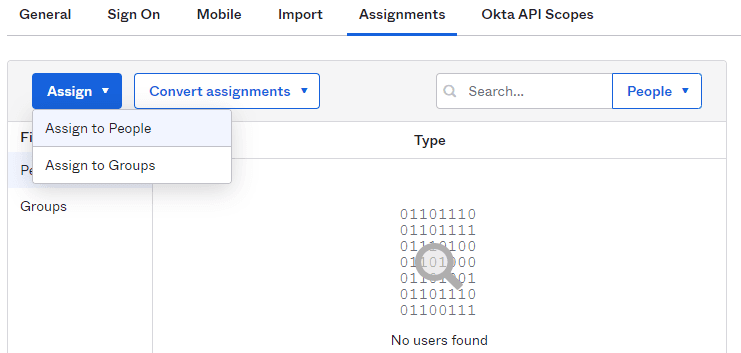
Note that if you make changes to a domain already activated for Okta, or when you migrate an existing tailnet from another identity provider to Okta, no custom link is sent—your activation finishes without requiring this step.
If your organization has defined custom access policies, verify that the Tailscale app is authorized for the openid, email, and profile scopes.
Notes
After activation, check out our getting started guide.
For information about provisioning users and groups in Okta, refer to User & group provisioning in Okta.
Okta initiated login
Tailscale is currently not compatible with Identity Provider initiated login, and only provides service provider initiated login. This means users must start authentication from Tailscale's login page, rather than from inside their Okta instance. As a workaround, users who are interested in initializing login from the Okta instance can create a Tailscale Login bookmark chiclet using these steps:
- Open the Tailscale App in Okta, select the General tab, then select Edit.
- Check Do not display application icon to users and save.
- Open the Okta Integration Network, search for Bookmark App, and select it. Choose Add integration.
- Fill out the application label name as Tailscale Login, and set
https://login.tailscale.comas the URL. - Leave the Application Visibility setting unchecked, and choose Done.
- Choose Applications, and assign the new bookmark app to Tailscale users.