Tailscale on NixOS: A New Minecraft Server in Ten Minutes
NixOS is a Linux distribution built from the ground up to deploy services. Tailscale is a peer-to-peer VPN built to securely connect devices. This topic describes how to set up a brand new Minecraft server (exposed only over Tailscale) in ten minutes on DigitalOcean.
Prerequisites
Before you begin, you need the following:
- A Tailscale account. You don't need to pay for Tailscale, as the scenario in this topic is possible on the Personal plan.
- A DigitalOcean account.
- A Minecraft Java Edition account.
Step 1: Write the NixOS Configuration File
In NixOS one of the core principles is that the entire system is configurable with a modular language called Nix. This lets you configure everything using a common syntax so you don't need to remember every configuration file format for every service you use. As such, you can configure an entire system from a single file.
Let's make a new configuration file called host.nix and set up a system that
has Tailscale start up on boot:
{ config, pkgs, ... }:

{
  # make the tailscale command usable to users
  environment.systemPackages = [ pkgs.tailscale ];

  # enable the tailscale service
  services.tailscale.enable = true;
}
This will have Tailscale start up, however to authenticate to Tailscale we need to take a few more steps. First, visit the Keys page in the admin console.
Create a new one-time use auth key and then copy it to your notes. We will use it below.
With this key we can write a systemd oneshot unit that will log in to Tailscale using this key.
A systemd oneshot job is something that systemd expects to be run once as opposed to being a persistent service. The above DigitalOcean tutorial explains this in more detail.
Copy this configuration below the services.tailscale.enable line in your
host.nix file:
# ...

# create a oneshot job to authenticate to Tailscale
systemd.services.tailscale-autoconnect = {
  description = "Automatic connection to Tailscale";

  # make sure tailscale is running before trying to connect to tailscale
  after = [ "network-pre.target" "tailscale.service" ];
  wants = [ "network-pre.target" "tailscale.service" ];
  wantedBy = [ "multi-user.target" ];

  # set this service as a oneshot job
  serviceConfig.Type = "oneshot";

  # have the job run this shell script
  script = with pkgs; ''
    # wait for tailscaled to settle
    sleep 2

    # check if we are already authenticated to tailscale
    status="$(${tailscale}/bin/tailscale status -json | ${jq}/bin/jq -r .BackendState)"
    if [ $status = "Running" ]; then # if so, then do nothing
      exit 0
    fi

    # otherwise authenticate with tailscale
    ${tailscale}/bin/tailscale up -authkey <your-auth-key>
  '';
};
Make sure to replace <your-auth-key> with the auth key you got from the Tailscale admin console. Without this auth key your VPS cannot connect to Tailscale.
The auth key is hard-coded in this configuration file. This offers no protection of the auth key if anyone else has access to the configuration file. For options on protecting secrets in NixOS, refer to the NixOS Comparison of secret managing schemes topic. For general information about protecting Tailscale auth keys, refer to Securely handle an auth key.
Now that we have Tailscale configured to authenticate and connect to your network, let's enable the lightweight NixOS firewall so that we can only allow Minecraft traffic over Tailscale. The NixOS manual has more details, but at a high level we need to:
- Enable the firewall.
- Mark tailscale0 as a trusted interface.
- Allow anyone on the internet to connect to Tailscale's UDP port (don't worry, they will be rejected if they are not a part of your network).
- Allow anyone on the internet to connect to your server's SSH port (this will also work over Tailscale, but having it exposed over the public internet can help when you need to administer the server by using SSH).
We can do that with the following configuration added to the end of your
host.nix file:
# ...
networking.firewall = {
  # enable the firewall
  enable = true;

  # always allow traffic from your Tailscale network
  trustedInterfaces = [ "tailscale0" ];

  # allow the Tailscale UDP port through the firewall
  allowedUDPPorts = [ config.services.tailscale.port ];

  # let you SSH in over the public internet
  allowedTCPPorts = [ 22 ];
};
Now we can configure the Minecraft server. The Minecraft options expose a number of settings you can use to configure your server however you want. Note that you must set the EULA agreement to true yourself. The Minecraft server is a closed-source program, so you must give NixOS permission to use closed source packages.
# ...
services.minecraft-server = {
  enable = true;
  eula = false; # set to true if you agree to Mojang's EULA: https://account.mojang.com/documents/minecraft_eula
  declarative = true;

  # see here for more info: https://minecraft.gamepedia.com/Server.properties#server.properties
  serverProperties = {
    server-port = 25565;
    gamemode = "survival";
    motd = "NixOS Minecraft server on Tailscale!";
    max-players = 5;
    enable-rcon = true;
    # This password can be used to administer your minecraft server.
    # Exact details as to how will be explained later. If you want
    # you can replace this with another password.
    "rcon.password" = "hunter2";
    level-seed = "10292992";
  };
};

# enable closed source packages such as the minecraft server
nixpkgs.config.allowUnfree = true;
Now we have everything we need. We set up Tailscale, we configured an automatic login to Tailscale, we set up the firewall so that it rejects all incoming traffic (except for traffic from your Tailscale network), and we configured the Minecraft server so that you can play in survival mode.
Step 2: DigitalOcean Setup
Now let's get this put into a new DigitalOcean server. Open a new text editor
window and create a file called user-data.yaml. Copy this template into it:
#cloud-config
write_files:
  - path: /etc/nixos/host.nix
    permissions: "0644"
    content: |
      { pkgs, config, ... }:

      {

      }

runcmd:
  - curl https://raw.githubusercontent.com/elitak/nixos-infect/master/nixos-infect | PROVIDER=digitalocean NIXOS_IMPORT=./host.nix NIX_CHANNEL=nixos-20.09 bash 2>&1 | tee /tmp/infect.log
At the time of this topic being written, DigitalOcean doesn't have a NixOS
image by default. So we will use
nixos-infect in order
to automatically replace our Ubuntu installation with a NixOS one. We are also
going to use it to automatically configure the server with the host.nix file
we just made.
Copy the contents of host.nix into the content value of the write_files
block. Be sure to indent the file by four spaces so that it will work as YAML
user data. When you are done you should have a file that looks something like
this reference file.
Now that you have the cloud configuration, let's launch the server in the cloud.
Open the DigitalOcean control panel and select Create and then select Droplets. Choose an Ubuntu 20.04 image and a plan with at least 4 GB of ram (the Minecraft server needs a lot of resources, unfortunately).
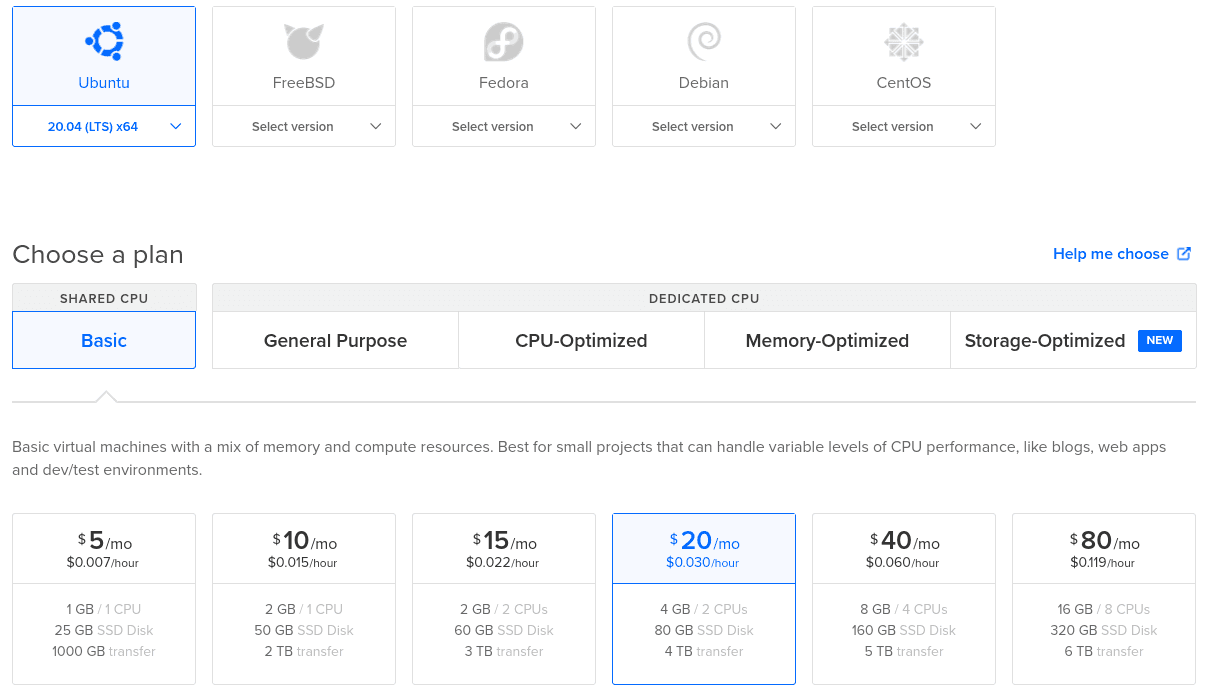
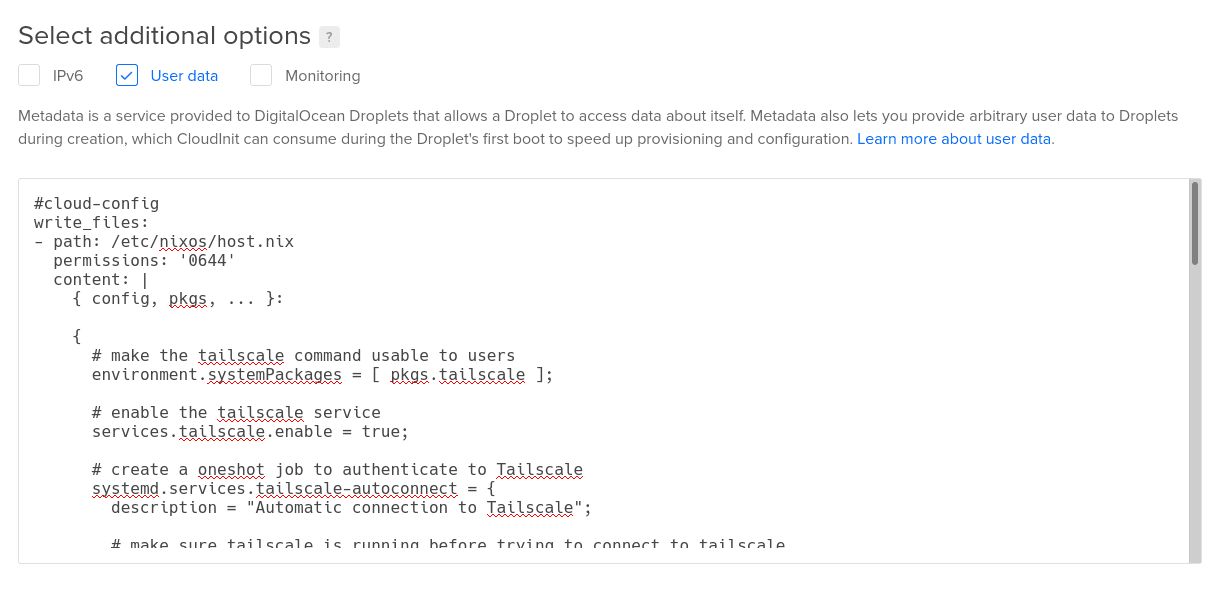
Then choose a data center near you and enable the IPv6 and User Data options.
Paste the contents of your user-data.yaml file into the text box that shows
up. Choose your SSH key in the list of SSH keys that shows up and then give the
droplet a hostname, such as minecraft. If you want you can enable backups.
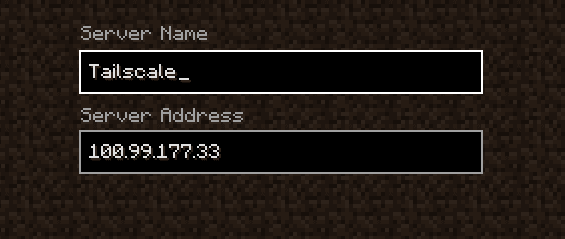
Once you have everything set up, select the large green button labeled Create Droplet. It may take up to ten minutes to install and configure NixOS. Once everything is done setting up, you should be able to verify that your server is in your Tailscale network.
Step 3: Play Minecraft
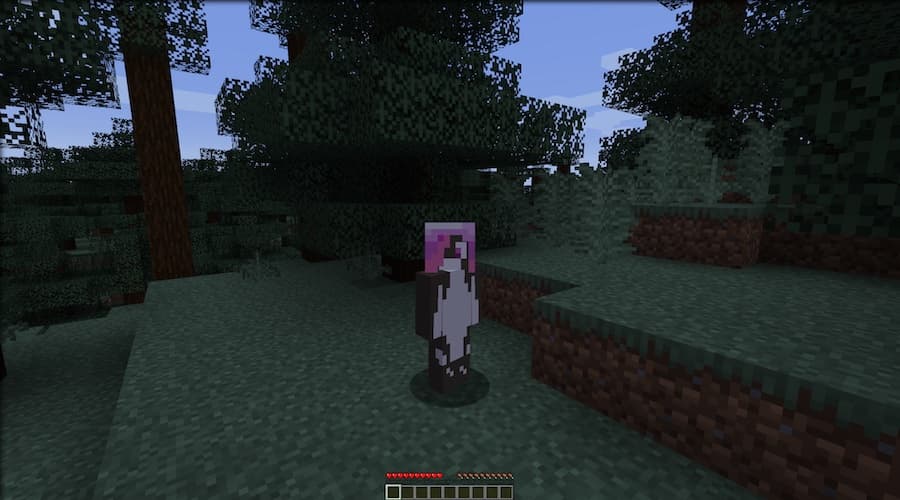
Once it shows up in your network list, you can fire up your Minecraft client and connect to your new server. You may need to select a slightly older version of Minecraft if the in-game UI tells you to use an older version of Minecraft. You can adjust the Minecraft version you are running using the launcher UI.

Next Steps
If you want to administer your Minecraft server, you can add the mcrcon package to your system configuration next to the tailscale package:
environment.systemPackages = with pkgs; [ tailscale mcrcon ];
Then you can connect to the Minecraft server command line with this command:
mcrcon -p hunter2
If you adjusted the rcon password above, you will need to adjust this command to
include that new password. From there you can change game modes, adjust the time
of day and anything else you want.
You can use node sharing to invite people you trust to your server, so they can join your adventure.
If you want to make configuration changes to your server after you provision it,
edit the /etc/nixos/host.nix file in your favorite text editor (such as nano).
The NixOS manual should help guide you if you want to install more services (such as backups using BorgBackup or anything else listed in the options). The cloud's the limit!
Refer to this BorgBackup guide.