Set up Raspberry Pi as a subnet router
Last validated:
In this topic, we'll set up a Raspberry Pi to be used as a subnet router in your network.
Tailscale works best when you install Tailscale on every client, server, or VM in your organization. That way traffic is end-to-end encrypted, and no configuration is needed to move machines between physical locations.
However, you may not want to (or be unable to) install Tailscale directly on all of your machines. In those cases, you can set up a Tailscale subnet router to advertise whole subnets at once. A subnet router routes all traffic from the Tailscale network onto your physical subnet. This makes it easy to incrementally deploy Tailscale, even on legacy networks.
This kind of Tailscale node connects your unencrypted subnet to the rest of your Tailscale network. As necessary it forwards unencrypted traffic on the subnet to Tailscale, and encrypted traffic from Tailscale to the subnet.
Prerequisites
Before you begin this guide, you'll need a Raspberry Pi (any version will work), power supply, and Ethernet cable. If you have a version with wireless capability and want to run it wirelessly, you'll need a wireless USB card.
You'll also need a Tailscale account. You don't need to pay for Tailscale—this is possible on the Personal plan!
Step 2: Install Tailscale onto your Raspberry Pi
You can find instructions at the link below.
Download TailscaleOnce it is installed, and you've run tailscale up on your Raspberry Pi, continue to the next step.
Step 3: Connect to Tailscale on the Raspberry Pi as a subnet router
First, find your local network's subnets. Go to the terminal in your Raspberry Pi and type ip addr show. That will list all connected network devices and their IP addresses.
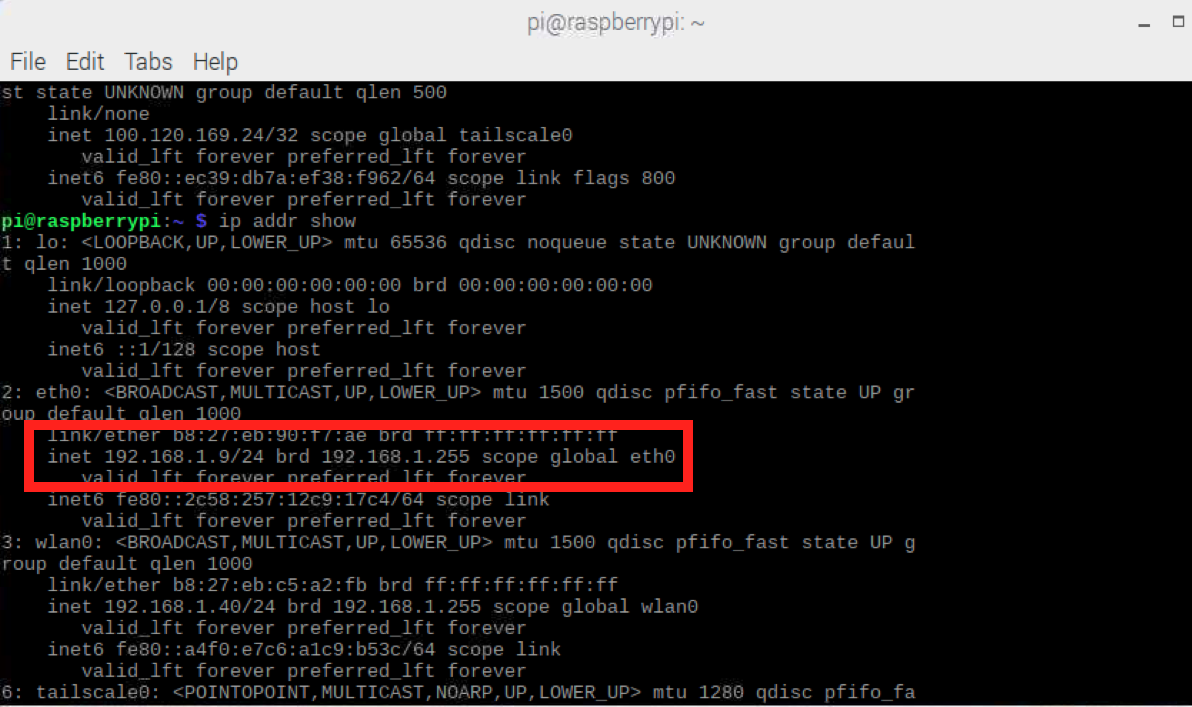
Find the inet entry for the network device for your local network. It will frequently look like 192.168.x.y/24. In this example, our IP address is 192.168.1.9/24.
From that IP address, calculate your network's CIDR. Using that calculator, put the part before the / (192.168.1.9) into the IP Address field, and the part after the / (24) in the Mask Bits field. The output you want will be in the Net: CIDR Notation field (192.168.1.0/24).
Now restart Tailscale as a subnet router, passing that CIDR using --advertise-routes flag:
sudo tailscale set --advertise-routes=192.168.1.0/24
Step 4: Authorize the subnet in the admin console
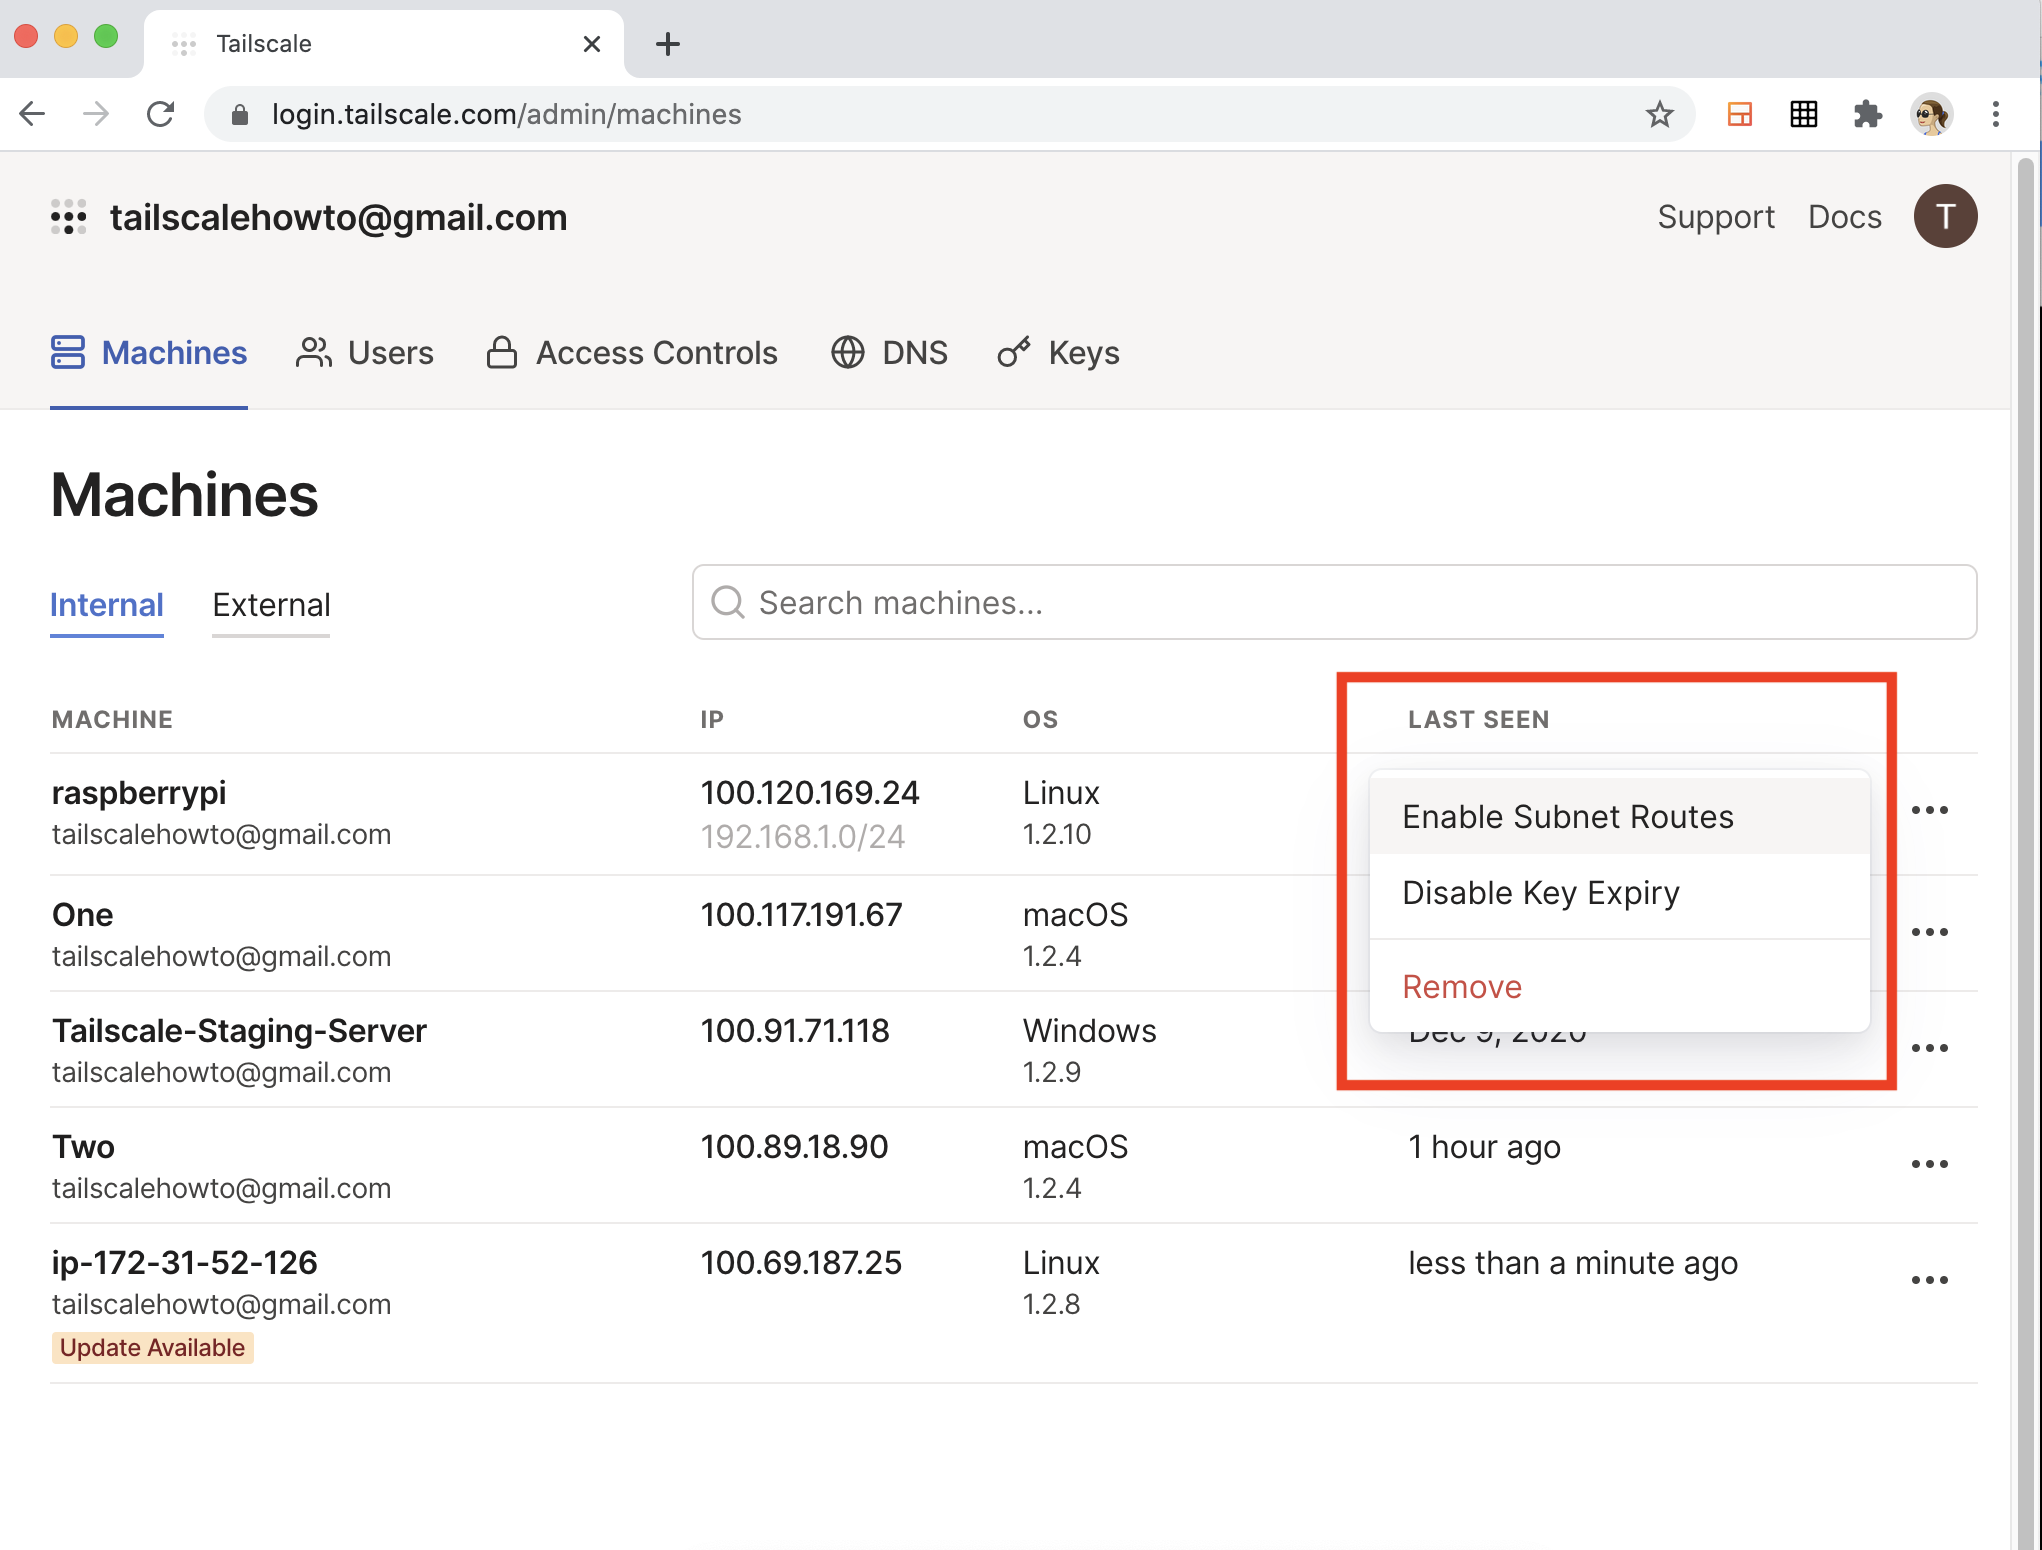
Subnet routers must be approved to take effect.
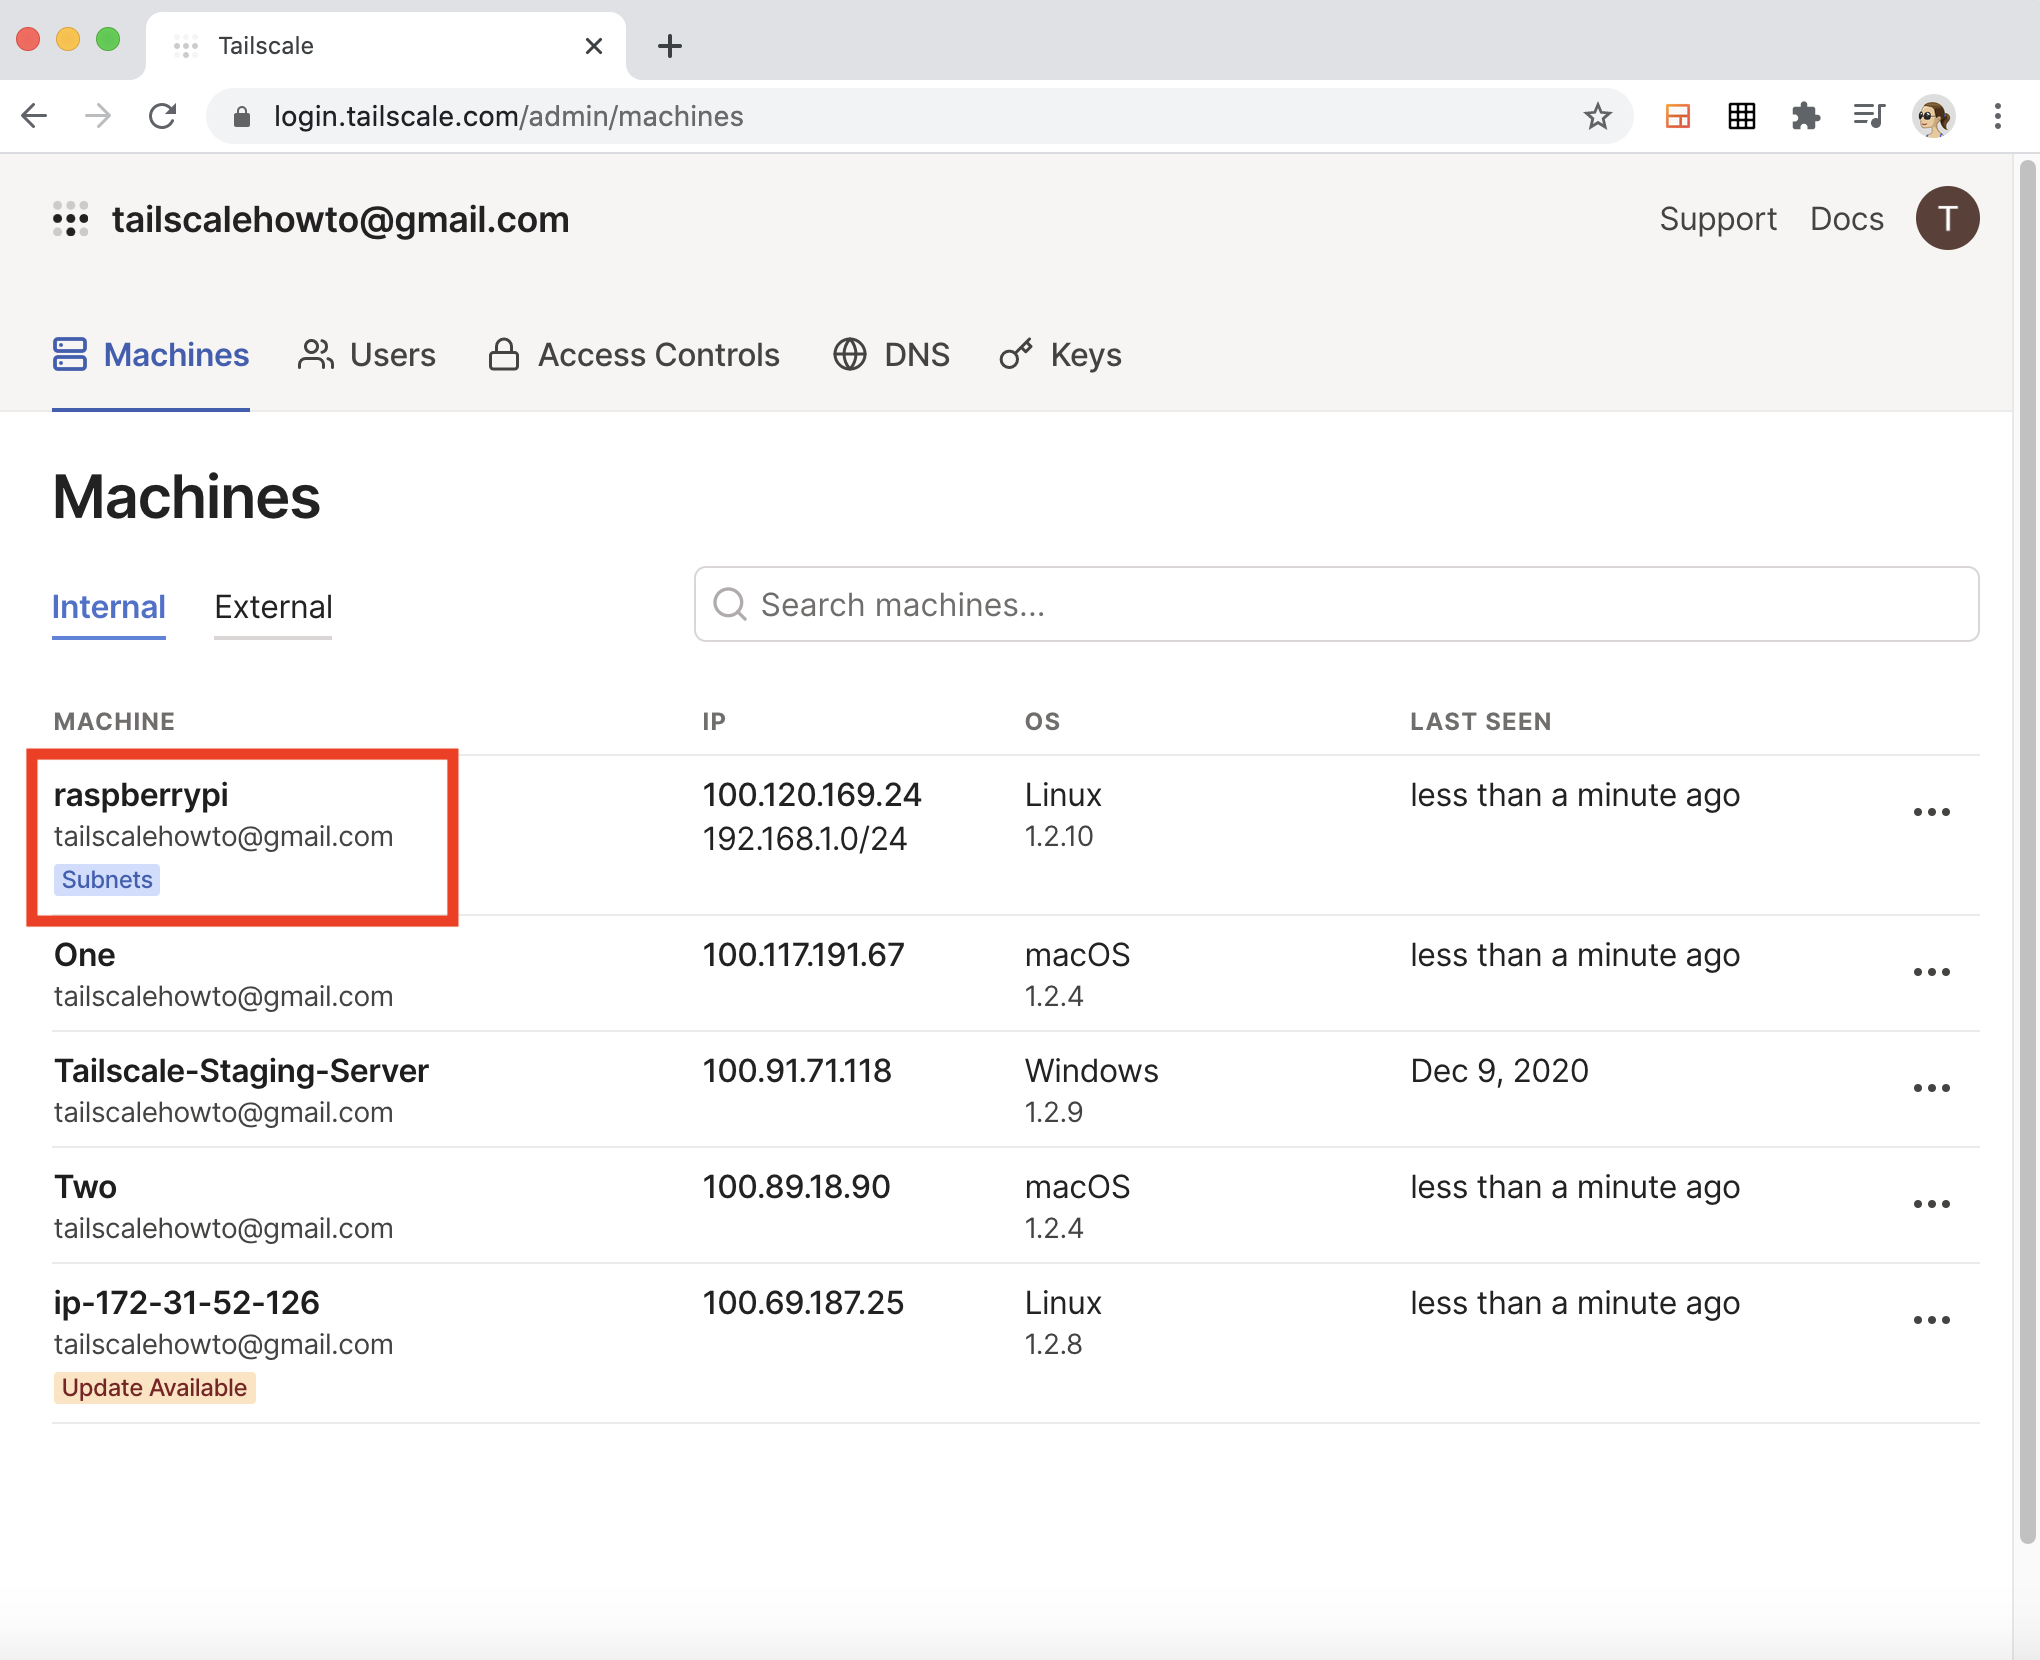
Go to the Machines page of the Tailscale admin console. Select the three dots to the right of the machine that will be your subnet router. In this case it's the Raspberry Pi on the top row. Select Enable Subnet Routes.
The Subnets tag displays immediately below the Raspberry Pi in the Machines page of the admin console.