App connectors
App connectors let you control device and user access to your third-party applications, without requiring any end user configuration. You can control access to software as a service (SaaS) applications available over your Tailscale network (known as a tailnet) in the same way that you would administer access for your self-hosted applications.
When you use an app connector, you specify which applications you wish to make accessible over the tailnet, and the domains for those applications. Any traffic for that application is then forced over the tailnet to a node running an app connector before egressing to the target domains. This is useful for cases where the application has an allowlist of IP addresses which can connect to it: the IP address of the node running the app connector can be added to the allowlist, and all nodes on the tailnet will use that IP address for their traffic egress. For more information, see How app connectors work.
Add an app connector
Any Linux server running client version 1.54 or later may serve as an app connector. Other platforms are not yet supported. A device must be owned by a tag to be an app connector.
You need to be an Owner, Admin, or Network admin of a tailnet in order to add an app connector.
-
Begin by creating a tag to group all of your app connectors. Tags are used to select which app connectors to use when setting up apps.
-
Install the app connector on the machine where you intend it to run. Advertise an app connector with the
--advertise-connectorflag, and set the appropriate tag that was created in the previous step.tailscale up --advertise-connector --advertise-tags=tag:connector -
On Linux machines, enable IP forwarding.
echo 'net.ipv4.ip_forward = 1' | sudo tee -a /etc/sysctl.conf echo 'net.ipv6.conf.all.forwarding = 1' | sudo tee -a /etc/sysctl.conf sudo sysctl -p /etc/sysctl.conf -
Within your ACL, configure the app connectors so they can automatically approve any route they resolve for the tailnet by adding these entries.
"autoApprovers": { "routes": { "0.0.0.0/0": ["tag:connector"], "::/0": ["tag:connector"], }, }, -
Finally, in the ACL, enable clients to access the internet via the app connectors.
"acls": [
  {
    "action": "accept",
    "src": ["autogroup:member"],
    "dst": ["autogroup:internet:*"],
  },
],
After you've added and registered the app connector for your tailnet, you must configure domains to route through the app connector using the steps provided in the following section.
Add an app to an app connector
You need to be an Owner, Admin, or Network admin of a tailnet in order to add a domain to an app connector.
-
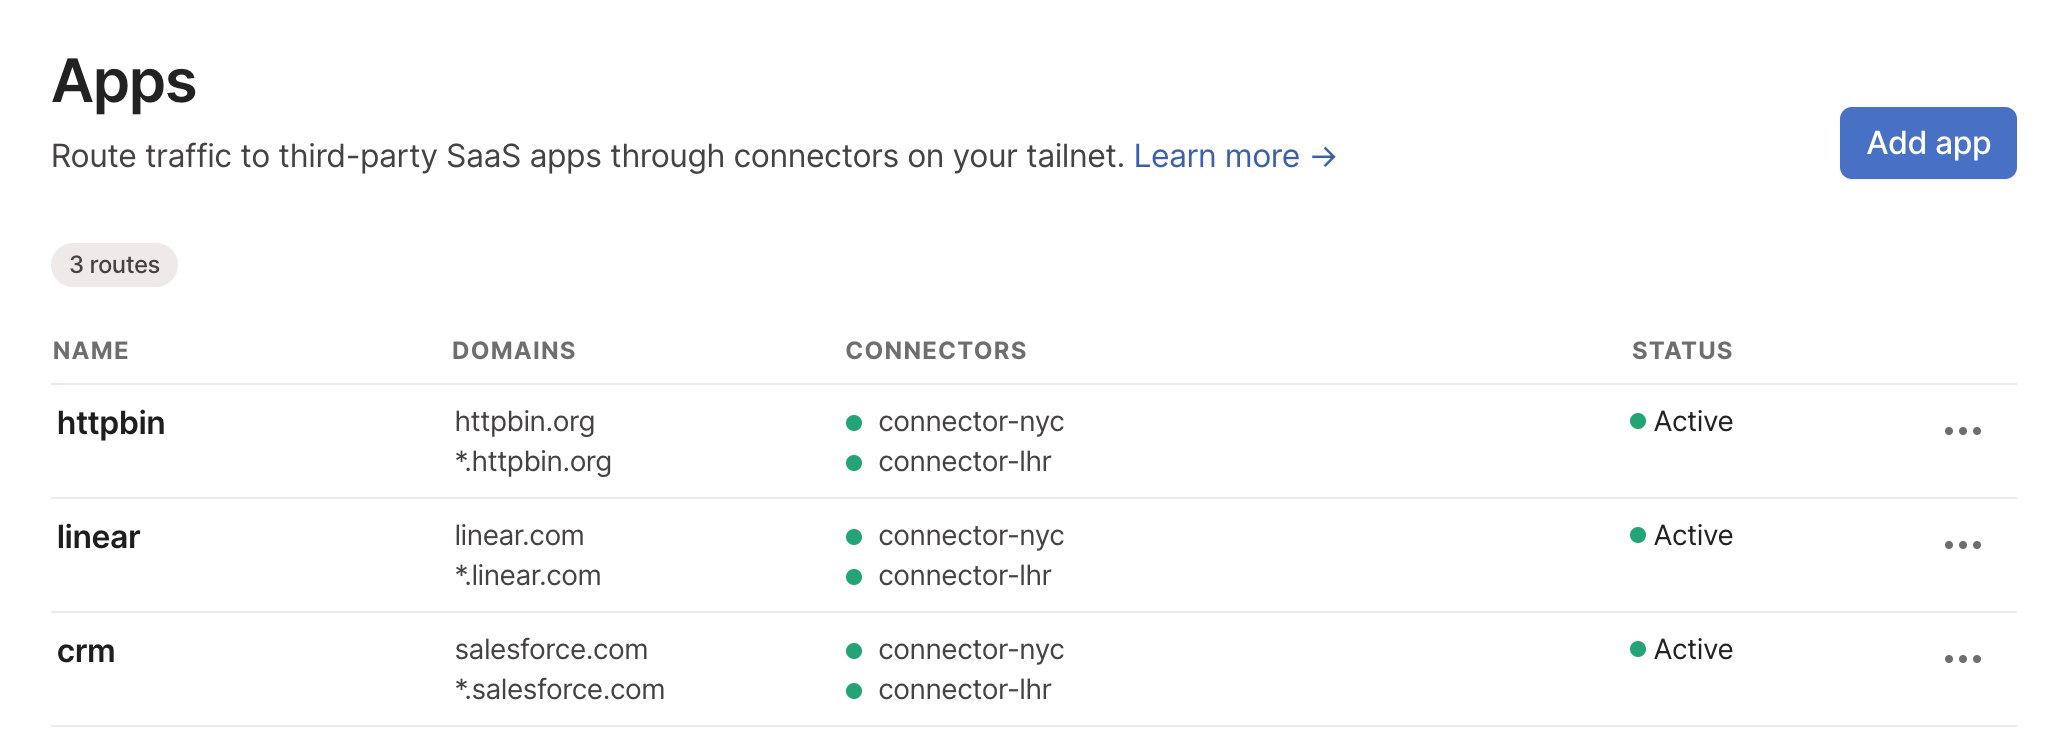
Open the Apps page of the admin console.
-
Click on the Add app button.
-
In the Name section, input a memorable name for the app, which represents a set of domains you'd like to route through an app connector.
-
In the Domains section, add all the domains relevant to this App, comma-separated.
-
In the Connectors section, select a tag or set of tags referencing the app connectors you'd like to use for this App.
-
Save your settings.

The app is now configured to route through the app connector. Traffic to the configured domains will now be carried over the tailnet to the tagged app connectors before egressing over the internet to the target domains, even when an exit node is enabled. The source IP address will be one of the public IP addresses of the machines running the app connectors.
Route discovery
Once an app is configured to route through a set of app connectors, any DNS request to any domains in the configured app will trigger route discovery. The app connector will attempt to add identified routes and CIDR blocks to the Tailscale policy file, to be approved by an administrator.
For ease of use and flexibility, the autoApprovers feature can be used to allow any discovered routes to be automatically added to your ACL. The following snippet can be added to your ACL to allow any discovered address space to be automatically approved on the tailnet if it is being advertised by an app connector.
"autoApprovers": {
  "routes": {
    "0.0.0.0/0": ["tag:connector"],
    "::/0": ["tag:connector"]
  },
}
Access to apps
In order to access the routes an app connector is advertising (and the apps behind them), users on the tailnet need access. A simple permission is to grant access to autogroup:internet:* for members of the tailnet (which will also grant users access to any exit nodes on the tailnet), like so:
"acls": [
  {
    "action": "accept",
    "src": ["autogroup:member"],
    "dst": ["autogroup:internet:*"],
  },
],
Add an app connector to a SaaS IP allowlist
Many SaaS applications can be configured for access from only trusted IP addresses. The app connector lets you always egress from a single or small set of known IP addresses, ensuring traffic to the SaaS application is coming from users and devices on your tailnet. To configure the IP allowlist, locate your SaaS provider's IP allowlist configuration page and add the public IP addresses of every machine where an app connector is installed for that SaaS application's domains. If multiple app connectors are being used in high availability mode, add all of the app connector public IP addresses. You can often find the public IP address in your infrastructure provider's administrative console.
For ease of use, egress IP addresses are automatically discovered by Tailscale. For any App, navigate to the Apps page in the admin console, select the app you'd like to configure, and copy the Egress IPs listed. This includes all IPs of all connectors configured on the associated tags. If new connectors are added to the tag, remember to update your IP allowlist.
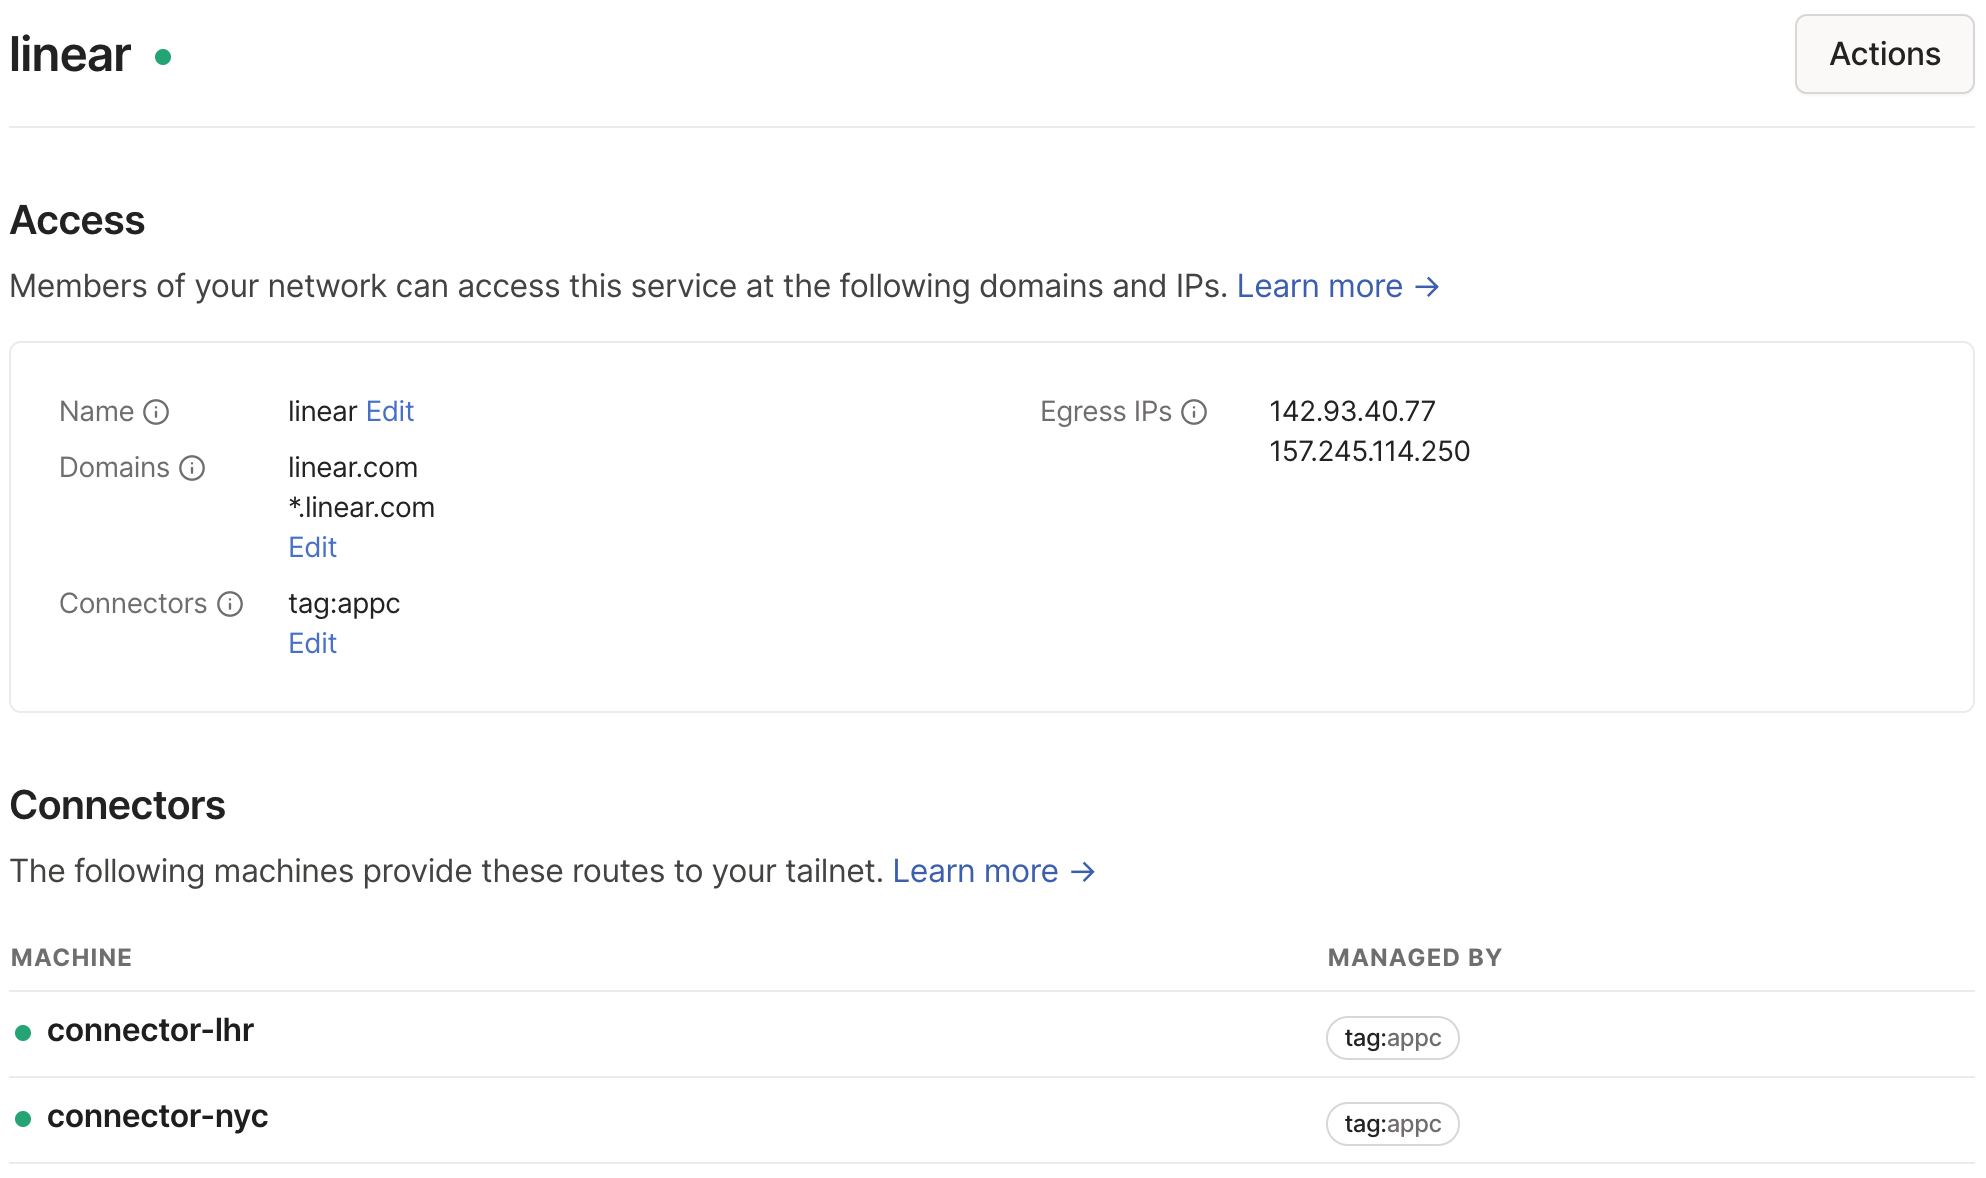
Note that the Tailscale IP of the app connectors are private to the tailnet and do not represent the public IP address from which an app connector will egress internet-bound traffic.
Remove an app from an app connector
You need to be an Owner, Admin, or Network admin of a tailnet in order to remove an app from an app connector.
-
Open the Apps page of the admin console.
-
Click on the
 menu next to the relevant app, and select Remove.
The app is no longer configured to route through any app connectors. Traffic to domain will now egress directly from the client device or over an exit node if one is enabled.
Remove an app connector
You need to be an Owner, Admin, or Network admin of a tailnet in order to remove an app connector.
-
Open the Machines page of the admin console and locate the app connector machine.
-
Click on the
menu next to the app connector machine, select Remove, and confirm the removal.
High availability
App connectors support Tailscale high availability options. For details, see the high availability topic.
Considerations
- When configuring a SaaS provider using this method, the provider often uses multiple domains. All of these domains need to be added to your app configuration. A helpful resource for this is the v2fly project, which curates a list of known domains used by various services.
- If a user disables accept routes on their client, they won't route through the connectors. You may use a system policy to prevent users from toggling that setting.
- If the user disables accept dns, they will still route through the connectors if accept routes is enabled and the routes are already established on that connector.
- If an app connector becomes unavailable while in use, and no other app connectors are available, resolution to the domain will begin to fail until the app connector is again online.
- To view all of the routes configured for use with app connectors, go to the Apps page of the admin console.
Migrating from SNI Proxy
Deprecation Notice: Tailscale's SNI Proxy is being sunset in favor of the in-client app connector described above. The SNI Proxy will be deprecated on March 1st, 2024. To migrate, follow the steps above to set up your new app connectors, configure apps, and then remove your legacy connectors and associated configuration.
Wildcard connectors no longer supported
Deprecation Notice: App connector configurations using all available connectors are no longer supported. Users with app connector configurations that contain connectors: ["*"] need to update their configuration in the Access Controls page of the admin console to use tags instead.
When attempting to update an app connector configuration, if you experience the following error:
- Failed to update app connector configuration: tailscale.com/app-connectors: connector ("*") must be a tag
then update all app connector configurations that use connectors: ["*"] directly in your tailnet policy file.
Here's an example of a configuration that contains connectors: ["*"]:
"nodeAttrs": [
    {"target": ["*"],
     "app": {
        "tailscale.com/app-connectors": [
            {"name": "example",
             "connectors":  ["*"],
             "domains": ["example.com, "*.example.com"]
            },
        ],
     }
    }
],
To replace the depracated connectors: ["*"] statement, define a tag, tag:connector, and use it in the app configuration:
"nodeAttrs": [
    {"target": ["*"],
     "app": {
        "tailscale.com/app-connectors": [
            {"name": "example",
             "connectors": ["tag:connector"],
             "domains": ["example.com", "*.example.com"]
            },
        ],
     }
    }
],
The tag name can be any allowed tag name—it does not need to be tag:connector.
For details about editing the tailnet policy file, see Edit tailnet policy file.