This post is part of an occasional series highlighting applications and services that work quite well with ("+") Tailscale.
Tailscale + BlueBubbles puts iMessage on Windows, Android, or anywhere
It is well documented that Apple executives understand iMessage's effectiveness as a lock-in tool. The weird cultural stigma of “green bubbles,” the convenient multi-device access, the end-to-end encryption—it’s hard to beat, and even harder to work around. You cannot get iMessage on Android, Windows, or Linux—unless you’re up for running BlueBubbles on a Mac.
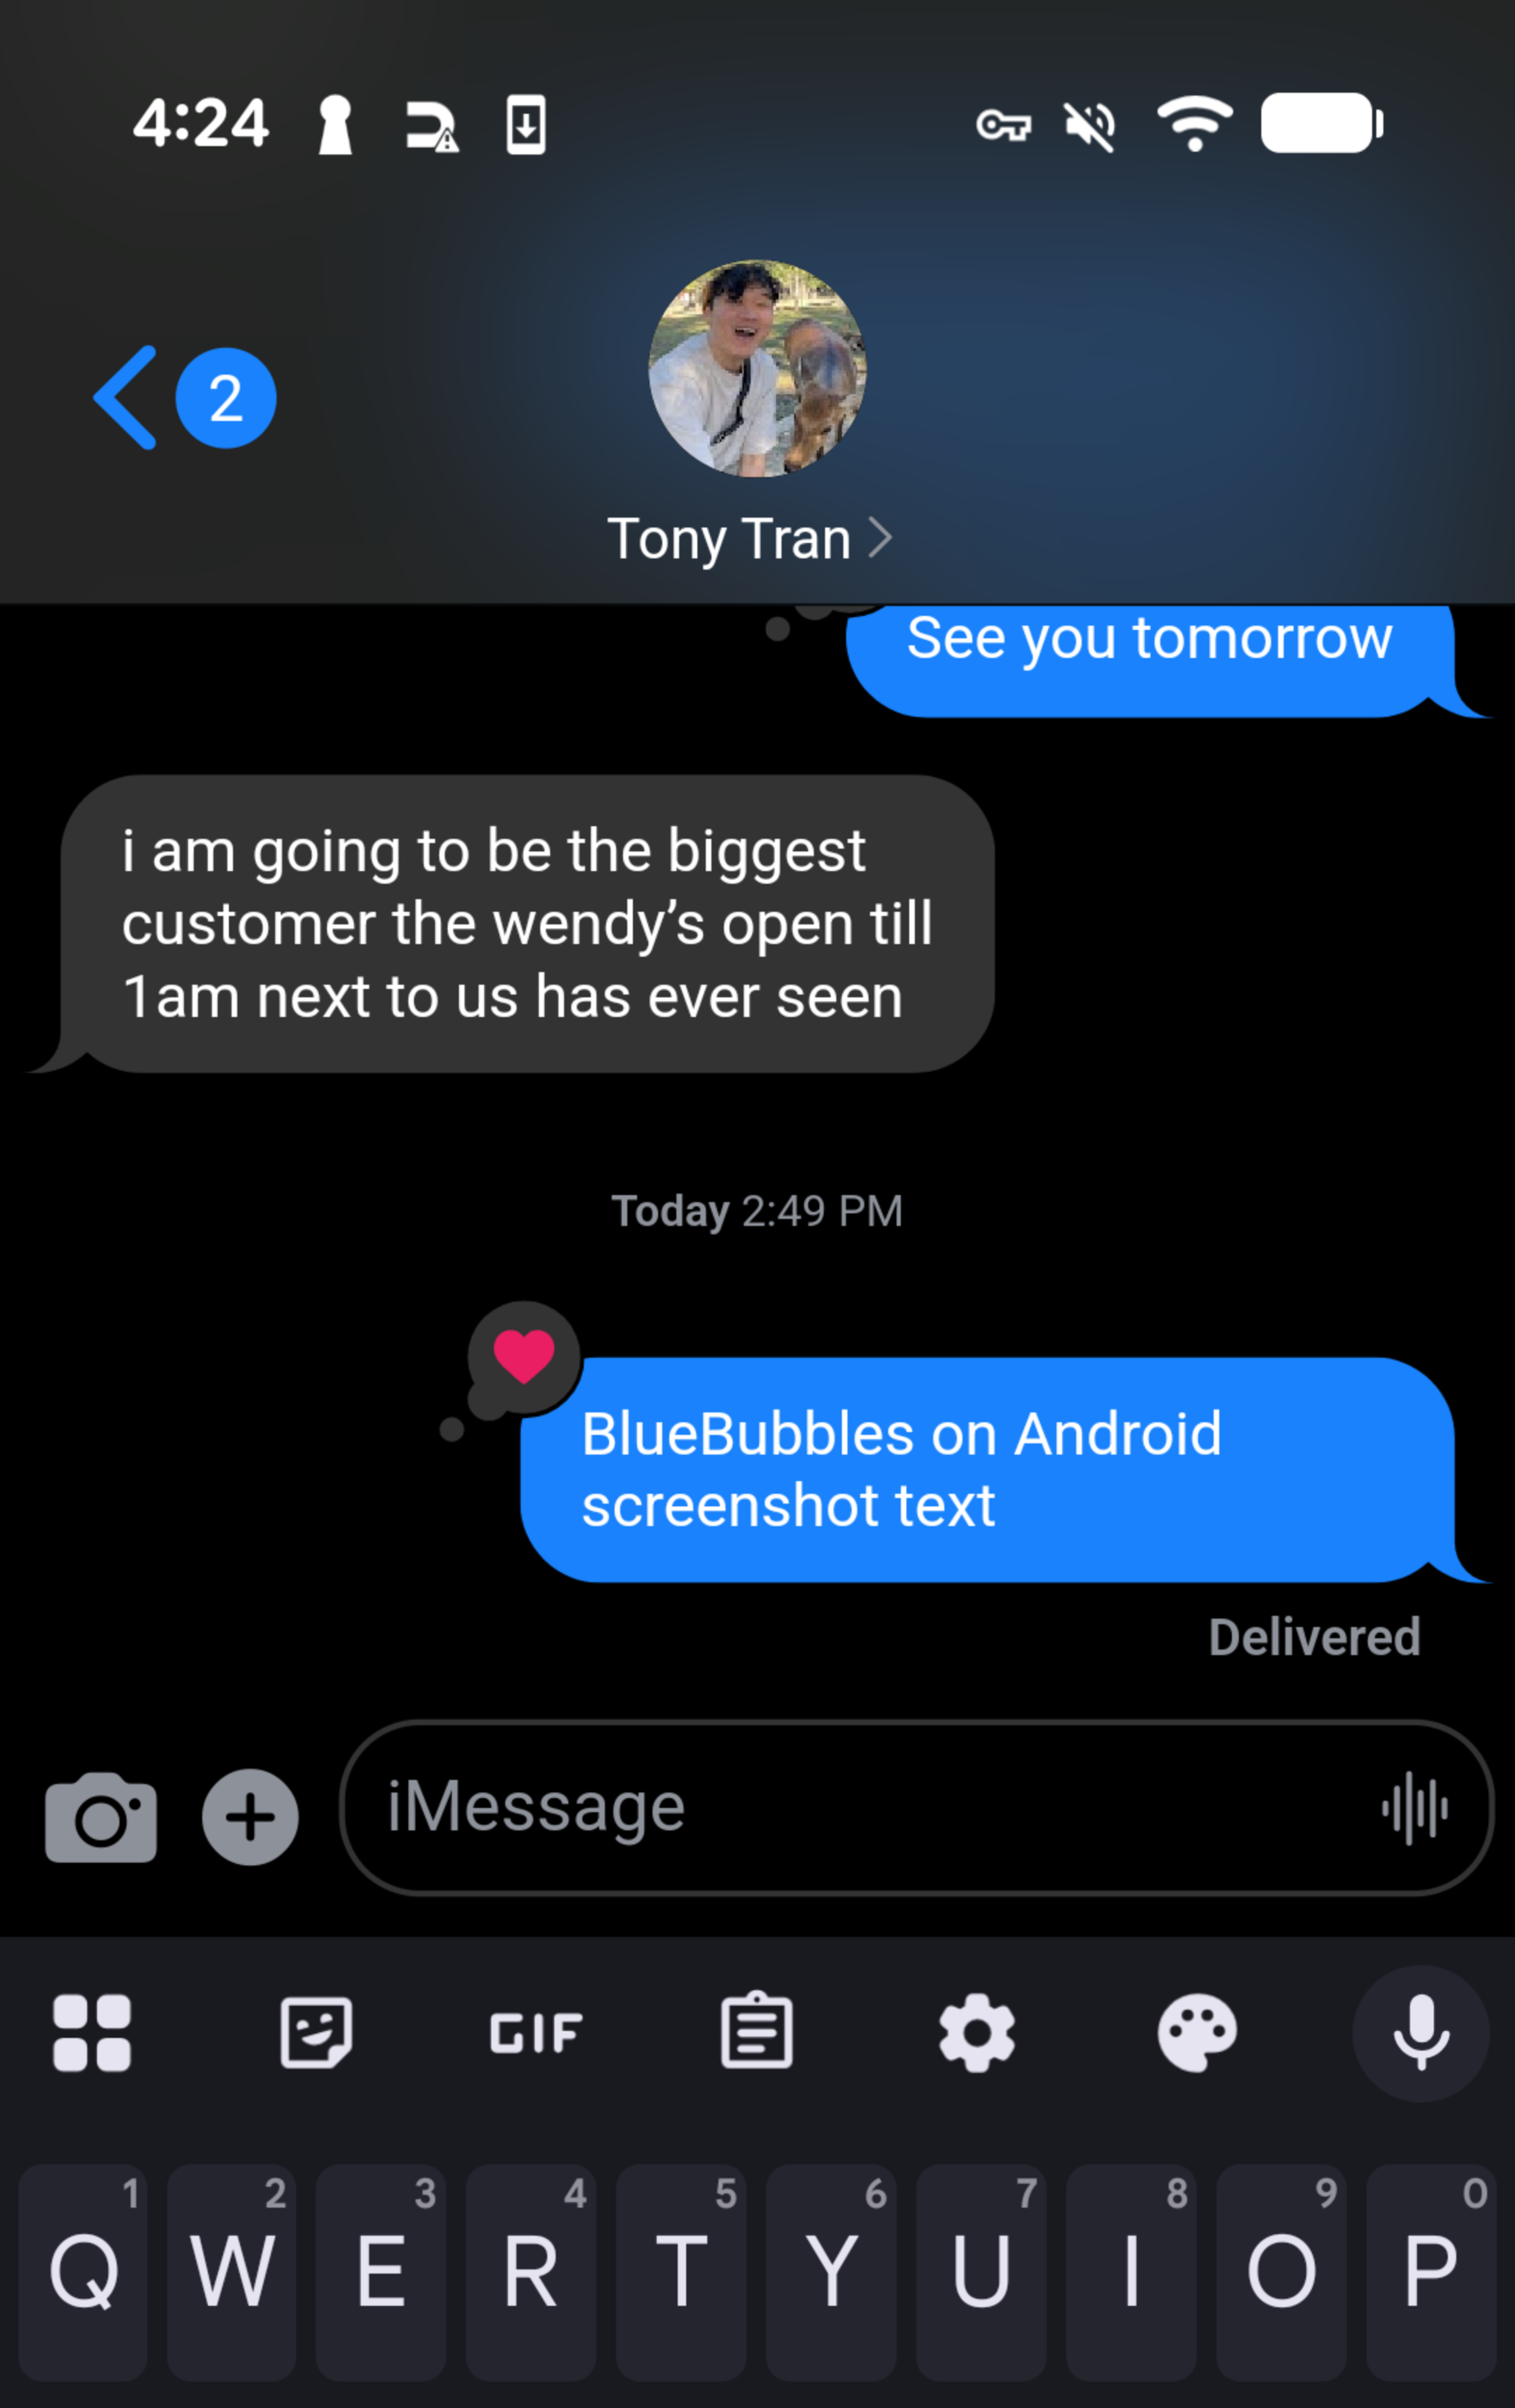
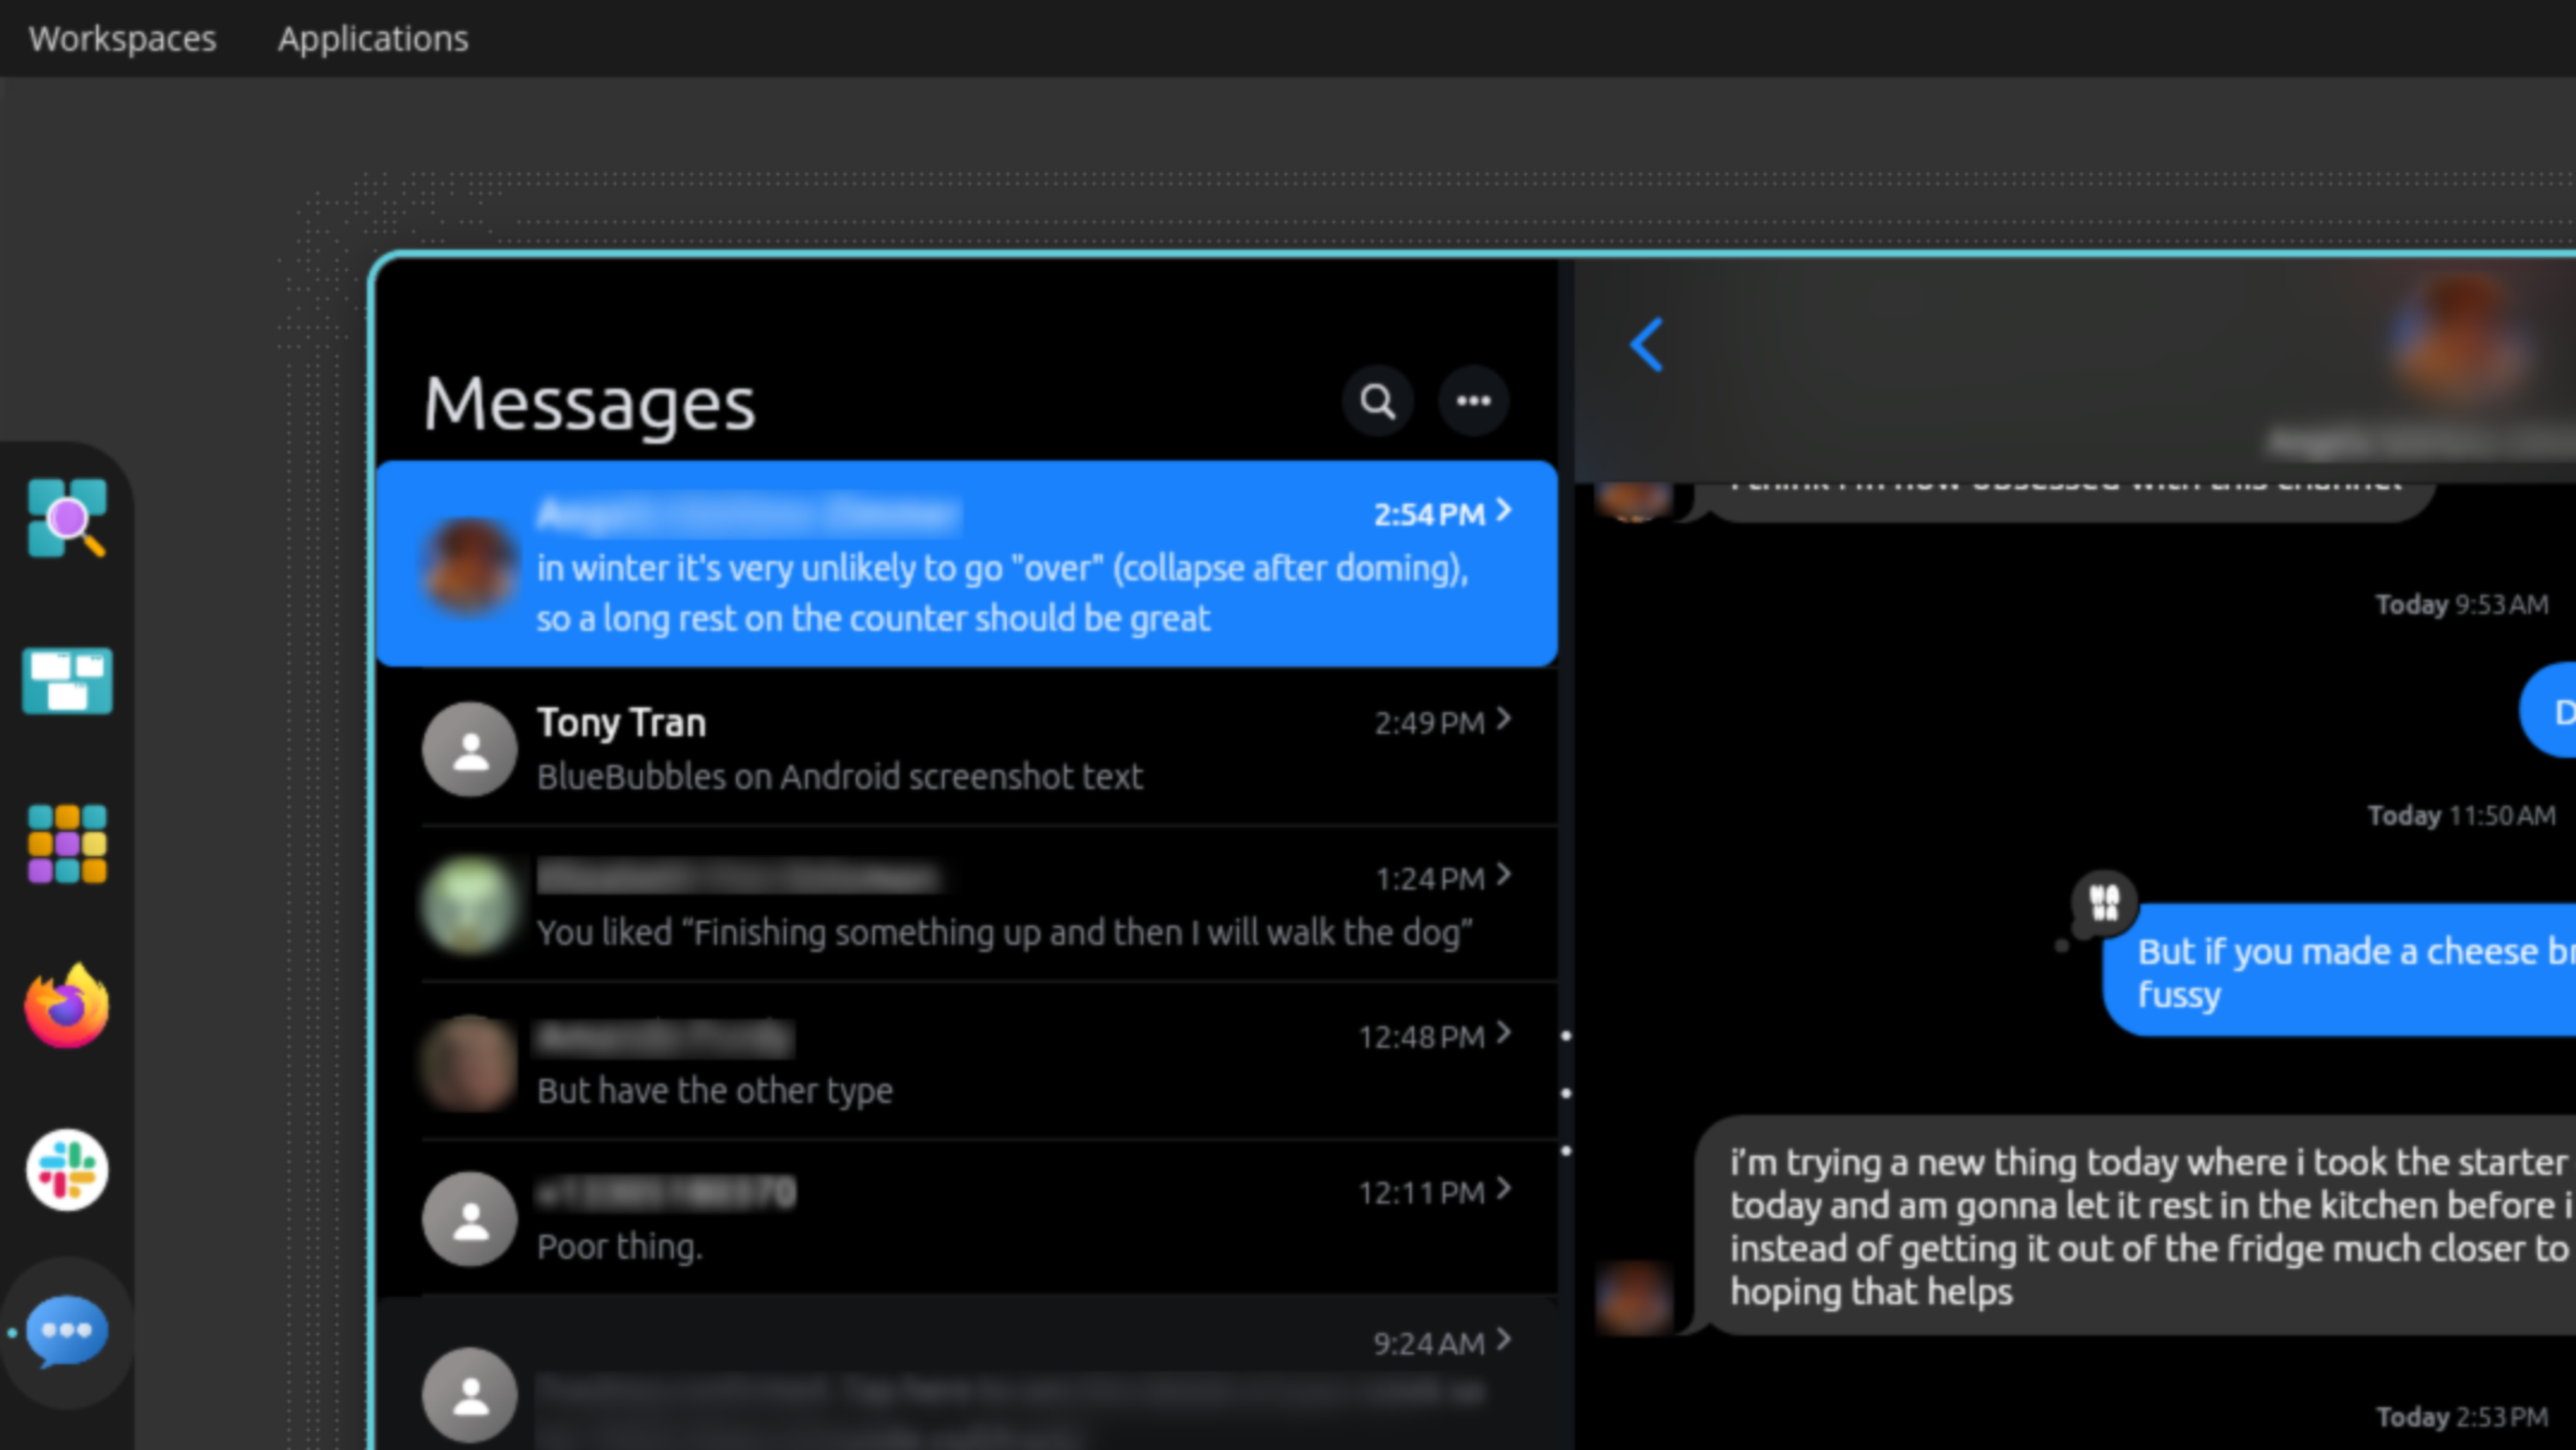
BlueBubbles is an open-source Mac server app that lets you read, send, and get notified about iMessage chats (and SMS texts, if you’re an iPhone user) on basically every major computing device. BlueBubbles is the main reason I’ve got a Mac Mini bolted to the underside of my desk. I’ve used the BlueBubbles client to trade messages on a Linux laptop, a Chromebook, my Windows gaming desktop, and through a webapp. BlueBubbles provides a nearly complete iMessage experience, including read/unread status, “tapbacks” and emoji reactions, group chat features, and message editing. And, like the name implies, all your bubbles are "blue."
Setting up BlueBubbles requires a Mac you can easily connect to, at a known IP address, with an accessible port. That’s a bit intimidating, even before you consider it’s your personal messages you now have to secure. We at Tailscale think we provide a great solution for this. But the thing is? Others, including BlueBubbles itself, tend to agree.
“We always recommend users use Tailscale if they have the technical know-how to set it up (even though it's almost too easy to not do),” wrote Zach, one of BlueBubbles’ main developers, in an email exchange.
What Tailscale replaces in a BlueBubbles setup
BlueBubbles is not something you can set up on a lunch break (this is not a challenge). The initial setup is a notable lift—providing extensive system permissions, disabling System Integrity Protection, choosing a notification scheme—before you get to the connection part. Luckily, connections are where Tailscale shines.
Here are the upgrades Tailscale brings to the BlueBubbles experience:
- A stable IP address or URL, instead of setting up dynamic DNS
- No open ports or port-forwarding on your router
- Fully encrypted traffic and optional HTTPS connections, rather than setting up certificates, tunnels, and proxies
- Setting up a second BlueBubbles user on the same Mac made easier with machine sharing
Three ways to use Tailscale with BlueBubbles
BlueBubbles’ own guide to using Tailscale suggests using Tailscale’s Funnel, which creates a publicly accessible URL with an encryption certificate (HTTPS). It works, but it’s the least secure route. You can run BlueBubbles through Tailscale a few ways, which I’ll call “Vanilla,” “Serve,” and “Funnel” setups:
- Vanilla: Best for BlueBubbles on desktops or laptops running Tailscale
- Serve: Like Vanilla, but with a HTTPS URL, useful for webapp access[^1]
- Funnel: If you need webapp access from any browser or devices running BlueBubbles, but not Tailscale.
You don’t have to make a firm choice between setups. All three “versions” of BlueBubbles-via-Tailscale are roughly one click and one terminal command apart, and easy to roll back. Let’s get into it.
Setting up BlueBubbles with Tailscale
This is not a full BlueBubbles setup guide. It is the gist of setting up BlueBubbles, derived from the standard instructions, with a note from developer Zach, along with a guide to making it reliably accessible anywhere with Tailscale.
The thrust of Zach’s note is that the “Notifications & Firebase” screen is far more optional than it seems. To get notifications of new messages on Android and Chromebooks, you can alternatively set up ntfy, or keep your BlueBubbles app running as a foreground service in Android (desktop clients on Windows and Linux keep an active background connection and don’t need separate notifications).
The other thing a Firebase cloud server does is send out URL changes to your BlueBubbles clients; Tailscale’s dedicated IP addresses and magicDNS names make this unnecessary.
Let’s run it down.
- Download and install the latest DMG of the BlueBubbles server on the Mac you plan to keep running to serve up iMessage
- Move through the installation, granting the permissions BlueBubbles requests.
- Set up, or skip, the Google Firebase creation step (see above)
- If you haven’t already, install Tailscale on the message-serving Mac. The standalone variant is recommended, as it allows for easier command-line access.
- Make Tailscale’s command-line interface (CLI) far easier to access by running the
aliascommand once on your Mac terminal, as detailed in our docs. - Install the BlueBubbles client (and ntfy, if needed) on devices needing iMessage access
If you’re going the “Vanilla” route (all devices use Tailscale), the next steps are simple.
- Get the Tailscale IP address (
100.xxx.yyy.zzz) for this Mac by runningtailscale statuson any device connected to your tailnet, or by looking in your web admin console. - On any BlueBubbles client you use, during setup or in the settings, enter your (http) Tailscale IP address and port 1234, like so:
http://100.xxx.yyy.zzz:1234
Before digging further into the “Serve” or “Funnel” setups, I’d recommend checking if you can connect to your BlueBubbles server from a client device.
For the “Serve” version, granting webapp access to Tailscale-connected clients, there are a few more steps.
- Enable HTTPS certificates in your Tailscale DNS settings
- On the Mac running BlueBubbles, open the command line and run:
tailscale serve --bg --https=443 1234(port 443 is the default, but 8080, 100000, or others can work) - Note the URL sent back, like
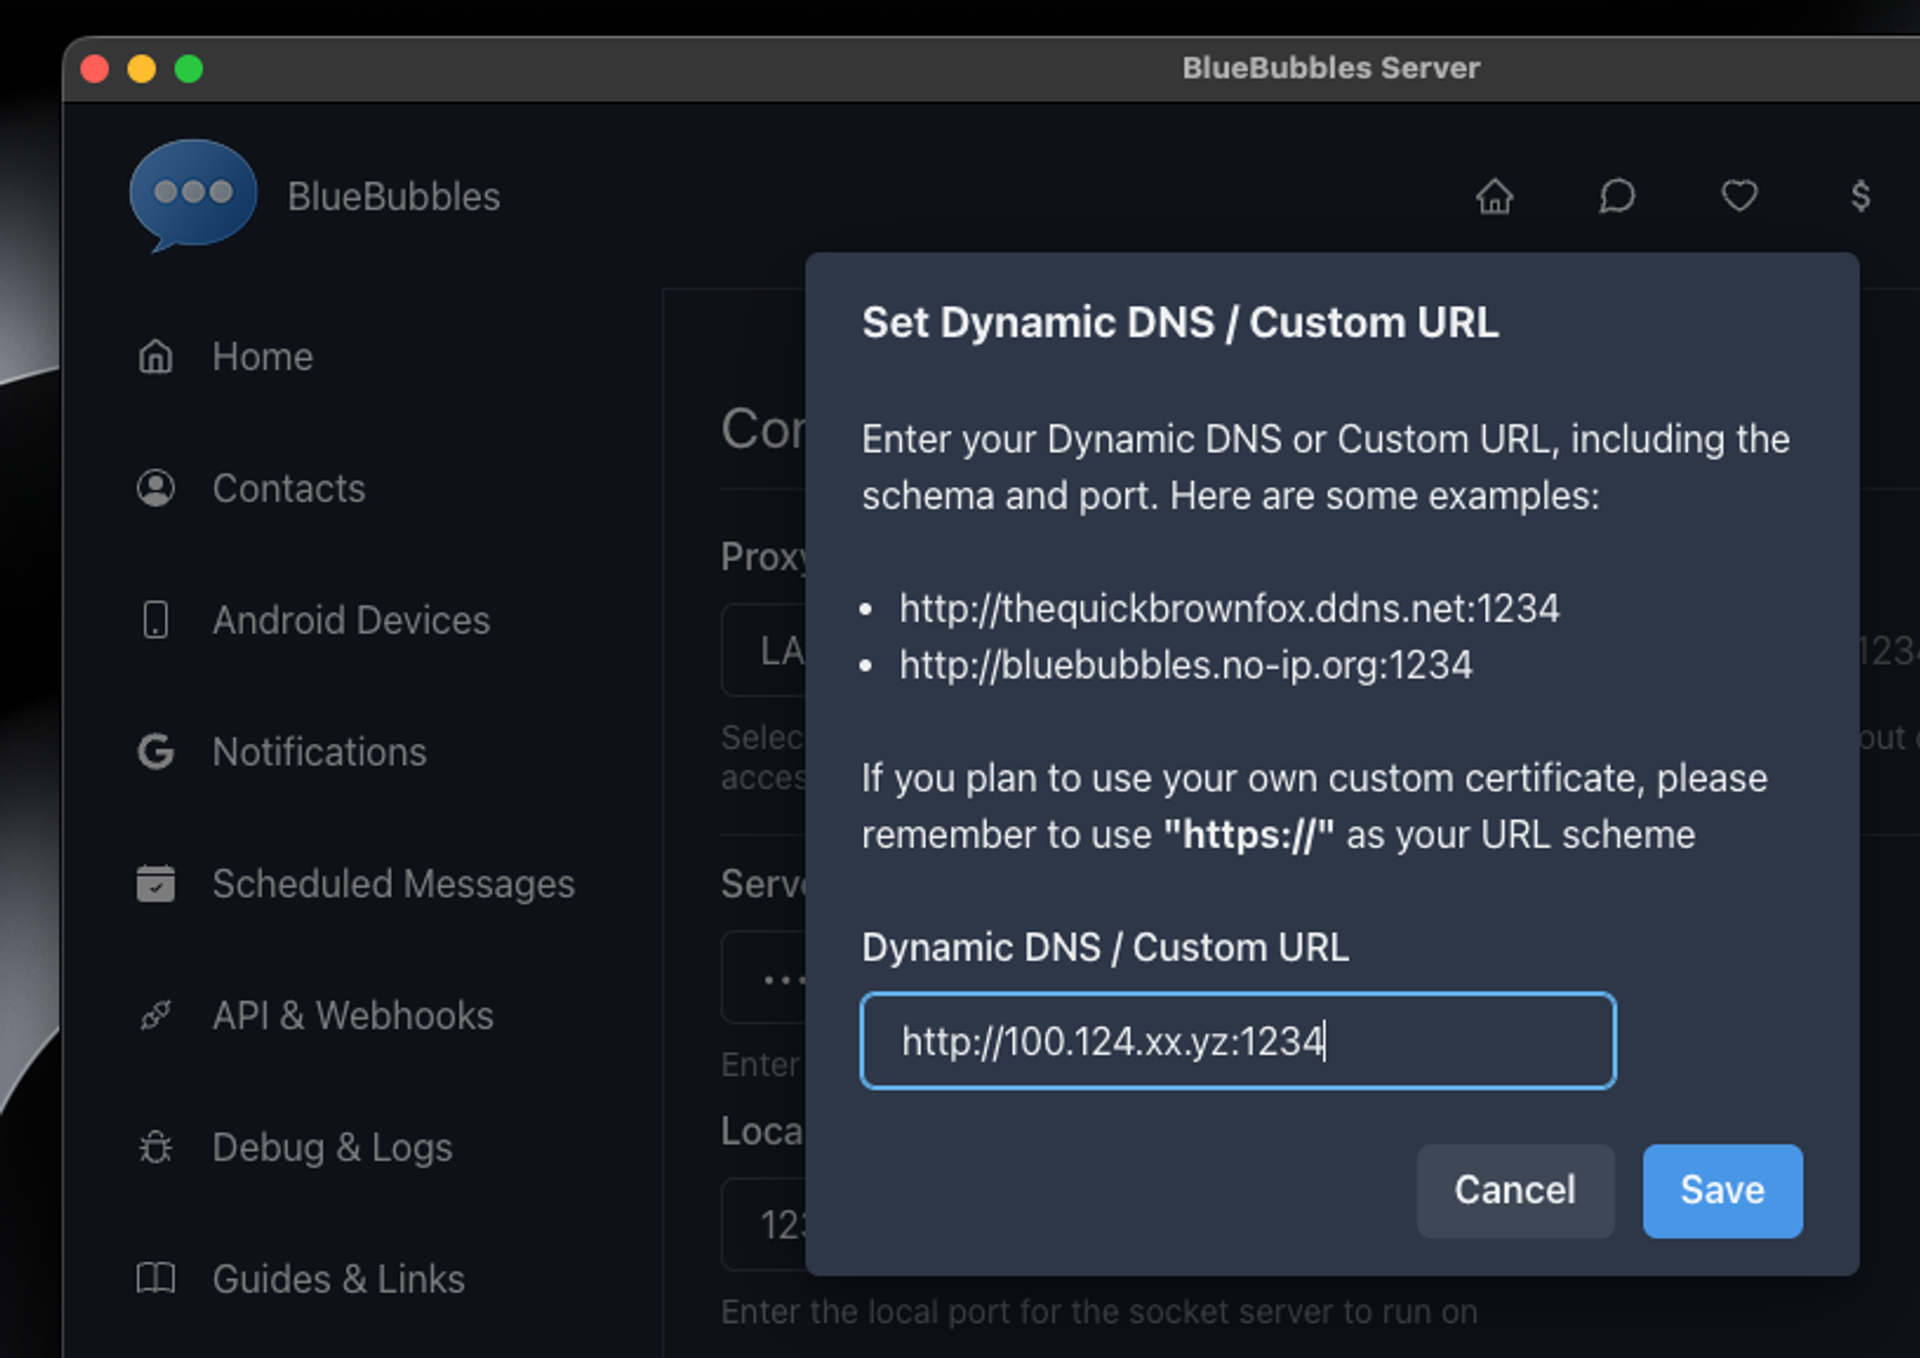
https://mac.tailnet-name.ts.net:443 - Use that full URL (https and port included) to set up the BlueBubbles server on Mac (under Settings > Proxy setup > Dynamic DNS / Custom URL) and your BlueBubbles clients
The “Funnel” setup, which lets any computer or the webapp access your BlueBubbles server with a password (please use a strong one, unused elsewhere), is fairly similar:
- Ensure HTTPS certificates, MagicDNS, and Funnel are enabled on your tailnet
- On the Mac running BlueBubbles, run:
tailscale funnel --bg --https=443 1234, substituting the 443 port if needed - Note the URL provided (https://mac.tailnet-name.ts.net:443), then use it in both BlueBubbles server settings and your clients.
A few tips on running a BlueBubbles server
Now that you’ve made it possible to reach your Mac full of iMessages, you’ll want to keep the Mac always running and easy to reach.
If it’s already in use as a desktop, with a keyboard, mouse, and monitor attached, set it so it doesn’t go to sleep: head to System Settings > Energy/Battery > Options (small button at bottom-right), and select “Prevent automatic sleeping when the display is off.” Also, look for Start up automatically after a power failure in that section, and if available, enable it.
If you’re looking to run your Mac (especially a Mini) “headless,” with no monitor attached, we’d recommend adding a few more steps:
- In BlueBubbles’ settings, under Features, look for Auto Start Method and choose Launch Agent (Crash Persistent)
- Search for “Remote Management” in the Mac's System Settings and enable Remote Management (for remote screen control) and Remote Login (for SSH).
- If you’re okay with turning off FileVault (disk encryption), you can disable it and enable automatic login (System Settings > Users & Groups > Automatically log in as …)
- Consider using the RustDesk/Tailscale combo for remote screen access
- Note that, with another Tailscale device serving as a subnet router in your home, you can now unlock a Mac over the command line, even after a power outage.
Your iMessages, encrypted, wherever you want
Opening up iMessage to all your devices certainly isn’t for everyone. But for those willing to take on the task, using Tailscale should remove some complicated layers. It takes a popular encrypted chat system and keeps its messages encrypted, its helpful Mac server protected, and you in touch from whatever you’ve got with you.
Tell us how this project worked for you, or share your own lock-in-defying Tailscale projects, on Reddit, Discord, Bluesky, Mastodon, or LinkedIn.
[1]: About the BlueBubbles webapp: It works as of this writing, but Zach, a BlueBubbles developer, notes that it has not received an update “in some time,” and is “essentially unsupported.” It’s due for an overhaul at some point, but there is no timeline set for it just yet. So if you need it, it’s around, but Zach suggests most people and devices (even Chromebooks) should stick with dedicated apps.[Back ⤴︎]
Share
Author
 Kevin Purdy
Loading...


