How to Secure Kubernetes Access with Tailscale
In this step-by-step guide, you'll see how to set up a fresh Kubernetes cluster and connect it to your Tailscale network (called a tailnet).
Gaining external access to workloads running in a Kubernetes cluster usually requires you to expose them via a load balancer. Load balancer services route traffic into your cluster by provisioning a load balancer resource in your cloud account and then assigning its public IP address to the service.
Opening up access this way means you're exposing a new IP to the internet, though—bad actors could discover your load balancer and direct malicious traffic to your cluster. If there's a zero-day vulnerability in the Kubernetes networking layer, your workloads could even be compromised.
Installing Tailscale in your cluster allows you to safely expose cluster access without the risks of using load balancers. Tailscale is an enterprise-grade VPN solution that provides effortless and safe remote access to your shared resources from anywhere, even if users are on an insecure physical network.
Tailscale can be connected to Kubernetes in several different ways—as a proxy, sidecar or subnet router, or using the recently-launched Kubernetes operator which makes connections simple and secure. We'll explore all these options later in this article.
Once you've added Tailscale to your cluster, you can make your Kubernetes resources available in your private tailnet. This lets you access them securely from any of your other Tailscale devices. Kubernetes pods become ephemeral tailnet nodes.
You can then use existing Tailscale features to manage access to your Kubernetes resources. As all communication occurs through Tailscale, interactions will also be fully encrypted and logged as audit events to support your compliance requirements.
In this guide, you'll see how to set up a fresh cluster and connect it to your Tailscale network. By following the steps below, you'll be able to reach your cluster from any device with the Tailscale client installed.
Creating a Tailscale Account
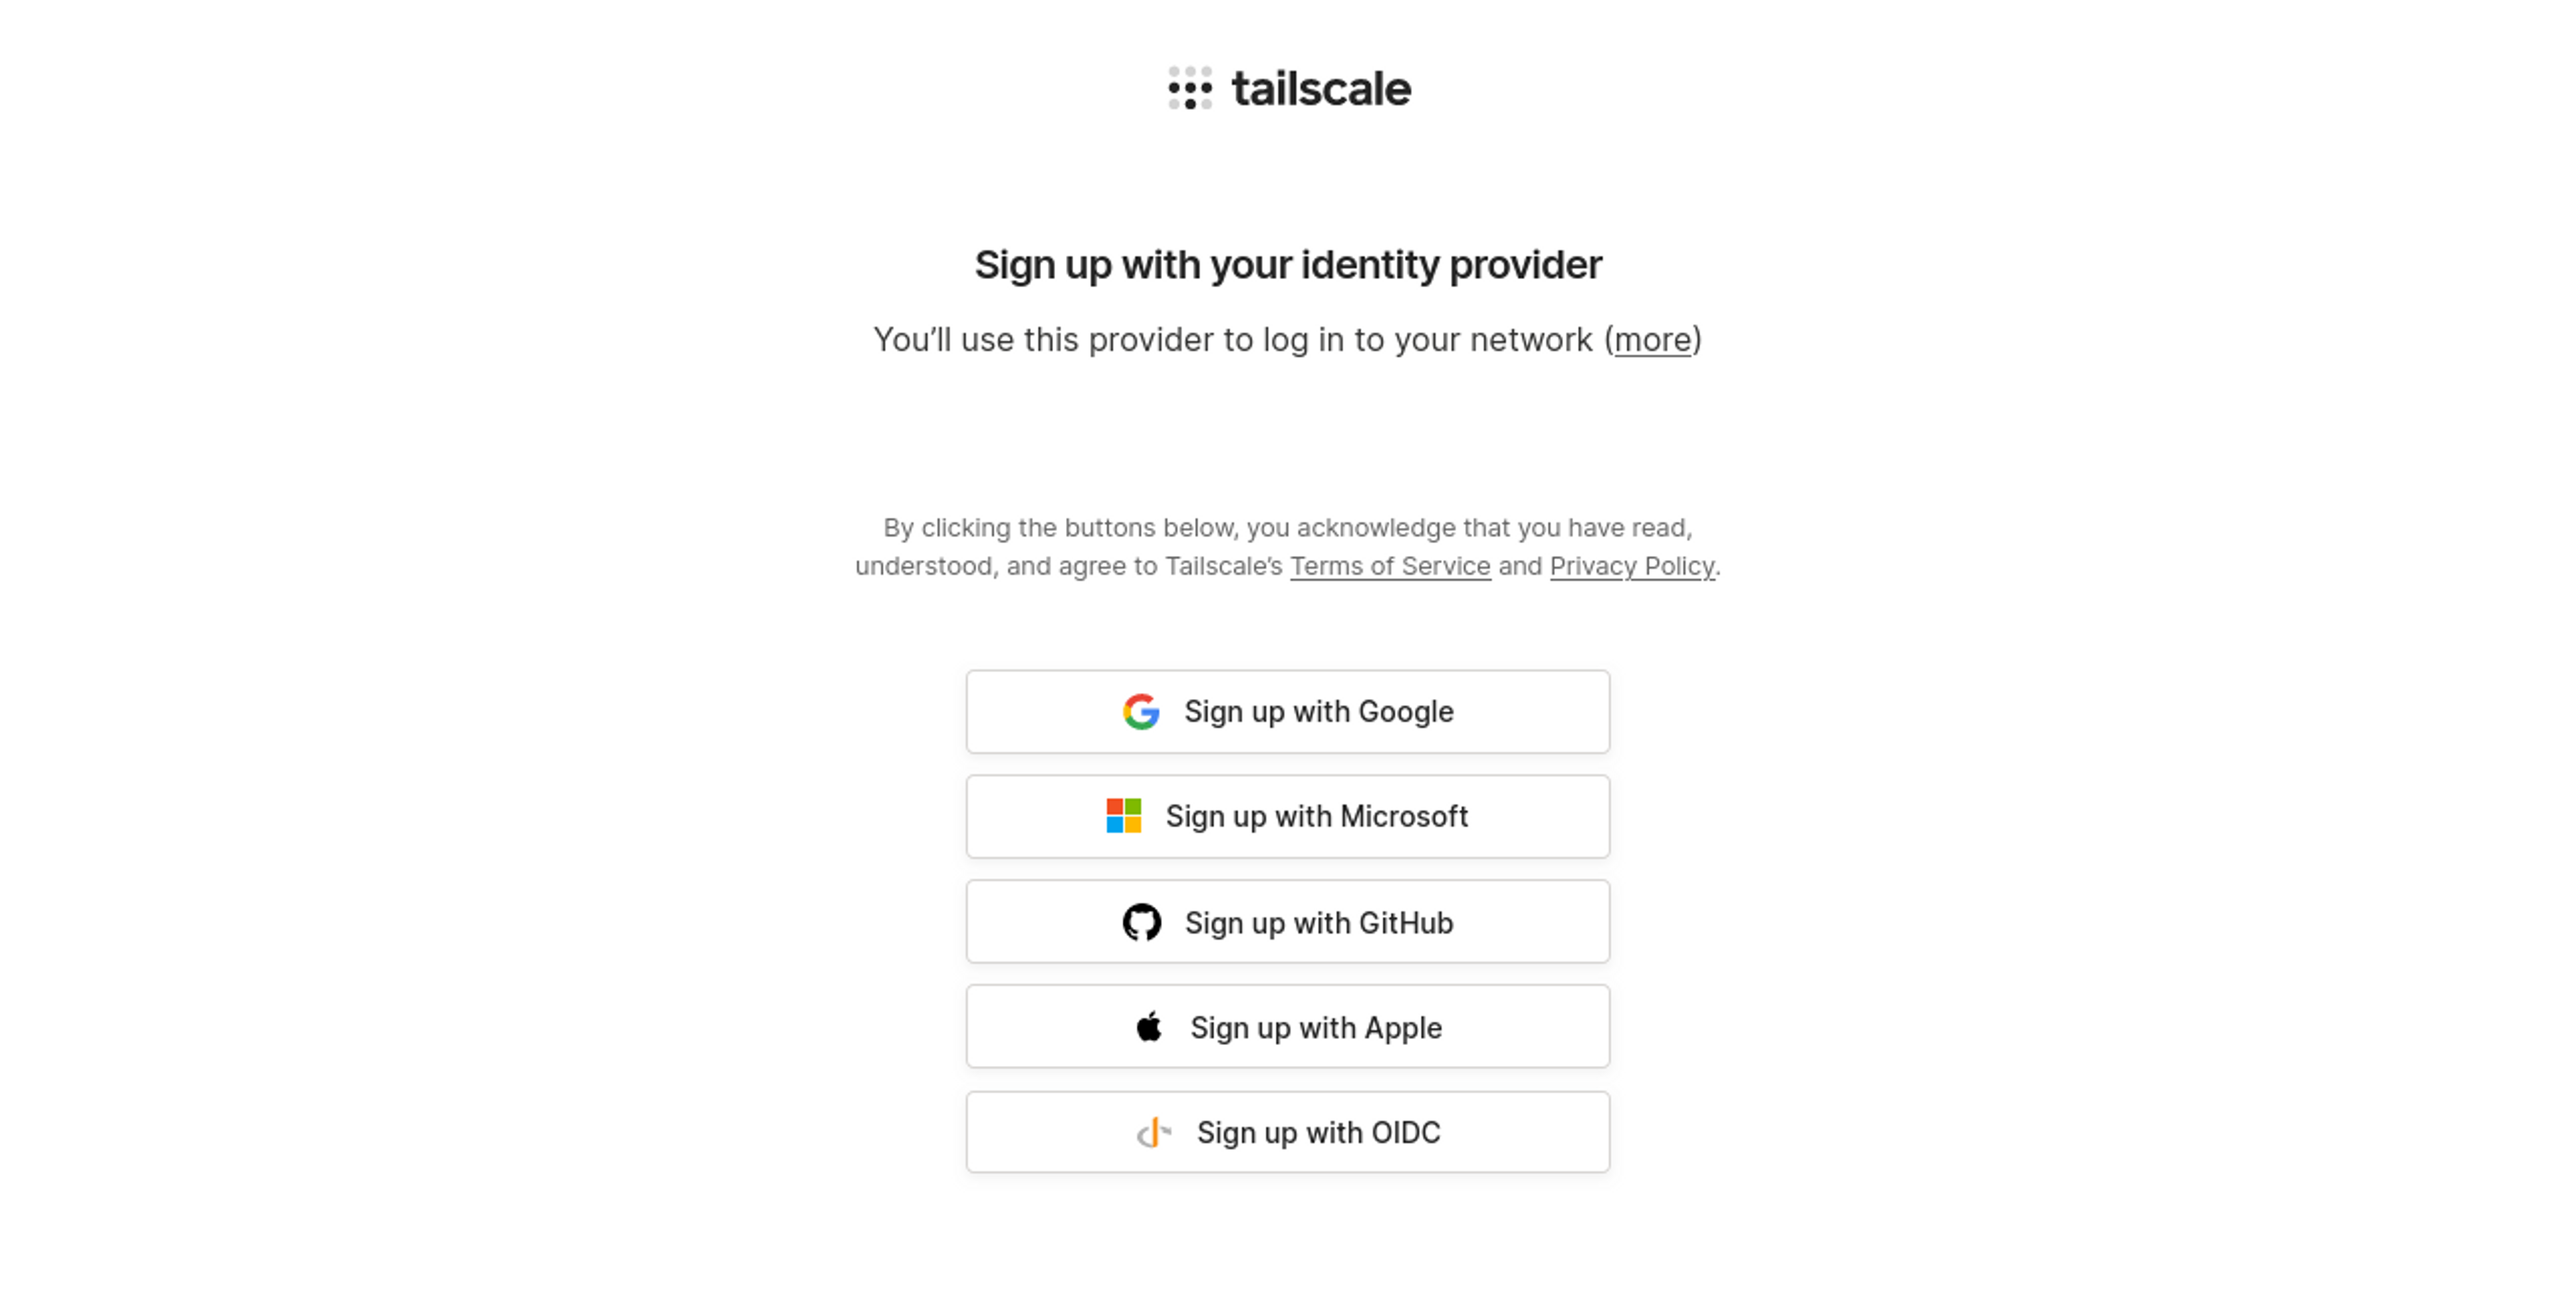
First, head to Tailscale's sign-up page and create your free account. You'll need to choose one of the supported identity providers, such as Apple, Google, or Microsoft.
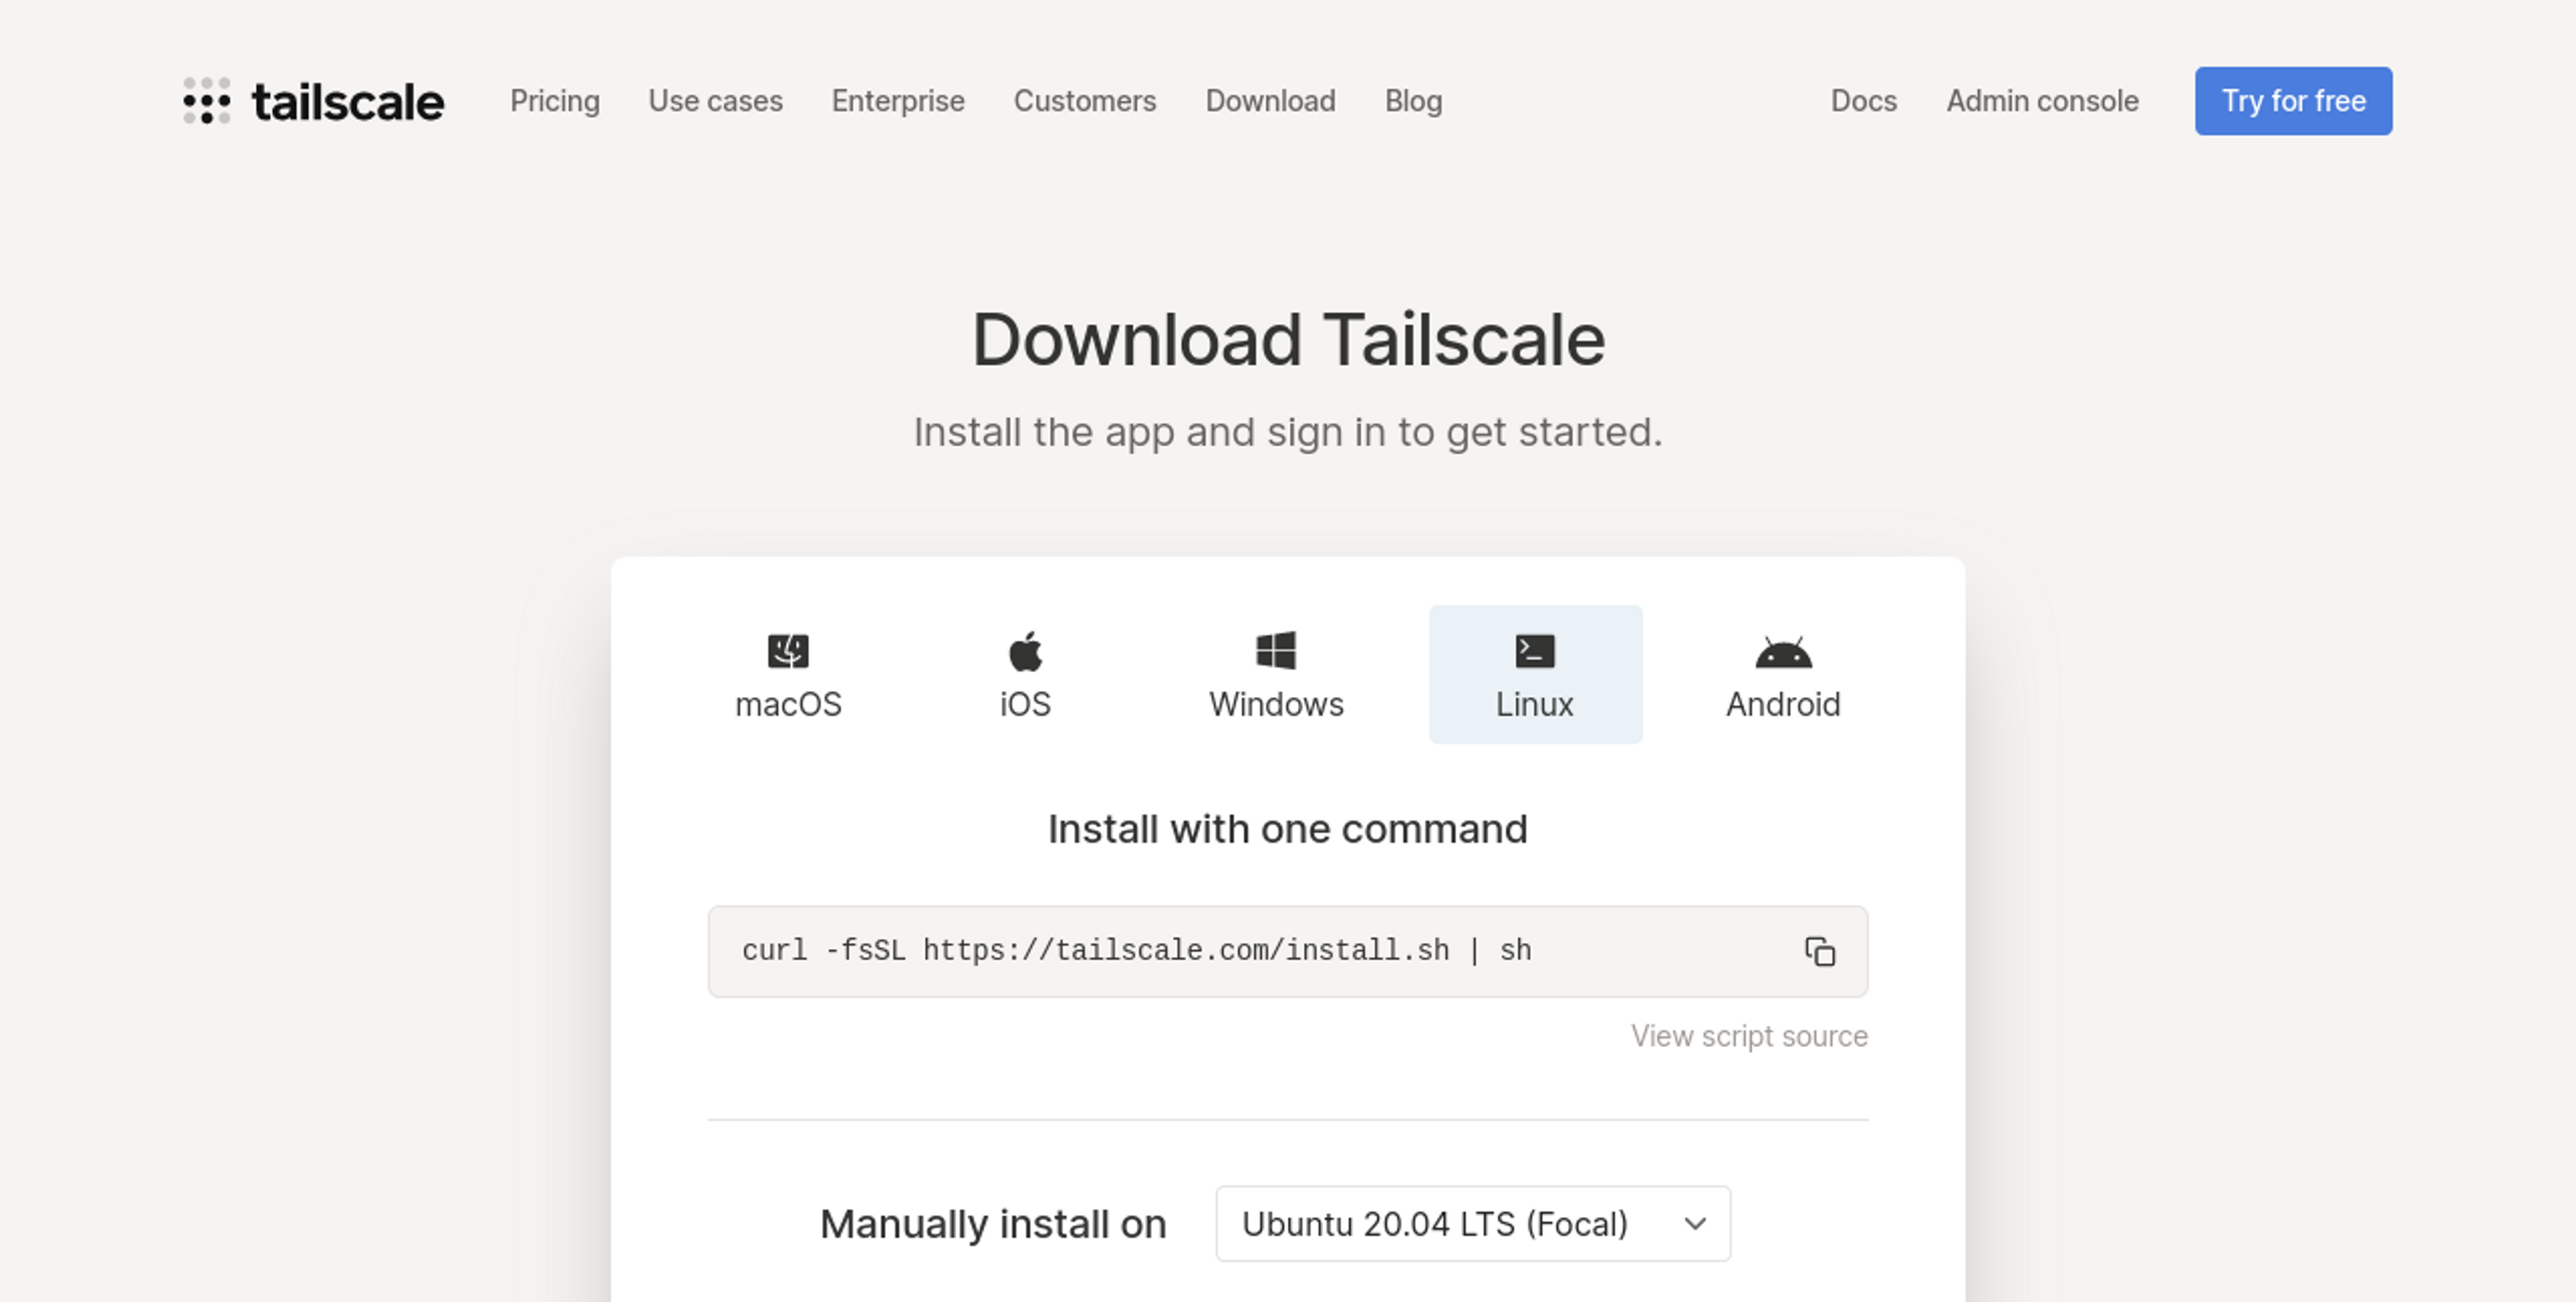
Once you've created your account, follow the prompts to install the Tailscale client on your device, then log in to your account.
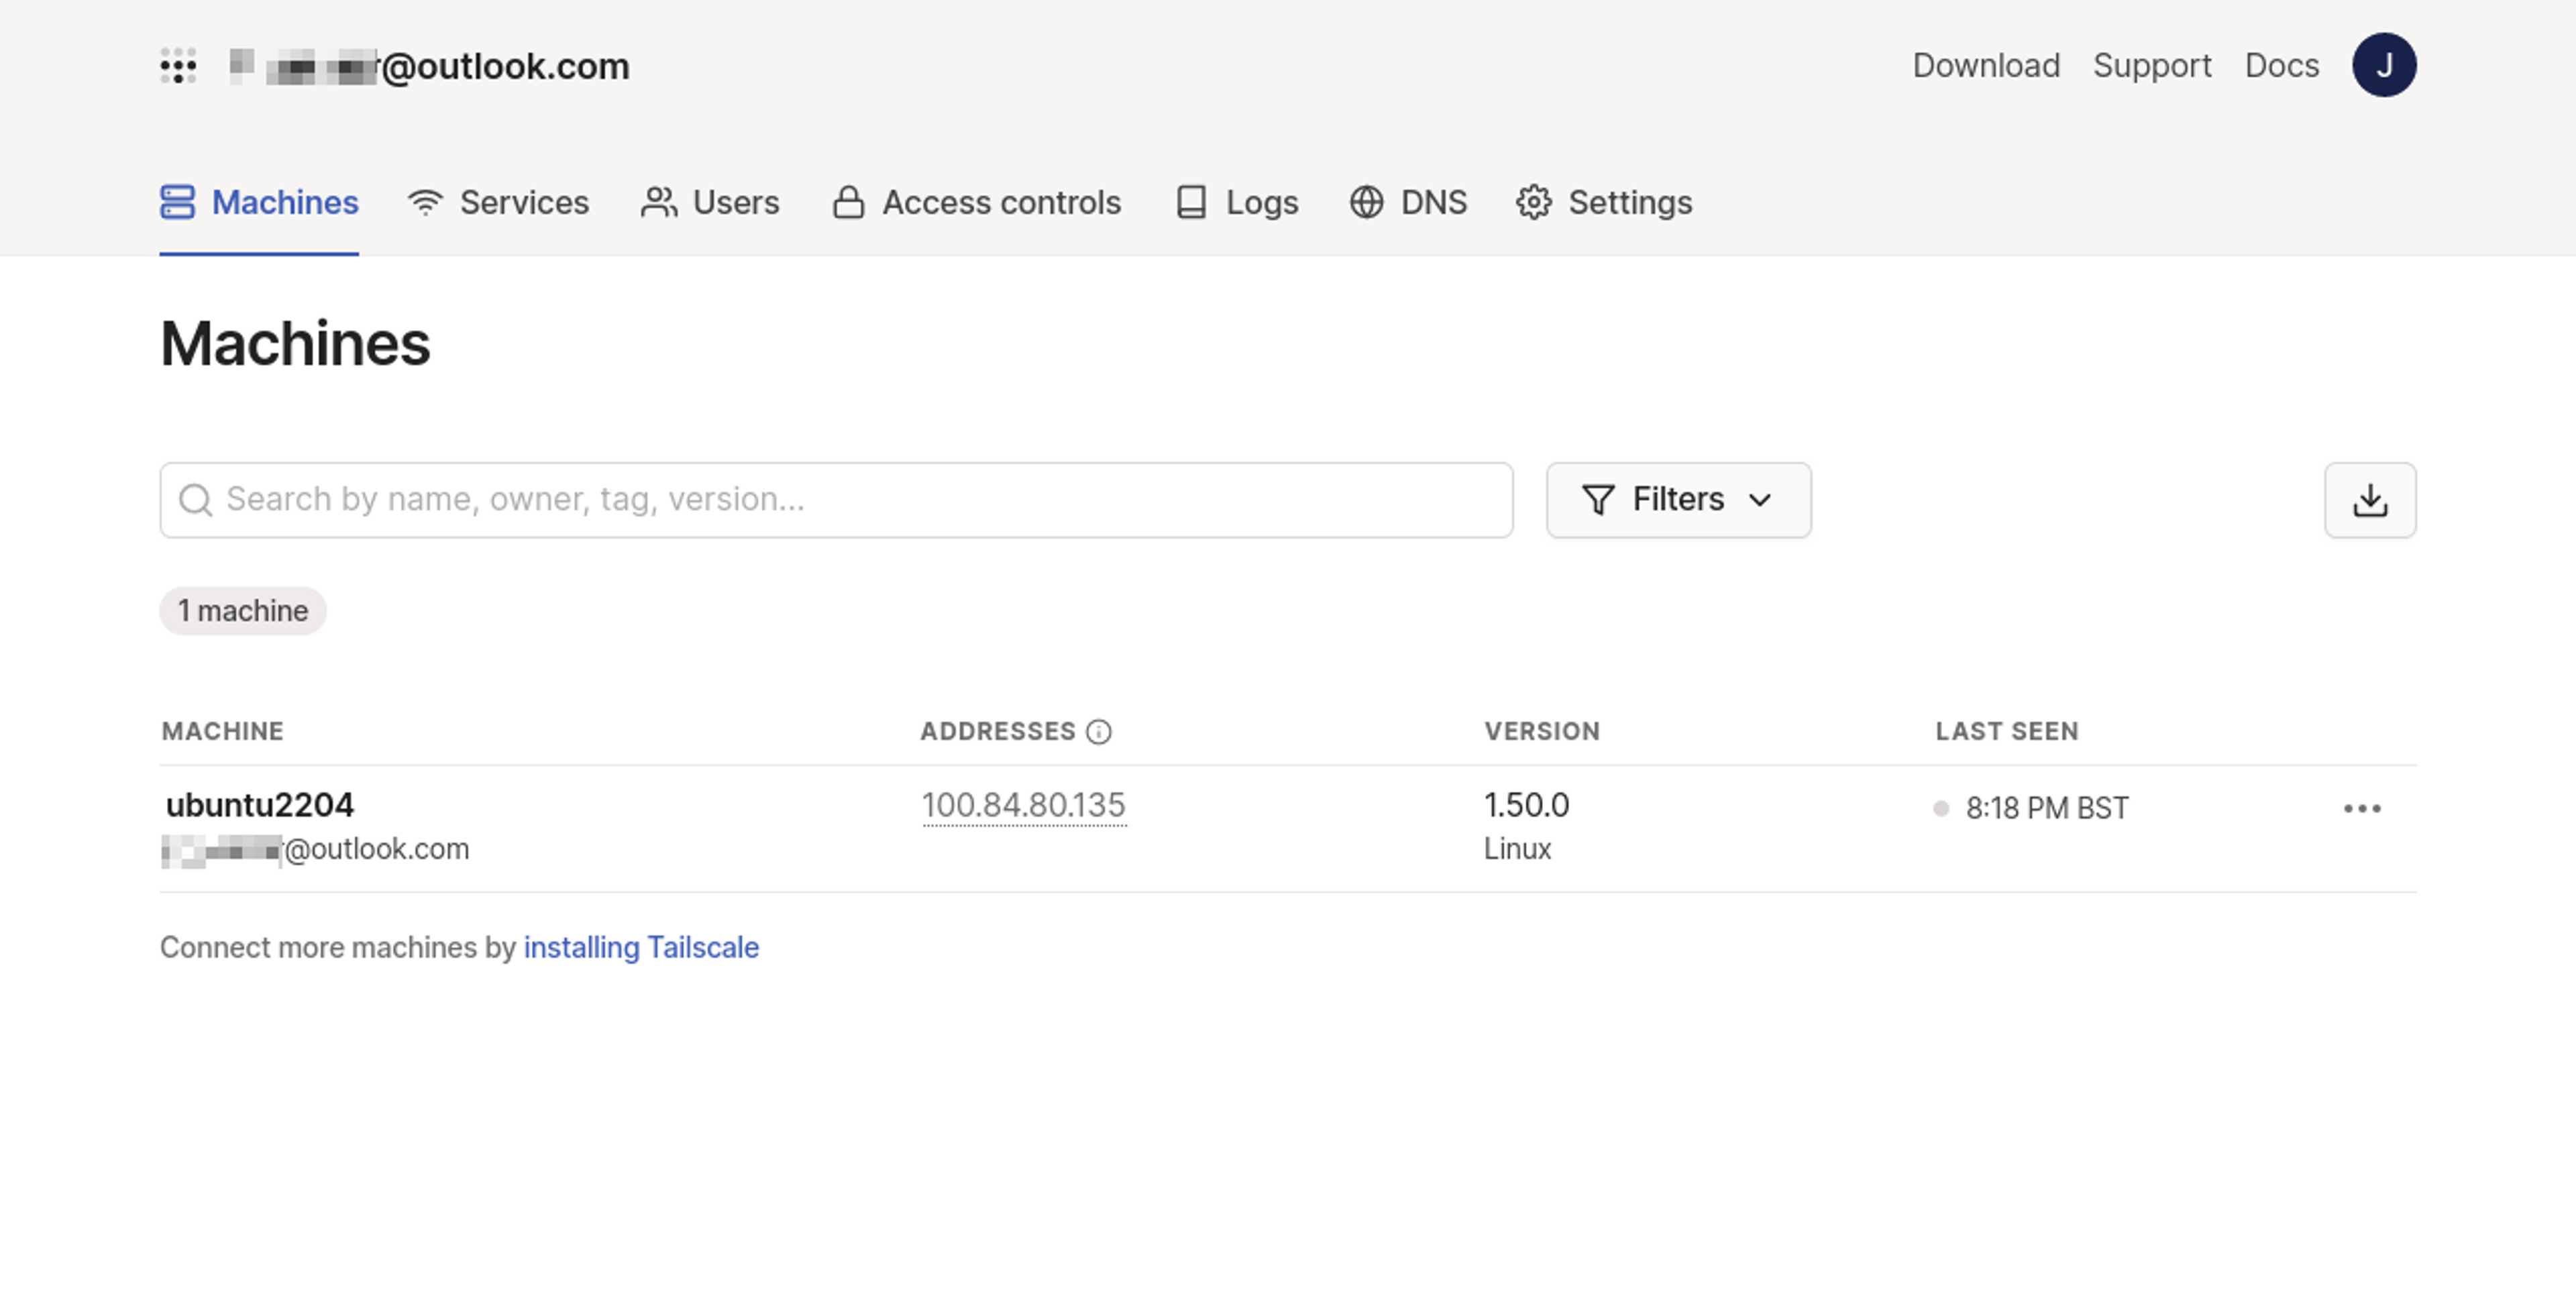
Your device should appear on Tailscale's Machines page:
Setting Up a Local Kubernetes Cluster
Now you're ready to start setting up Kubernetes.
For this tutorial, you'll set up a new single-node local cluster to experiment with. Ordinarily, this cluster would only be accessible on your own machine. But using Tailscale makes it easy to give other devices in your tailnet secure access to your cluster
minikube is a compact Kubernetes distribution that works on Linux, macOS, and Windows. It uses containerization or virtualization to host your cluster. Follow the guidance in the documentation to install the minikube CLI, then run minikube start to create your cluster:
$ minikube start
😄  minikube v1.29.0 on Ubuntu 22.04 (kvm/amd64)
✨  Automatically selected the docker driver. Other choices: kvm2, qemu2, ssh
📌  Using Docker driver with root privileges
👍  Starting control plane node minikube in cluster minikube
🚜  Pulling base image ...
🔥  Creating docker container (CPUs=2, Memory=2200MB) ...
🐳  Preparing Kubernetes v1.26.1 on Docker 20.10.23 ...
    ▪ Generating certificates and keys ...
    ▪ Booting up control plane ...
    ▪ Configuring RBAC rules ...
🔗  Configuring bridge CNI (Container Networking Interface) ...
    ▪ Using image gcr.io/k8s-minikube/storage-provisioner:v5
🔎  Verifying Kubernetes components...
🌟  Enabled addons: storage-provisioner, default-storageclass

🏄  Done! kubectl is now configured to use "minikube" cluster and "default" namespace by default
Creating a Sample App
Now that Kubernetes is running, create a sample application to run in your cluster and expose in Tailscale.
Copy the following YAML manifest and save it to app.yaml in your working directory:
apiVersion: apps/v1
kind: Deployment
metadata:
  name: nginx
  labels:
    app: nginx
spec:
  replicas: 1
  selector:
    matchLabels:
      app: nginx
  template:
    metadata:
      labels:
        app: nginx
    spec:
      containers:
        - name: nginx
          image: nginx:latest
          ports:
            - containerPort: 80

---

apiVersion: v1
kind: Service
metadata:
  name: nginxpod
spec:
  selector:
    app: nginx
  ports:
    - port: 80
      targetPort: 80
The manifest defines a deployment of the Nginx web server that's exposed by a service.
Use kubectl to create the resources:
$ kubectl apply -f app.yaml
deployment.apps/nginx created
service/nginx created
You should see that your pod and service now both exist in your cluster:
$ kubectl get pods
NAME                     READY   STATUS    RESTARTS   AGE
nginx-6b7f675859-sltwh   1/1     Running   0          58s

$ kubectl get services
NAME         TYPE        CLUSTER-IP      EXTERNAL-IP   PORT(S)   AGE
nginx        ClusterIP   10.105.15.225   <none>        80/TCP    86s
Deploy Tailscale in Your Kubernetes Cluster
Now you're ready to start adding Tailscale to your cluster.
First, create an auth key that will be used by the Tailscale service that's deployed into the cluster. The key will allow Tailscale to authenticate new devices in your tailnet (*ie* your Kubernetes resources) without requiring interactive login in a web browser.
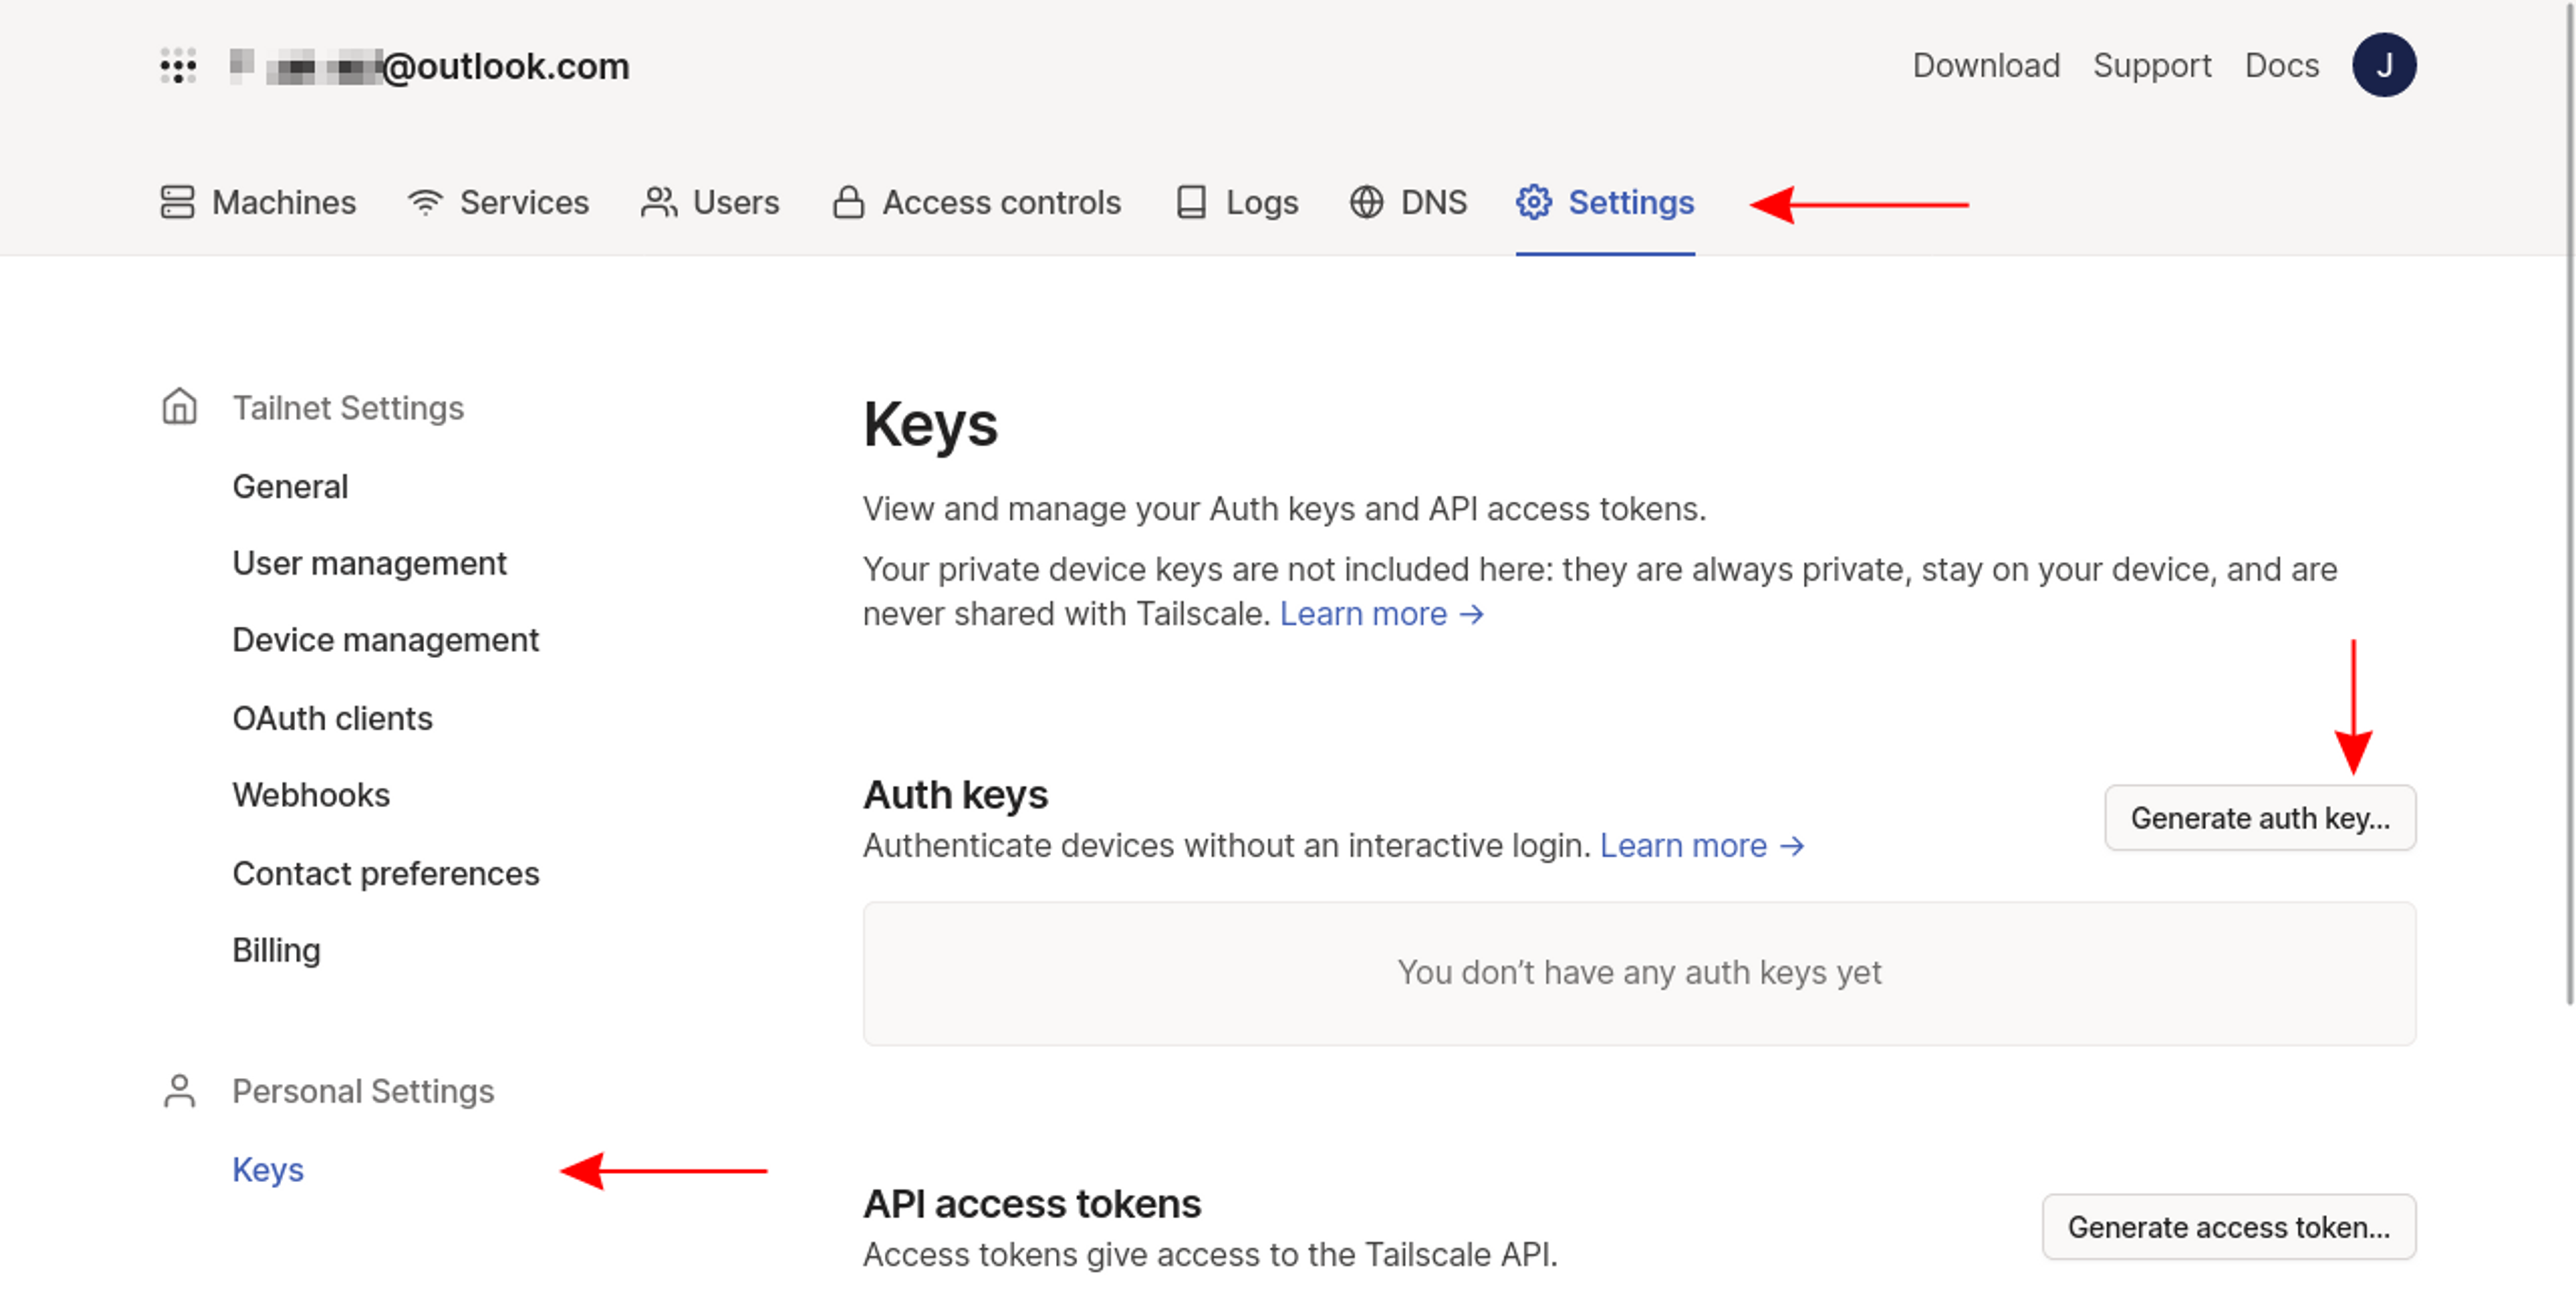
Head to Settings > Keys in the Tailscale web interface, then click the Generate auth key… button to the right of the screen:
Next, fill out the form to configure your key. Add a description, such as kubernetes, and enable the Reusable option—without it, the key can only add a single resource to your tailnet, which will be inconvenient for busy clusters.
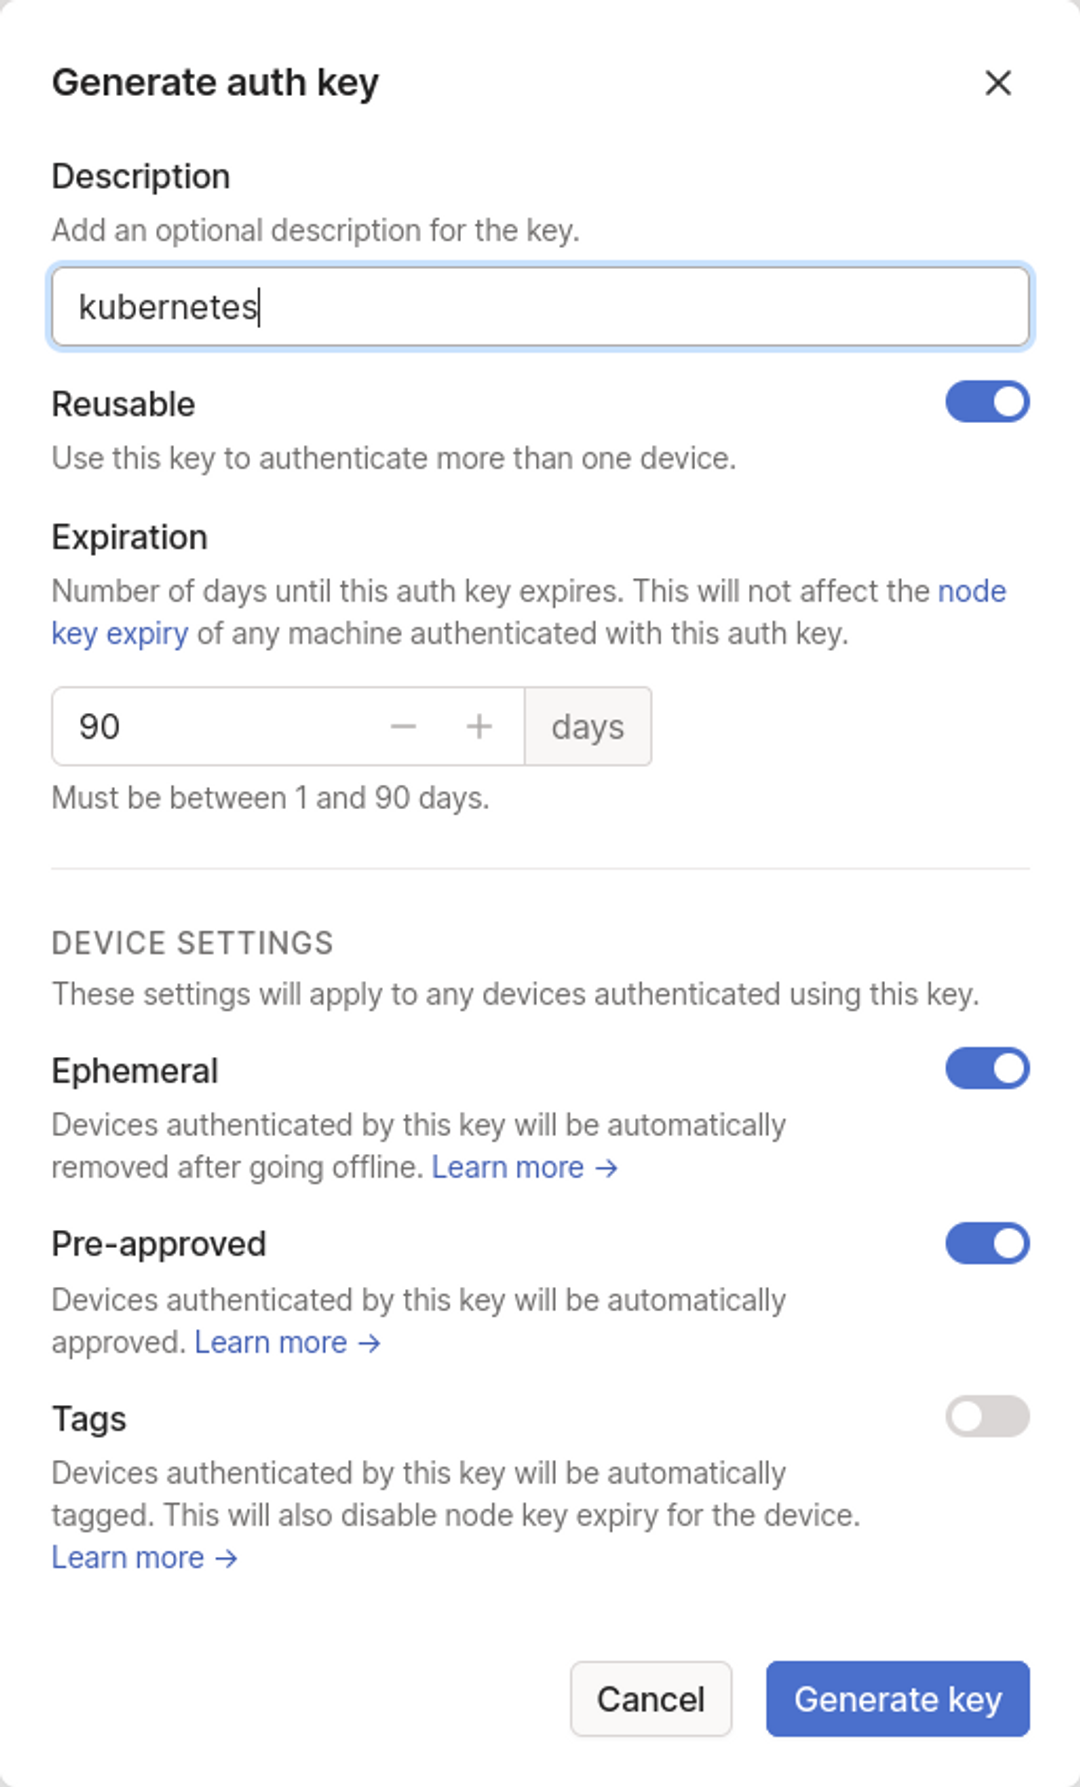
Your key's value will be displayed after you press the blue Generate key button at the bottom of the form. Note the value down as you won't be able to retrieve it after you leave the page. If you forget the key, you'll have to generate a new one.
Next, you need to add your key to a secret in your cluster. Your Tailscale pod will access the secret when it needs to authenticate to your Tailscale account. Secrets are Kubernetes API objects that are designed to store small amounts of sensitive data, such as your Tailscale key.
Copy the following YAML manifest and save it to tailscale-secret.yaml in your working directory:
apiVersion: v1
kind: Secret
metadata:
  name: tailscale-auth
stringData:
  TS_AUTHKEY: tskey-0123456789abcdef
Replace the value of the stringData.TS_AUTHKEY field with your real Tailscale auth key that you generated in the previous steps.
Run the following kubectl command to add the secret to your Kubernetes cluster:
$ kubectl apply -f tailscale-secret.yaml
secret/tailscale-auth created
Next, you must create a Kubernetes service account, role, and role binding to configure role-based access control (RBAC) for your Tailscale deployment. You'll run your Tailscale pods as this new service account. The pods will be able to use the granted RBAC permissions to perform limited interactions with your cluster.
Copy the following YAML manifest to tailscale-rbac.yaml:
apiVersion: v1
kind: ServiceAccount
metadata:
  name: tailscale

---

apiVersion: rbac.authorization.k8s.io/v1
kind: Role
metadata:
  name: tailscale
rules:
  - apiGroups: [""]
    resourceNames: ["tailscale-auth"]
    resources: ["secrets"]
    verbs: ["get", "update", "patch"]

---

apiVersion: rbac.authorization.k8s.io/v1
kind: RoleBinding
metadata:
  name: tailscale
subjects:
  - kind: ServiceAccount
    name: tailscale
roleRef:
  kind: Role
  name: tailscale
  apiGroup: rbac.authorization.k8s.io
The role allows your tailscale service account to retrieve and modify the tailscale-auth secret you created earlier, which is required for Tailscale to function.
Use kubectl to create the Service Account, Role, and RoleBinding in your cluster:
$ kubectl apply -f tailscale-rbac.yaml
serviceaccount/tailscale created
role.rbac.authorization.k8s.io/tailscale created
rolebinding.rbac.authorization.k8s.io/tailscale created
Understanding Tailscale Kubernetes Deployment Types
The prerequisites are now ready so that you can deploy Tailscale to Kubernetes—but first, you need to choose which deployment type you want.
Tailscale for Kubernetes supports three different operating modes that let you choose the level of exposure you require for your cluster:
- Proxy: Tailscale proxies traffic to one of your Kubernetes services. Your tailnet devices can communicate with the service but not with any other Kubernetes resources. Tailscale users can reach the service using the proxy's name.
- Sidecar: Tailscale runs as a sidecar next to a specific pod in your cluster. It lets you expose that pod on your tailnet without allowing access to any others. Tailscale users can connect to the pod using its name.
- Subnet router: A subnet router deployment exposes your entire cluster network in your tailnet. Your Tailscale devices can connect to any pod or service in your cluster, provided that applicable Kubernetes network policies and Tailscale access controls allow it.
For each sidecar, proxy, and subnet router you want to use, you need to create a new Tailscale pod running the official Docker image.
If you've got specific services or pods to share, you should use sidecars and proxies to add them to Tailscale. When teams use Kubernetes for development and regularly create new resources or perform cluster-level operations, subnet routing lets you integrate your cluster into your tailnet.
Let's explore each of these deployment types in turn.
Using Tailscale's Kubernetes Operator
Tailscale's new Kubernetes operator makes it even easier to add your cluster services and control plane to your Tailscale network. Instead of manually configuring a Tailscale Proxy or Subnet Router deployment, you can use simple Kubernetes annotations to expose your services.
The operator requires some additional configuration steps but then provides a simpler management experience for the most common Kubernetes workloads. It runs in your cluster and automatically detects when Kubernetes resources are added, changed, and removed. It then applies the relevant changes to your Tailscale network.
You need Tailscale version v1.50 or later to use it.
Preparing the Operator
You must set up new Tailscale ACL policy rules to get started. These are required so that tailnet devices added by the operator can be identified as belonging to its ownership.
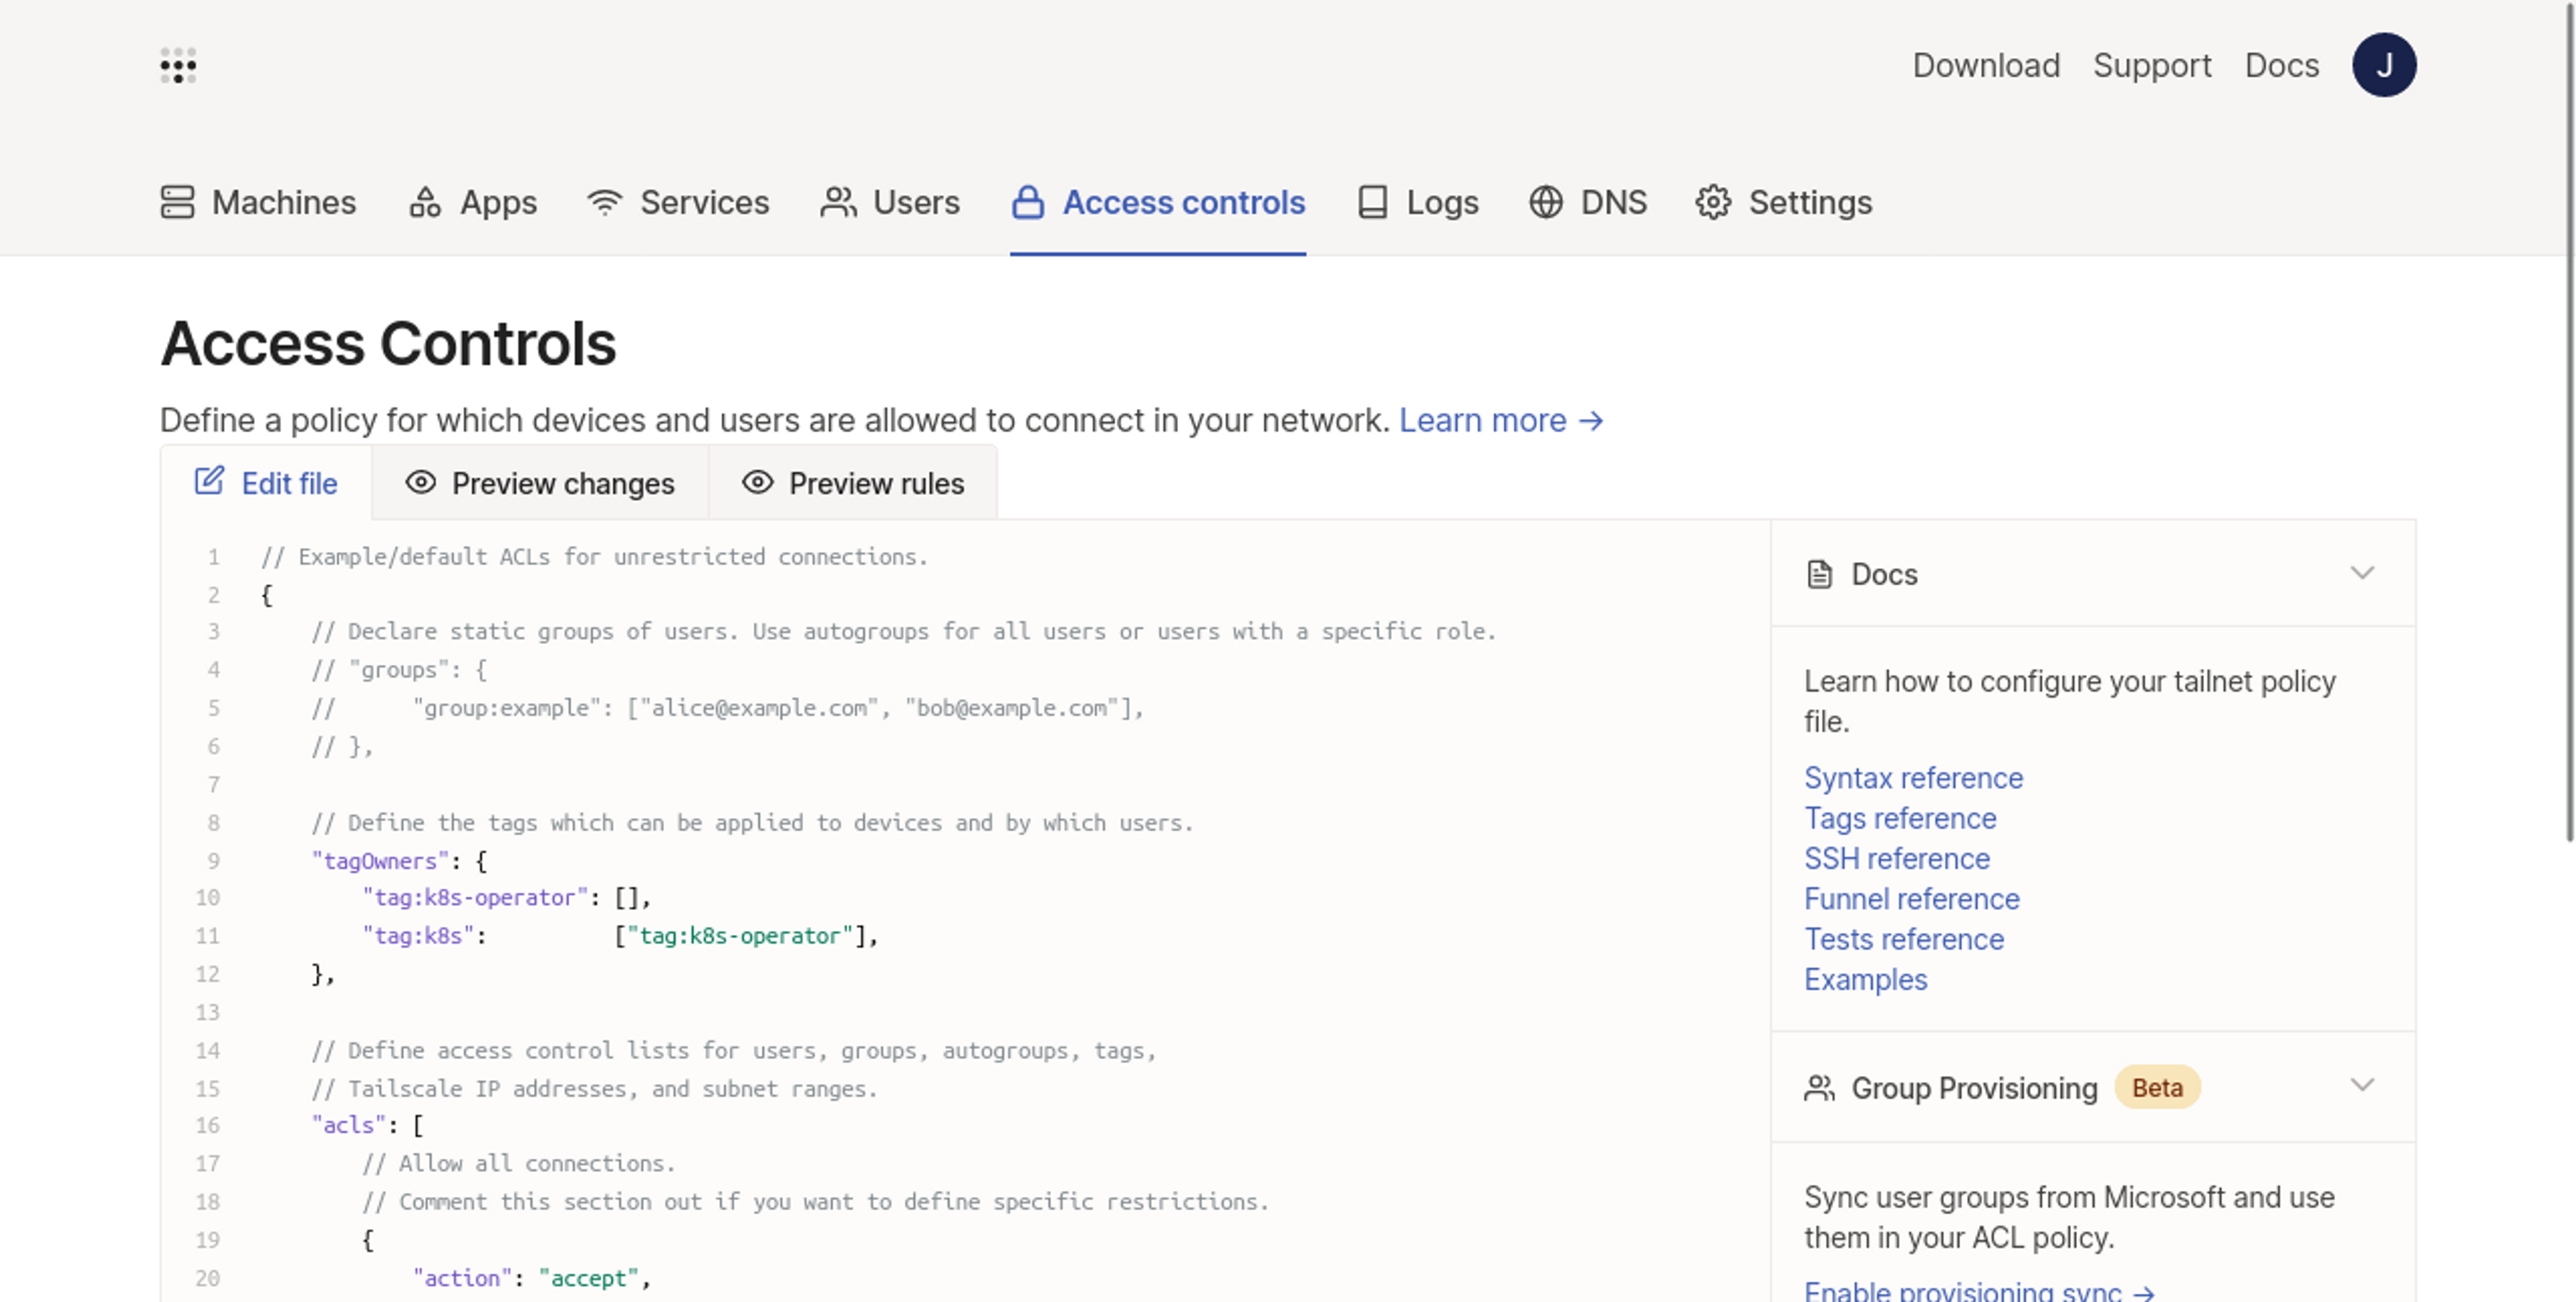
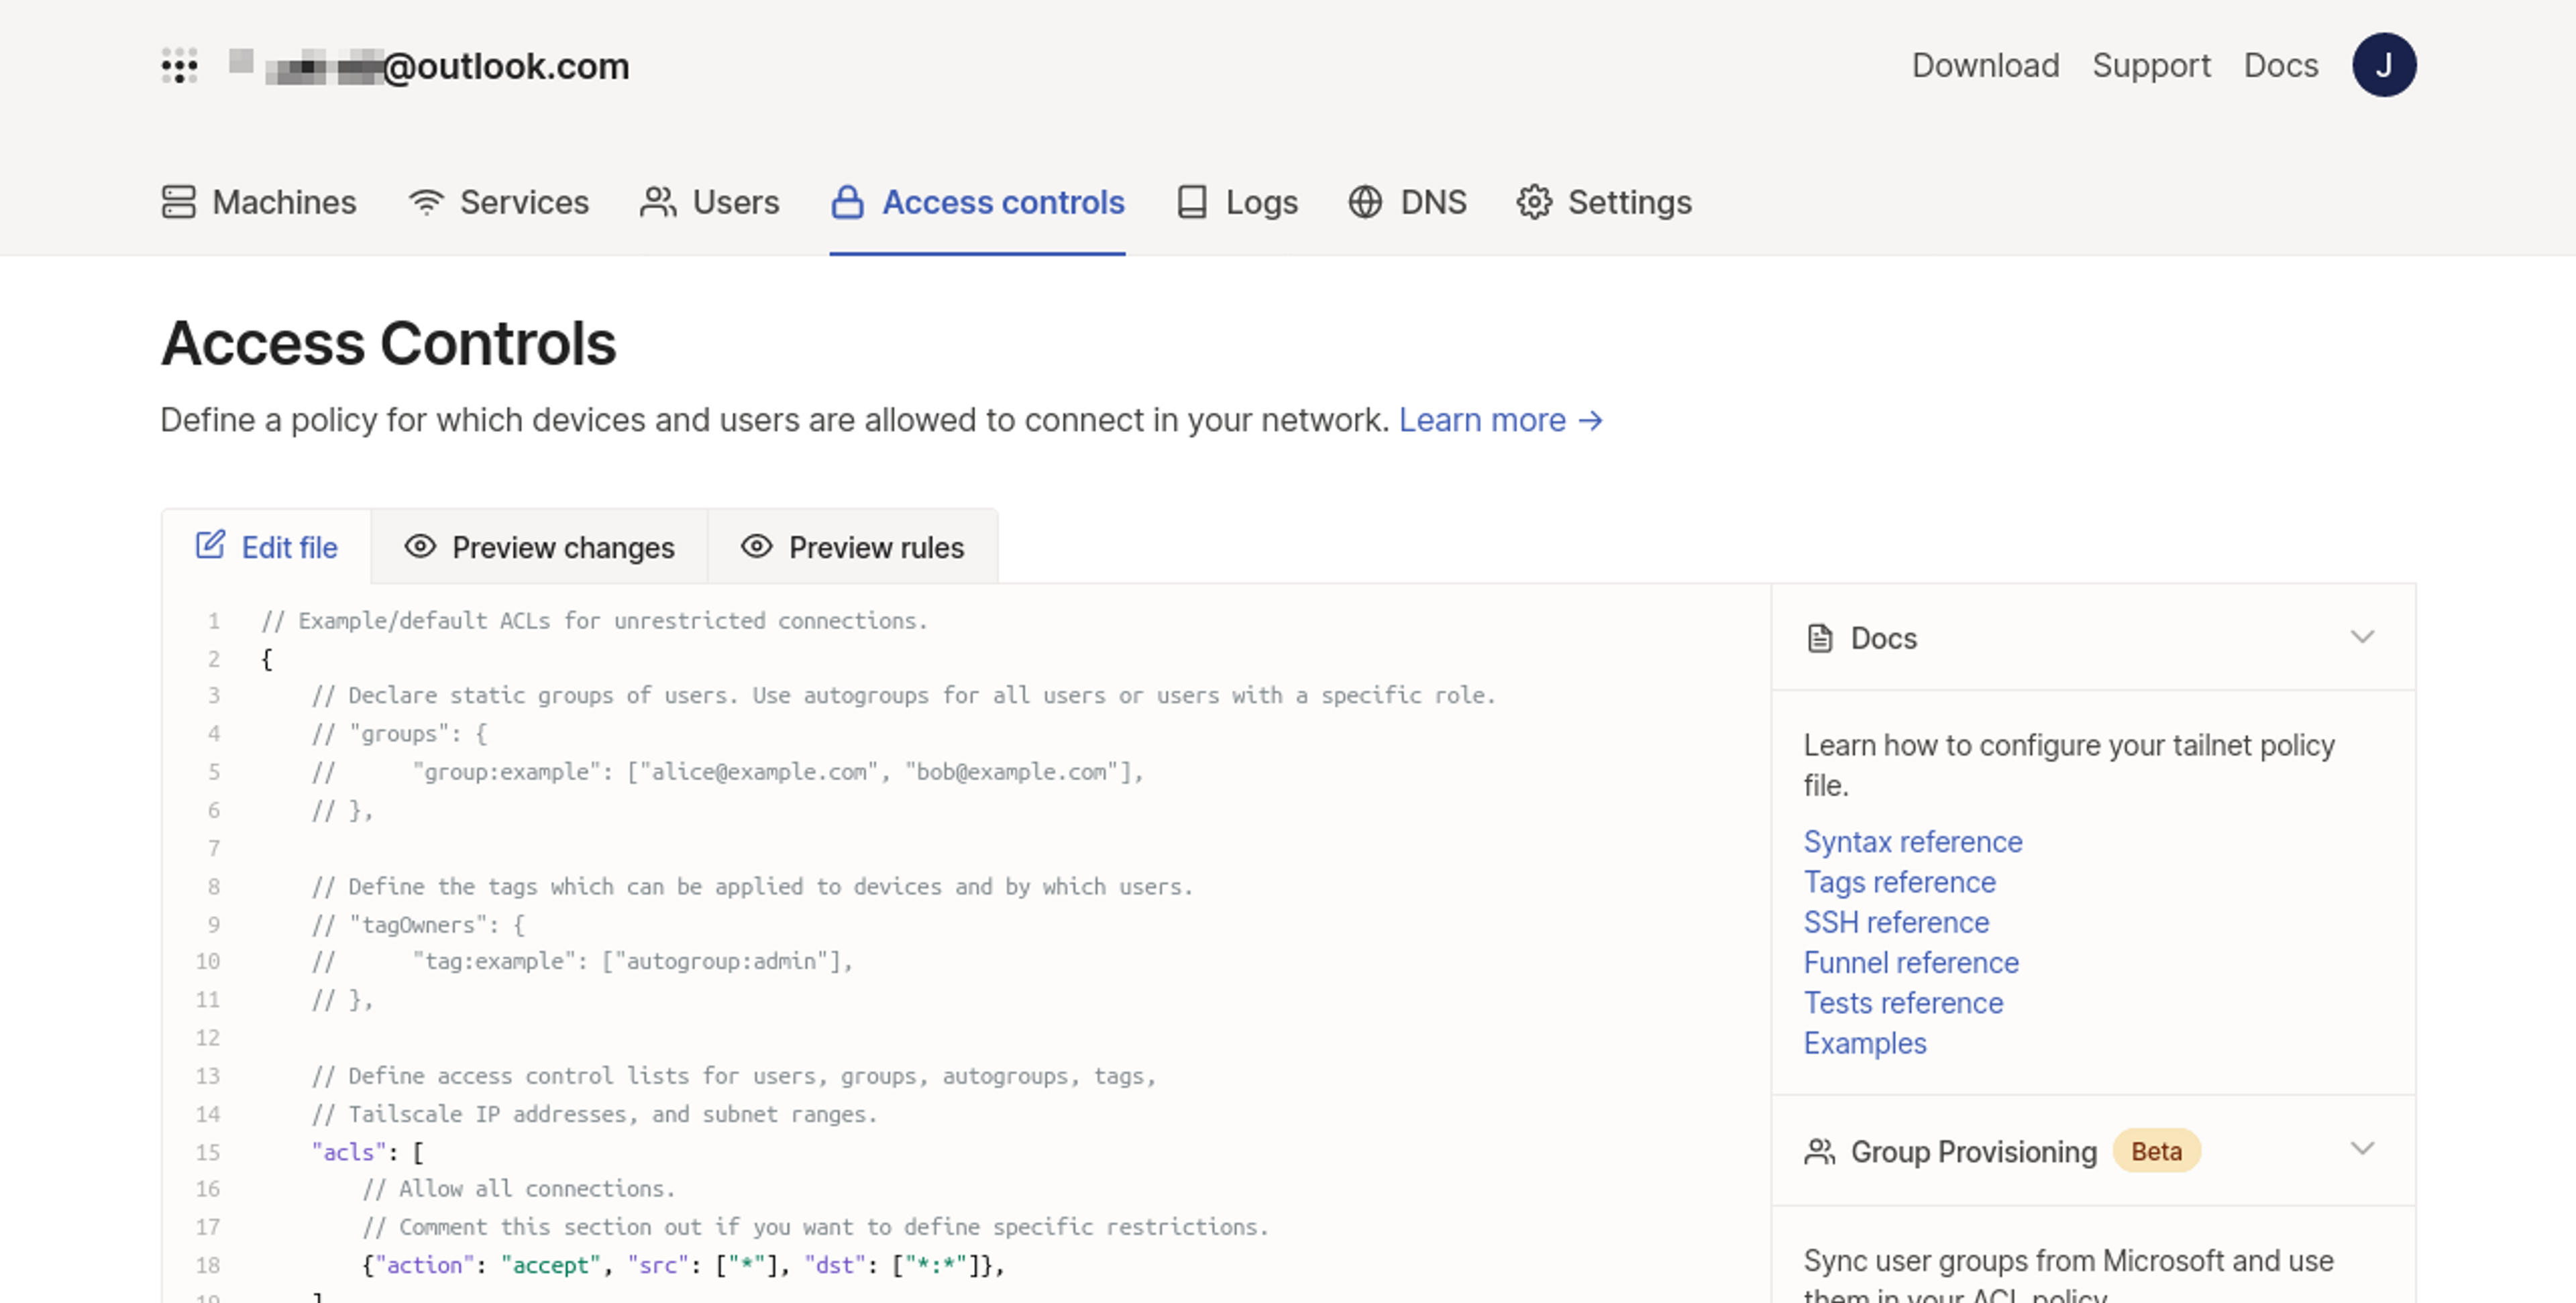
First, head to the Access Controls screen in your Tailscale admin console. Uncomment the tagOwners section and define the k8s-operator and k8s tags, with k8s-operator registered as an owner of k8s:
{
  "tagOwners": {
	"tag:k8s-operator": [],
	"tag:k8s": ["tag:k8s-operator"]
  }
}
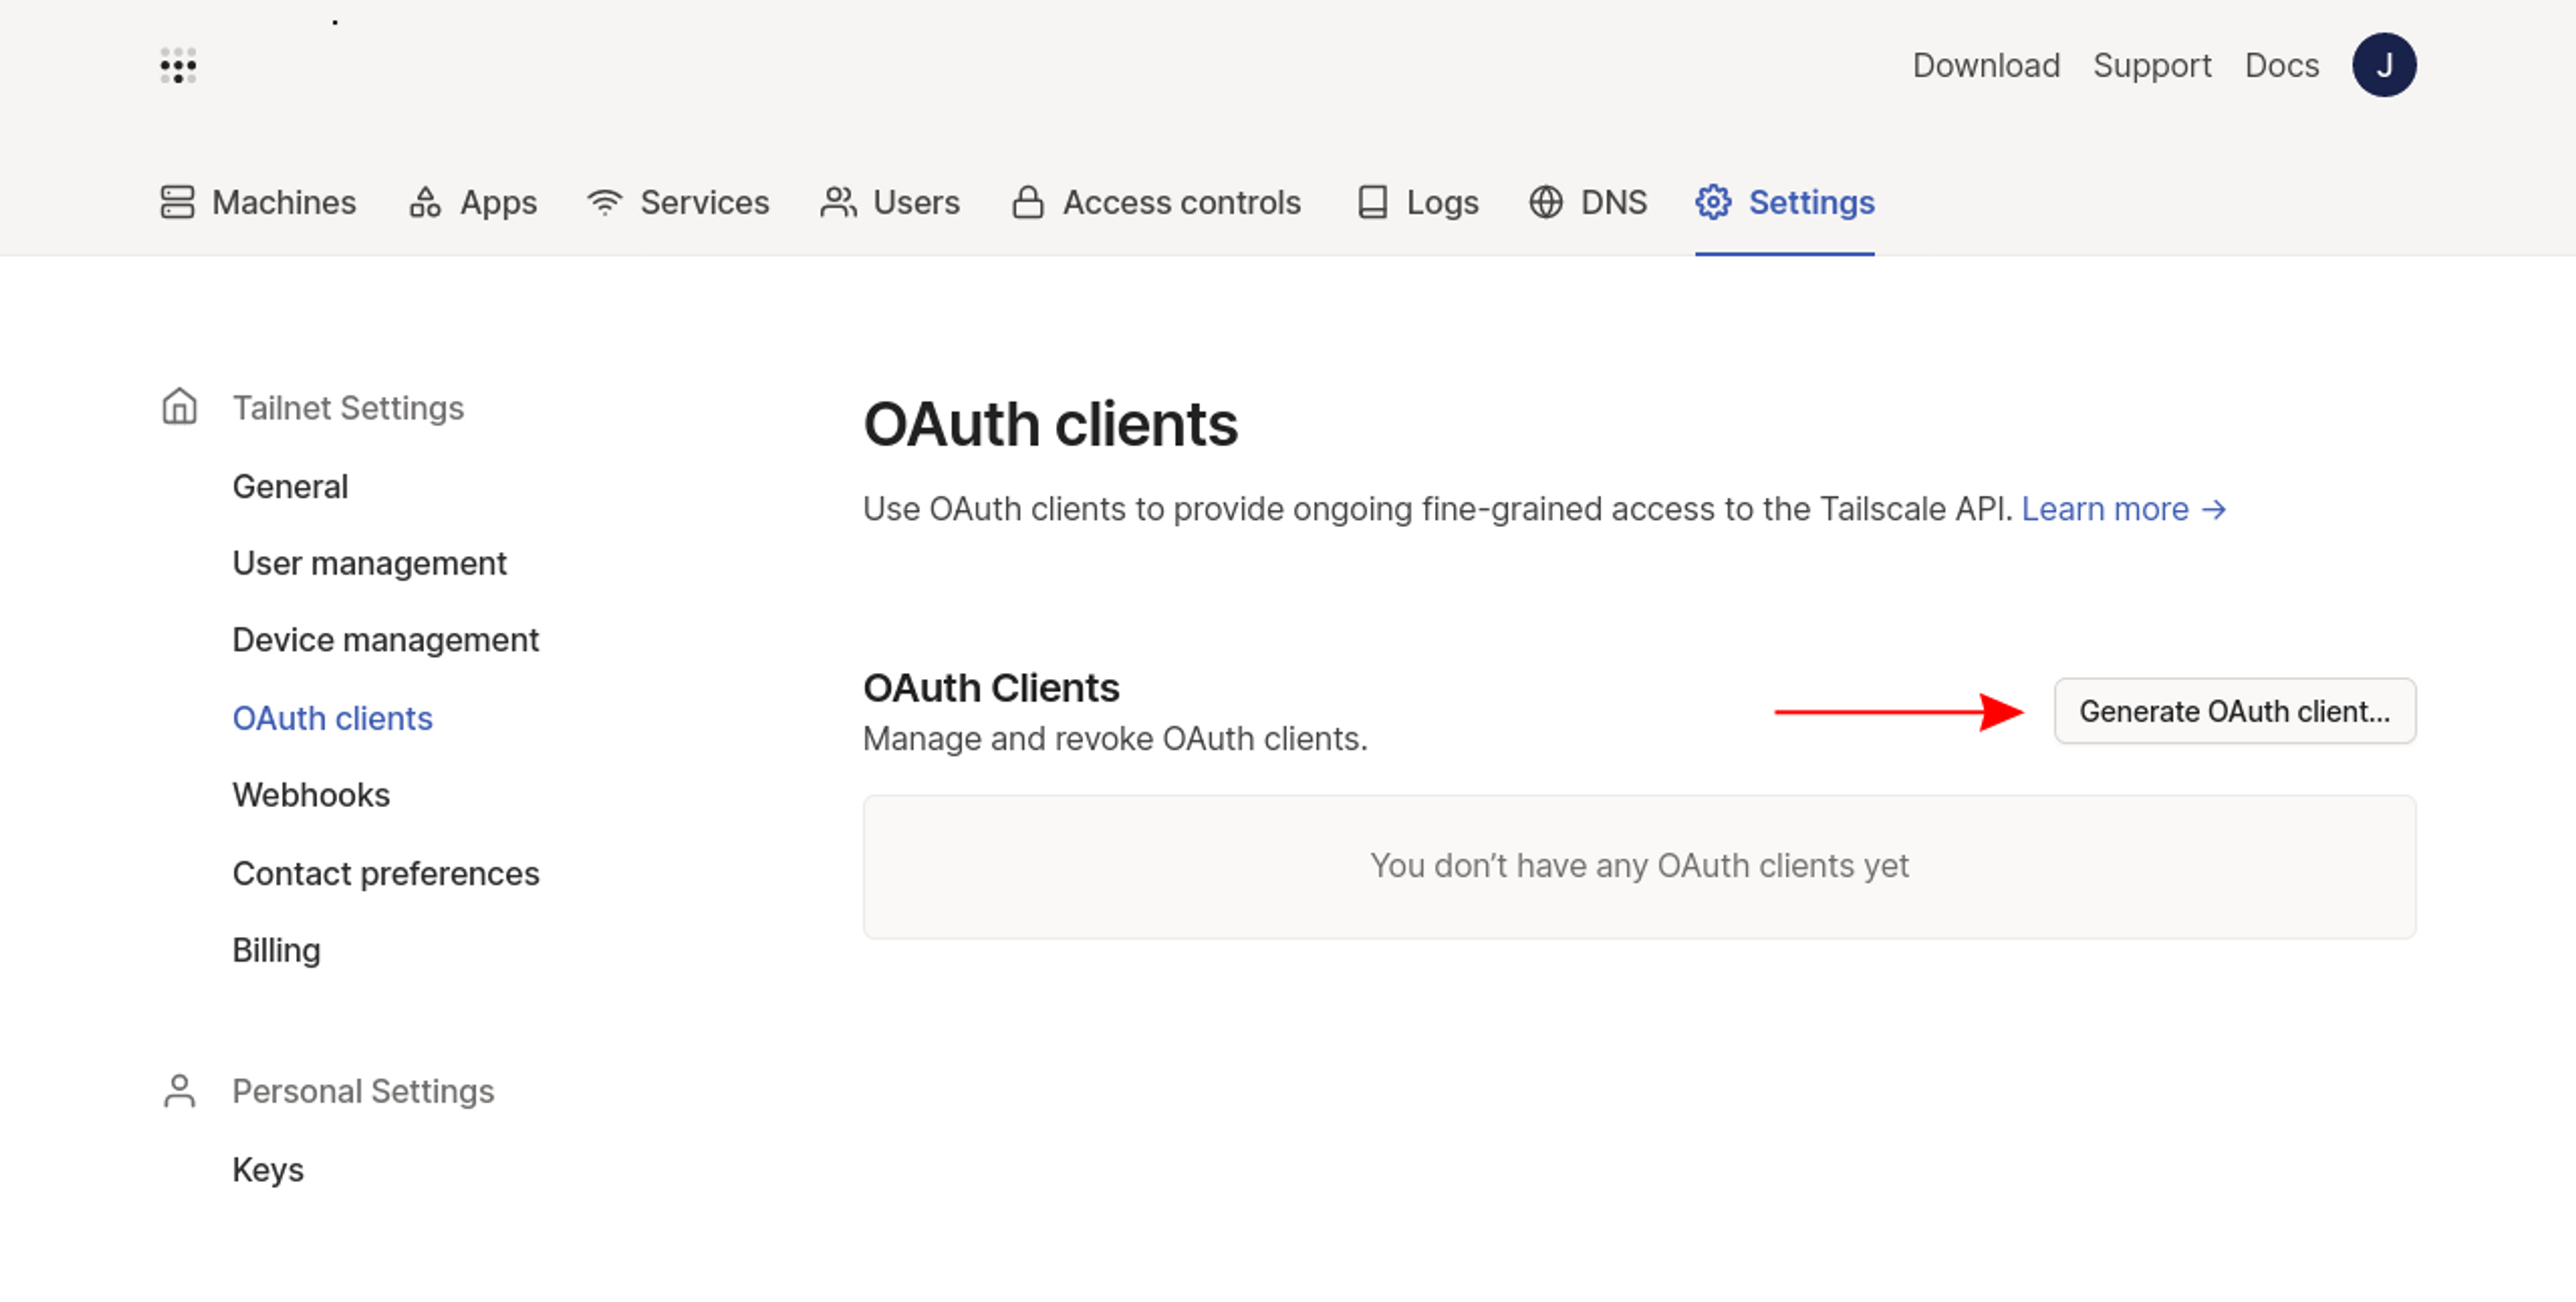
Next, a new OAuth client is required to authenticate the operator to your Tailscale account and allow it to register new devices. Navigate to the admin console's Settings > OAuth clients page and click the Generate OAuth client… button:
Give your OAuth client a name using the form’s description field, then enable the Read and Write scopes for the Devices role. When the Write scope is expanded, a Tags field will appear. Select the tag:k8s-operator tag created earlier from the dropdown to ensure devices created by the operator will have the tag assigned.
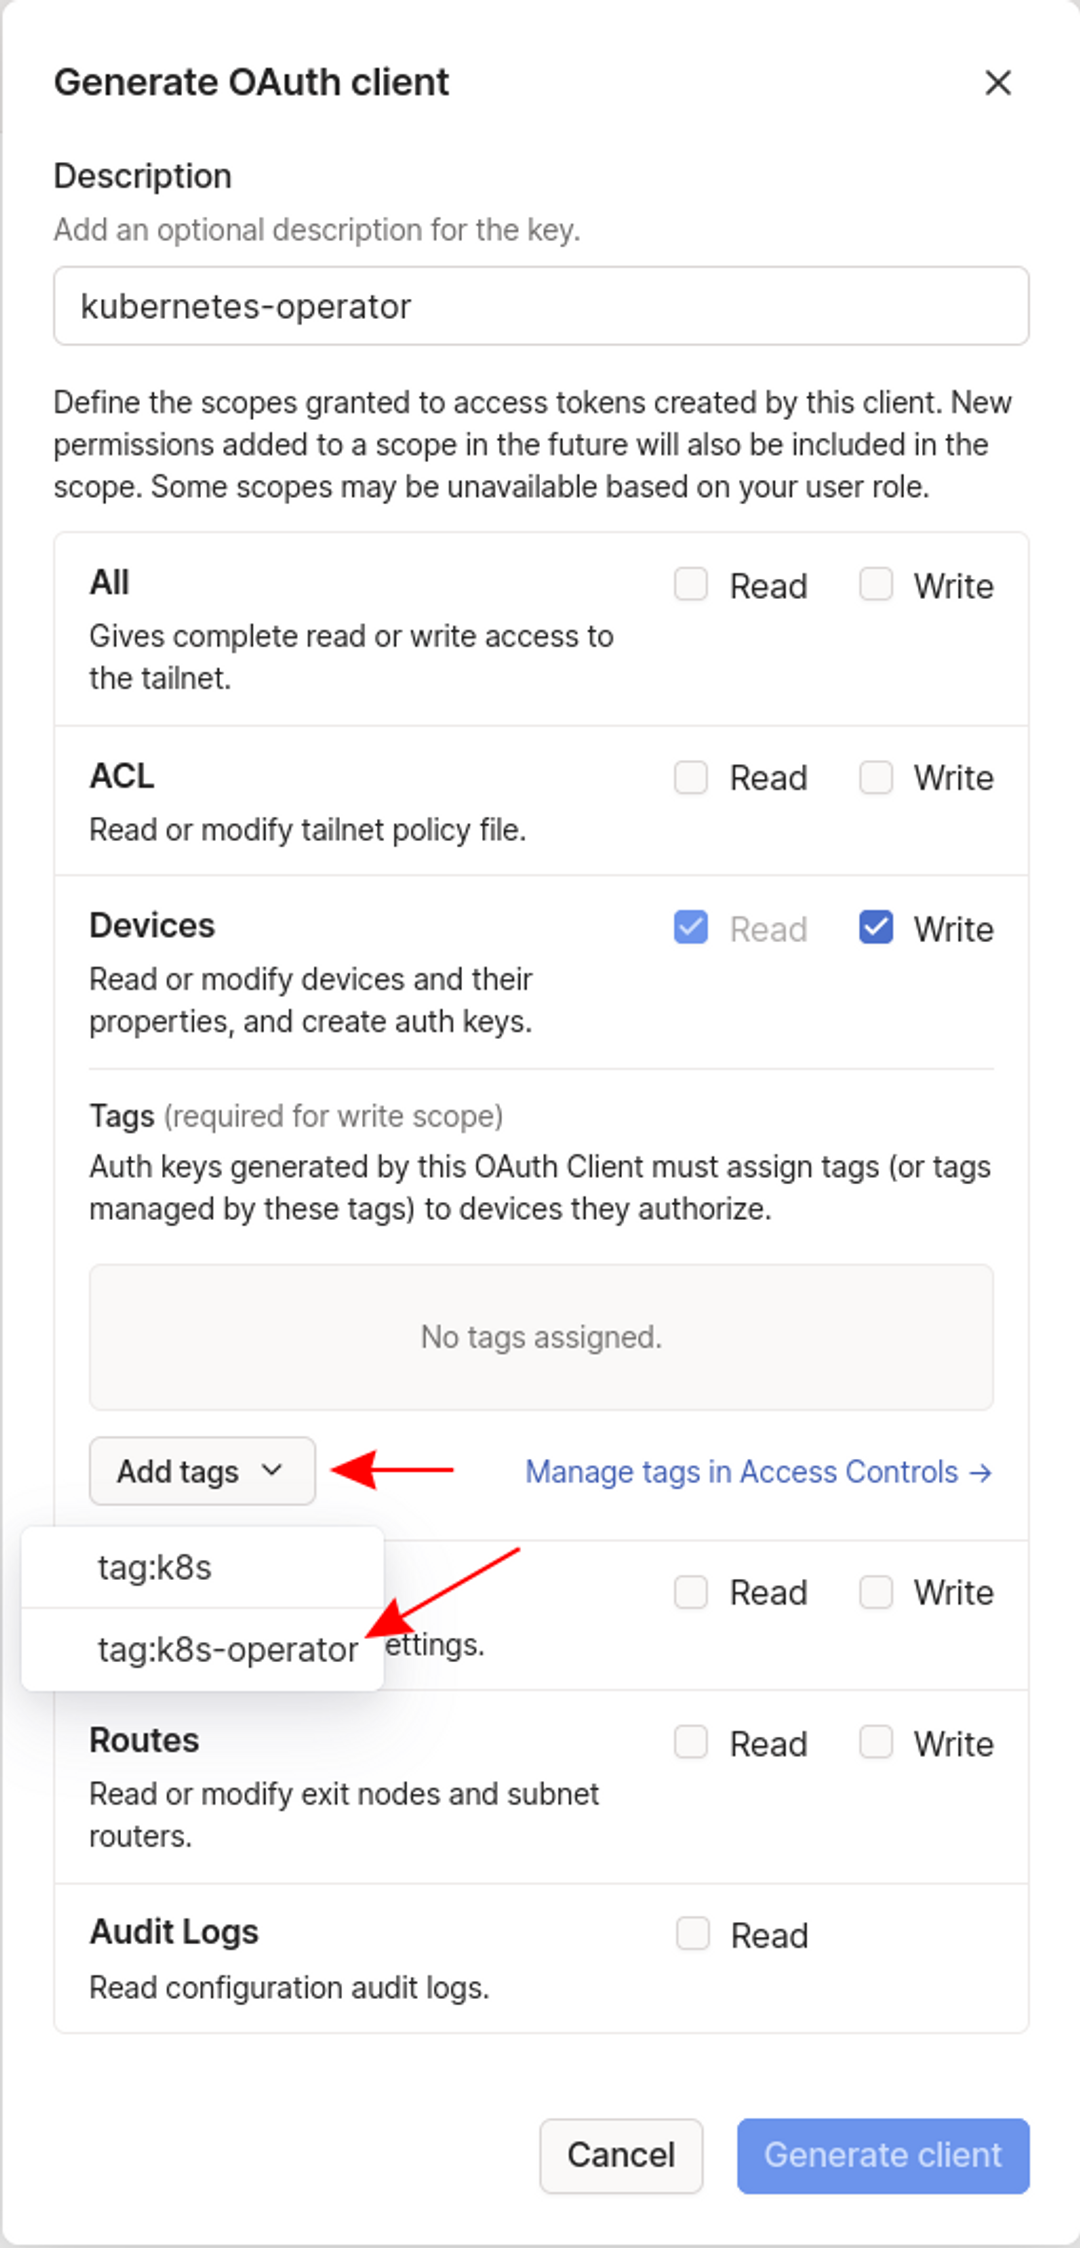
Press the blue Generate client button at the bottom of the form to complete the process.
Your new OAuth client's Client ID and Client Secret will be displayed—copy these values now as you'll need them in the next step.
Note that the client secret can't be retrieved again after you dismiss the popup.
Installing the Operator
You're now ready to install the Tailscale Operator in your cluster. It's easiest to use the official Helm chart to automate the install process.
First, register the chart's repository with your local Helm client:
# Add the repository
$ helm repo add tailscale https://pkgs.tailscale.com/helmcharts

# Update your client’s package list
$ helm repo update
Next, run the following command to install the operator:
$ helm upgrade --install tailscale-operator tailscale/tailscale-operator \
  --namespace=tailscale \
  --create-namespace \
  --set-string oauth.clientId=<oauth_client_id> \
  --set-string oauth.clientSecret=<oauth_client_secret> \
  --wait
Release "tailscale-operator" does not exist. Installing it now.
NAME: tailscale-operator
LAST DEPLOYED: Fri Dec 22 09:03:21 2023
NAMESPACE: tailscale
STATUS: deployed
REVISION: 1
TEST SUITE: None
$ helm upgrade --install tailscale-operator tailscale/tailscale-operator \
--namespace=tailscale \
--create-namespace \
--set-string oauth.clientId=<oauth_client_id> \
--set-string oauth.clientSecret=<oauth_client_secret> \
--wait
Release "tailscale-operator" does not exist. Installing it now.
NAME: tailscale-operator
LAST DEPLOYED: Fri Dec 22 09:03:21 2023
NAMESPACE: tailscale
STATUS: deployed
REVISION: 1
TEST SUITE: NoneIt uses Helm to install the Helm chart as a release called tailscale-operator inside the tailscale namespace. You must replace the <oauth_client_id> and <oauth_client_secret> placeholders with the real values you noted down at the end of the previous section.tailscale-operator inside the tailscale namespace. You must replace the <oauth_client_id> and <oauth_client_secret> placeholders with the real values you noted down at the end of the previous section.
Use Kubectl to check that the operator's pod transitions to the Running state successfully:
$ kubectl get pods -n tailscale
NAME                       READY   STATUS    RESTARTS   AGE
operator-6d5495994-79684   1/1     Running   0          12s
Back in your Tailscale account, you should see the operator join your network as a machine with the k8s-operator tag applied:
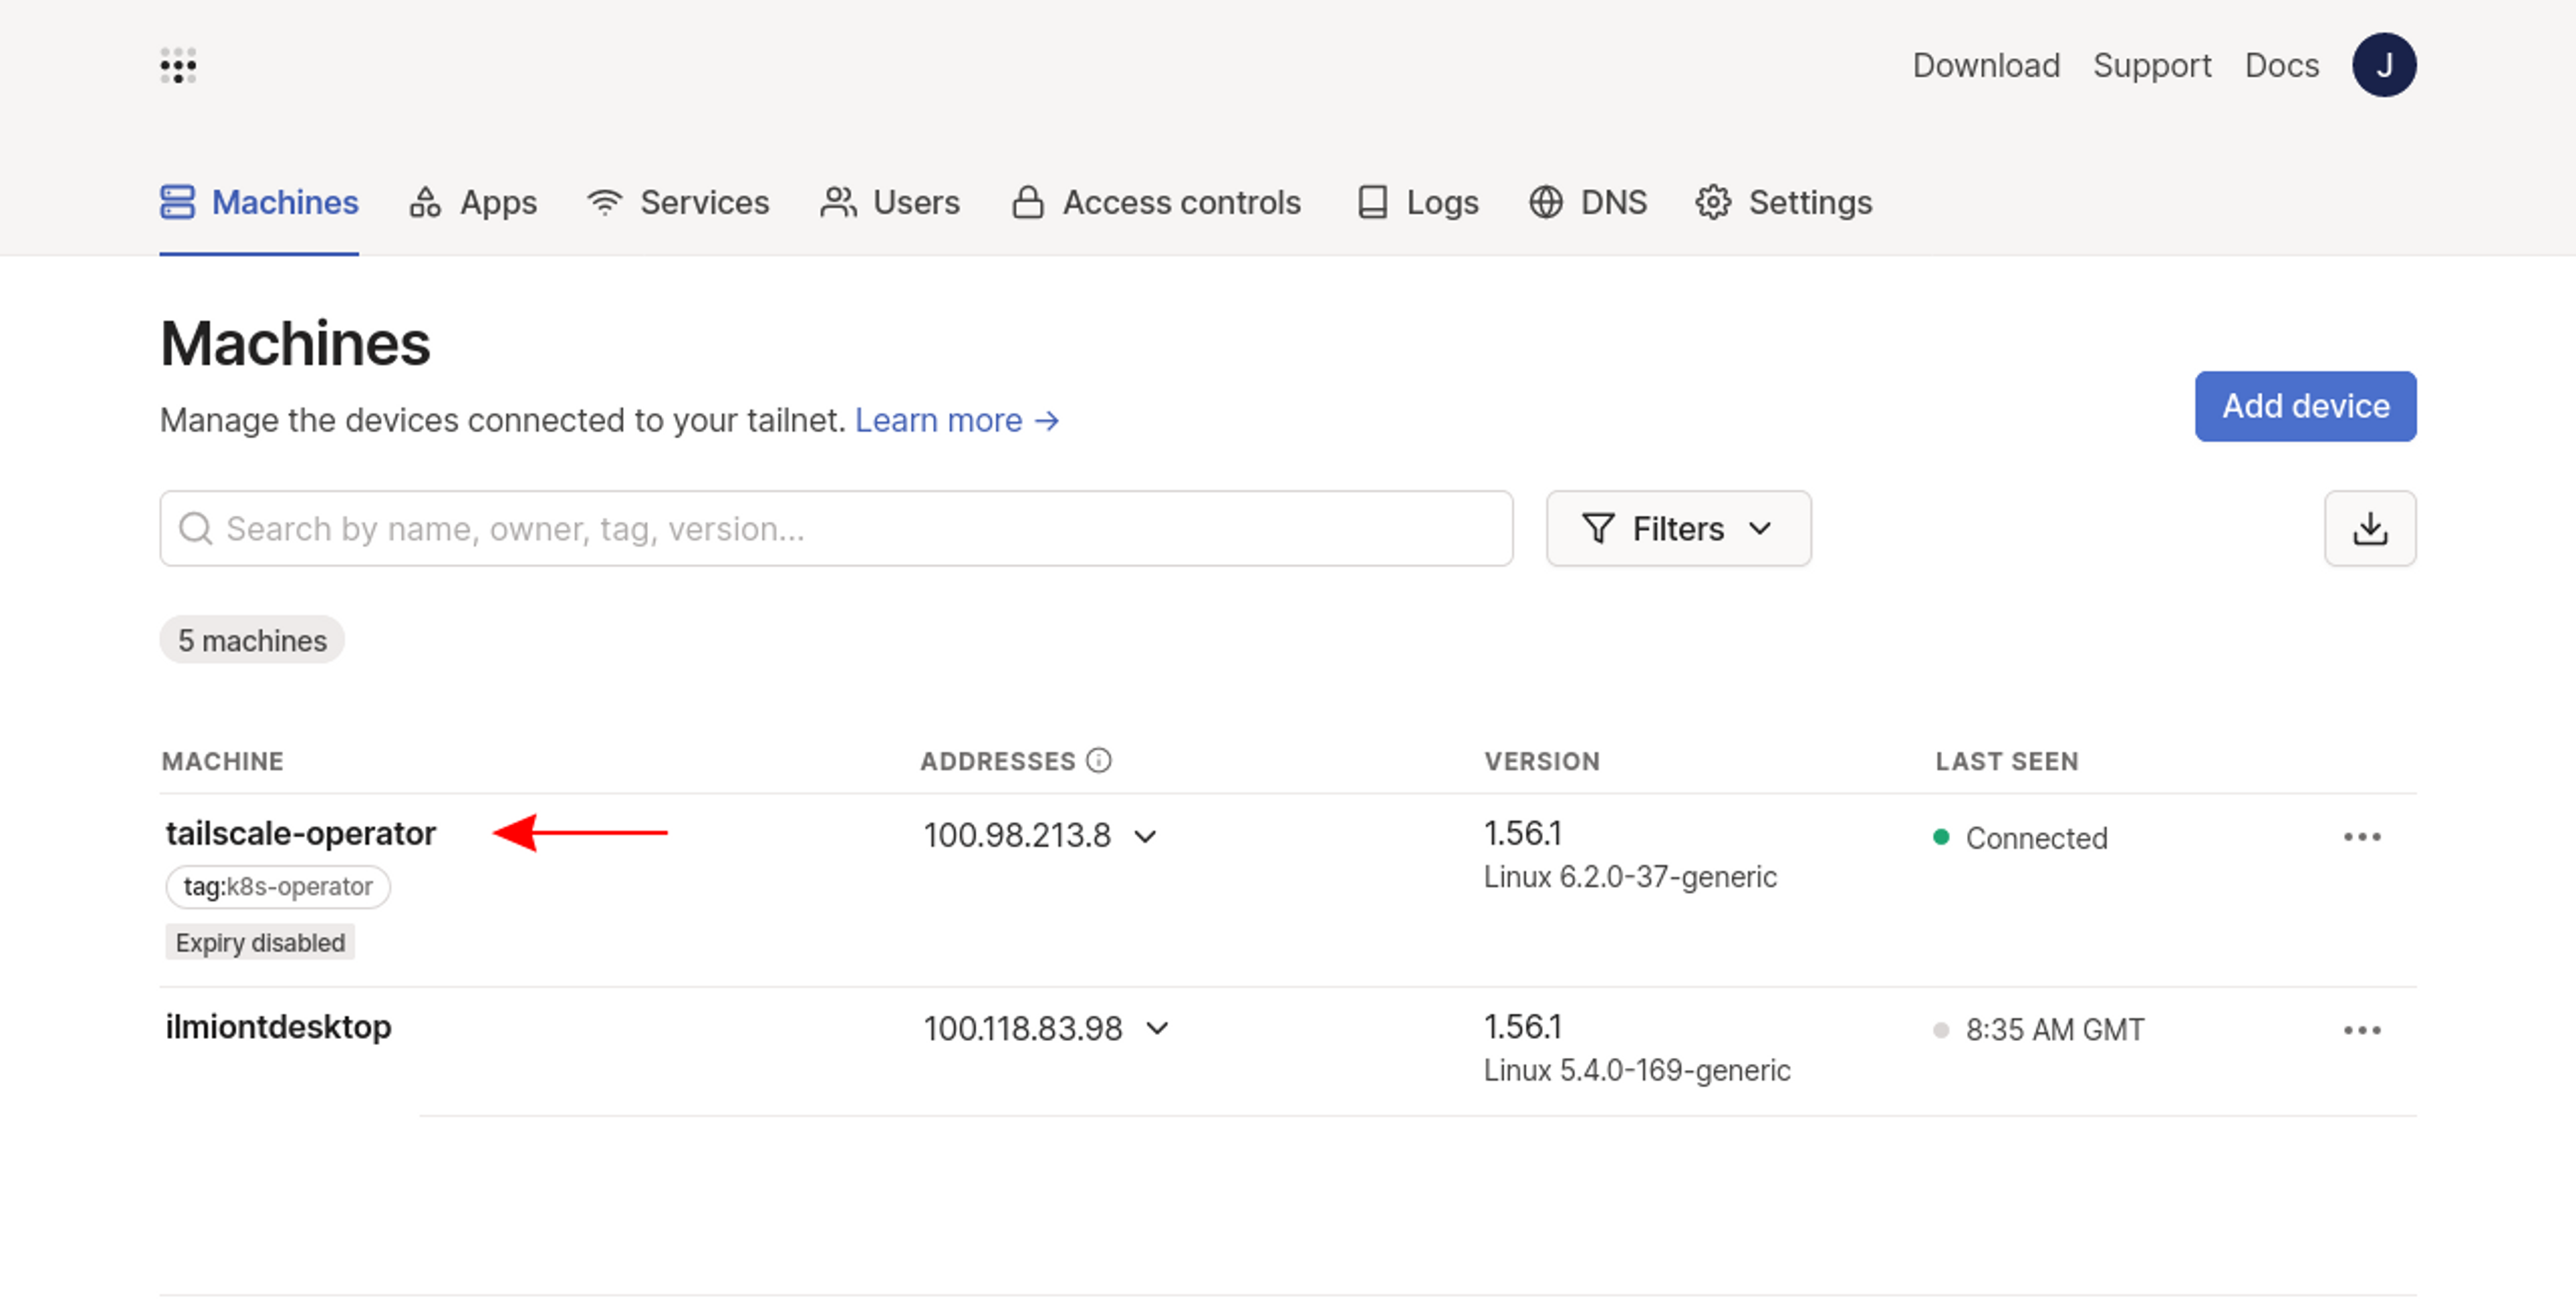
Now you can begin using the Operator to expose Kubernetes resources in your tailnet.
Exposing a Kubernetes Service Using the Operator
The operator includes extensive functionality to support different Kubernetes networking use cases. For this article, we're going to show a basic demo that exposes a simple service in your tailnet, but you can find more information on all the supported usage modes in the Operator's documentation.
The YAML manifest below is a variant of the NGINX deployment and service created earlier. However, a new tailscale.com/expose annotation has been added (under the service's metadata.annotations field), which automatically exposes the service in your tailnet. After you add the service to your cluster, the Tailscale Operator will detect the annotation's presence and automatically set up an appropriate route.
apiVersion: apps/v1
kind: Deployment
metadata:
  name: nginx
  labels:
    app: nginx
spec:
  replicas: 1
  selector:
    matchLabels:
      app: nginx
  template:
    metadata:
      labels:
        app: nginx
    spec:
      containers:
        - name: nginx
          image: nginx:latest
          ports:
            - containerPort: 80

---

apiVersion: v1
kind: Service
metadata:
  name: nginx
  annotations:
    tailscale.com/expose: "true"
spec:
  selector:
    app: nginx
  ports:
    - port: 80
      targetPort: 80
Save the YAML to app-operator.yaml and use Kubectl to apply it to your cluster:
$ kubectl apply -f app-operator.yaml
deployment.apps/created
service/nginx created
You should see the service appear as a new machine in your Tailscale admin console:

Kubernetes services exposed by annotations are automatically assigned DNS names in namespace_name-service_name format. Now you can reach your service from the other devices in your tailnet:
$ curl http://default-nginx
<!DOCTYPE html>
<html>
<head>
<title>Welcome to nginx!</title>
You've successfully used the Tailscale Operator to add a Kubernetes Service to your tailnet without having to manually configure any extra resources in your cluster.
Proxy Deployments
Deploying Tailscale in proxy mode makes a Kubernetes service accessible on your Tailnet.
First, retrieve the cluster IP address that's assigned to your nginx service:
$ kubectl get services nginx
NAME         TYPE        CLUSTER-IP      EXTERNAL-IP   PORT(S)   AGE
nginx        ClusterIP   10.105.15.225   <none>        80/TCP    2d19h
In this case, the service's IP address is 10.105.15.225.
Next, save the following sample manifest to tailscale-proxy.yaml, but remember to replace <YOUR_SERVICE_IP> with your service's actual IP address:
apiVersion: v1
kind: Pod
metadata:
  name: tailscale-proxy
spec:
  serviceAccountName: tailscale
  initContainers:
    - name: sysctler
      image: busybox:latest
      securityContext:
        privileged: true
      command: ["/bin/sh"]
      args:
        - -c
        - sysctl -w net.ipv4.ip_forward=1 net.ipv6.conf.all.forwarding=1
  containers:
    - name: tailscale
      image: ghcr.io/tailscale/tailscale:latest
      env:
        - name: TS_KUBE_SECRET
          value: tailscale-auth
        - name: TS_AUTHKEY
          valueFrom:
            secretKeyRef:
              name: tailscale-auth
              key: TS_AUTHKEY
        - name: TS_USERSPACE
          value: "false"
        - name: TS_DEST_IP
          value: <YOUR_SERVICE_IP>
      securityContext:
        capabilities:
           add:
            - NET_ADMIN
This manifest has a few important fields:
spec.serviceAccountNameis set to the name of the service account you created earlier, ensuring the pod runs as that service account.spec.initContainersdefines a single init container that configures the container to enable IP forwarding. It's required for Tailscale to work as a proxy.spec.containers.envprovides several environment variables that configure the Tailscale Pod.TS_KUBE_SECRETdeclares the name of yourtailscale-authsecret, whileTS_AUTHKEYis set to your Tailscale API key (extracted from the secret). TheTS_USERSPACEvariable specifies not to use userspace networking mode, which isn't required when Tailscale is proxying to a specific destination.- The
TS_DEST_IPvariable tells Tailscale which Kubernetes service to route traffic to. This is set to the service IP you identified above. - Finally, the pod's security context is amended to include the
NET_ADMINcapability. This allows Tailscale to perform advanced network stack interactions, including modification of network interfaces.
Use kubectl to deploy the Tailscale pod:
$ kubectl apply -f tailscale-proxy.yaml
pod/tailscale-proxy created
Wait until the pod is running:
$ kubectl get pods
NAME                     READY   STATUS    RESTARTS   AGE
nginx-6b7f675859-sltwh   1/1     Running   0          2d19h
tailscale-proxy          1/1     Running   0          36s
Your new proxy should appear in your Tailscale dashboard:

Now you can use your proxy to access your Kubernetes service from any of the devices in your Tailscale network. Tailscale automatically configures a DNS entry with a name that matches your Tailscale pod's name—in our example, this is tailscale-proxy:
$ curl http://tailscale-proxy
<!DOCTYPE html>
<html>
<head>
<title>Welcome to nginx!</title>
This response demonstrates that Tailscale is proxying traffic to the application service. You can now access the service from your Tailscale devices, but you haven't had to publicly expose the cluster or manually configure port forwarding.
Sidecar Deployments
The sidecar deployment method lets you add a specific pod to your Tailscale network. Tailscale is deployed as a container in the pod alongside your existing application container (which is Nginx in this example).
To see this in action, copy the following manifest and save it as tailscale-sidecar.yaml:
apiVersion: v1
kind: Pod
metadata:
  name: nginx-with-tailscale
spec:
  serviceAccountName: tailscale
  containers:
    - name: nginx
      image: nginx:latest
      ports:
        - containerPort: 80
    - name: tailscale-sidecar
      image: ghcr.io/tailscale/tailscale:latest
      env:
        - name: TS_KUBE_SECRET
          value: tailscale-auth
        - name: TS_AUTHKEY
          valueFrom:
            secretKeyRef:
              name: tailscale-auth
              key: TS_AUTHKEY
        - name: TS_USERSPACE
          value: "false"
      securityContext:
        capabilities:
           add:
- NET_ADMINapiVersion: v1
kind: Pod
metadata:
name: nginx-with-tailscale
spec:
serviceAccountName: tailscale
containers:
- name: nginx
image: nginx:latest
ports:
- containerPort: 80
- name: tailscale-sidecar
image: ghcr.io/tailscale/tailscale:latest
env:
- name: TS_KUBE_SECRET
value: tailscale-auth
- name: TS_AUTHKEY
valueFrom:
secretKeyRef:
name: tailscale-auth
key: TS_AUTHKEY
- name: TS_USERSPACE
value: "false"
securityContext:
capabilities:
add:
- NET_ADMINThe Tailscale container configuration is very similar to that of proxy mode. However, the TS_DEST_IP environment variable has been removed—because Tailscale is a sidecar to its own pod, not a proxy to a service—and the init container is no longer required as no IP forwarding will occur.TS_DEST_IP environment variable has been removed—because Tailscale is a sidecar to its own pod, not a proxy to a service—and the init container is no longer required as no IP forwarding will occur.
Use kubectl to deploy this manifest to start a second Nginx pod in your cluster that includes a Tailscale sidecar:
$ kubectl apply -f tailscale-sidecar.yaml
pod/tailscale-sidecar created
Once the pod is running, your sidecar will appear on your Tailscale Machines page:
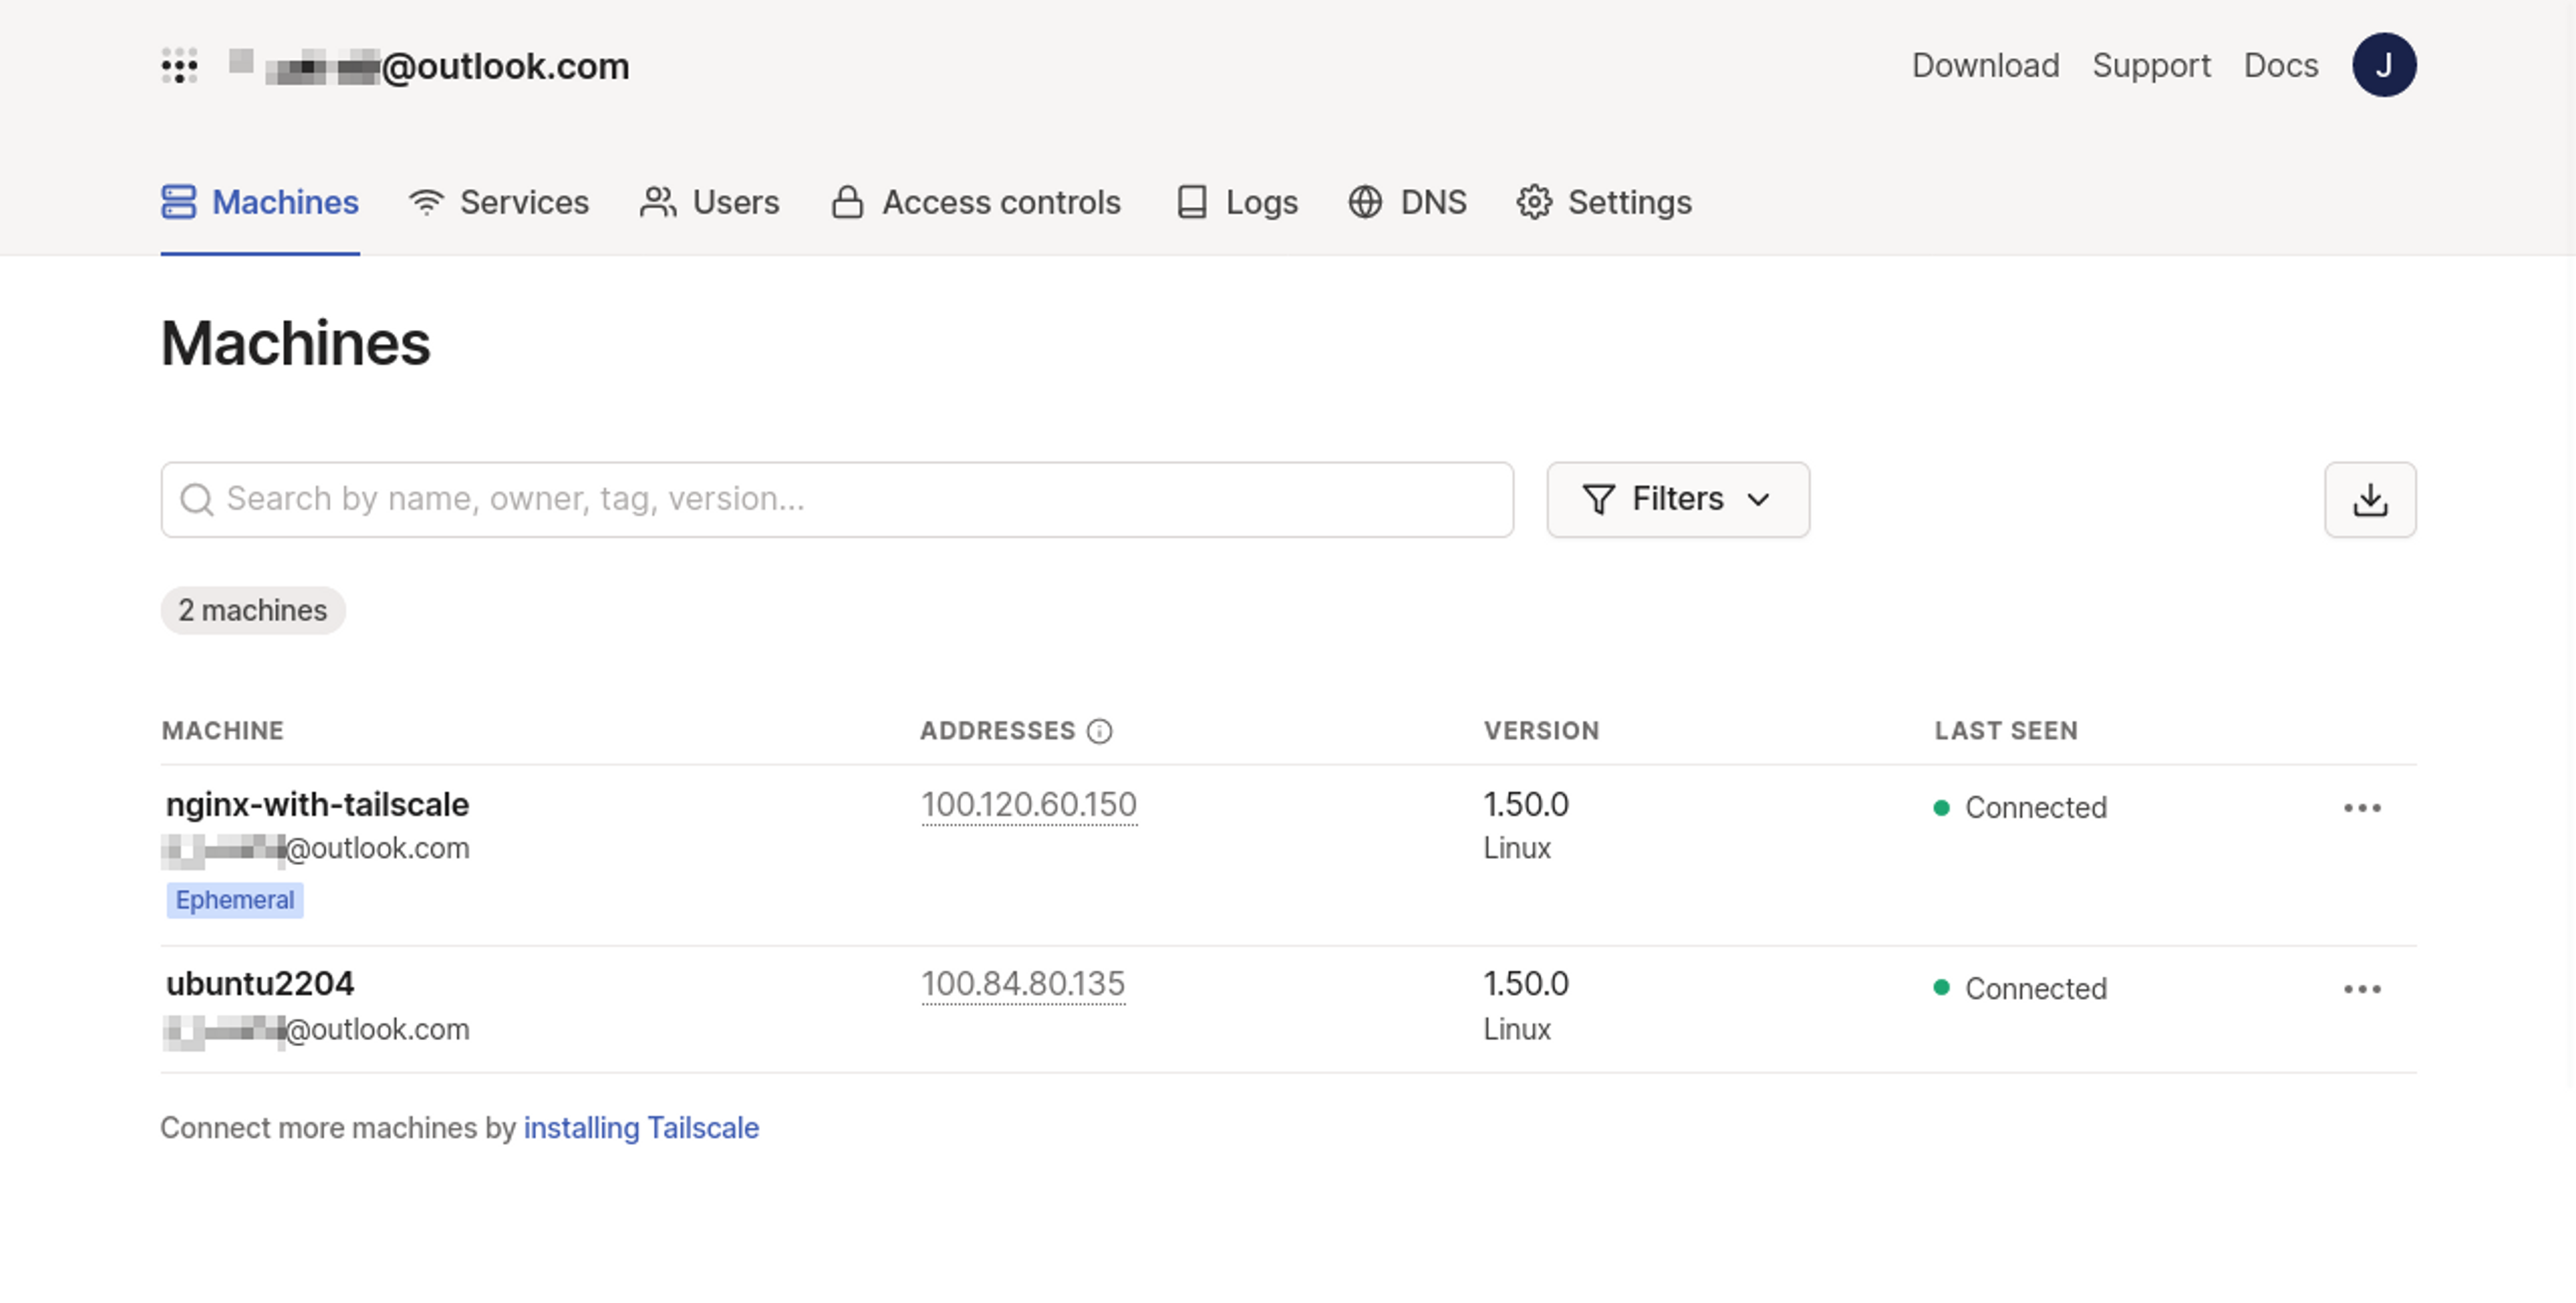
The devices in your Tailscale network can now communicate with your Kubernetes pod. Your Tailscale client will automatically configure a DNS entry on your device that resolves the Tailscale pod's name to the proxy target in your cluster—the pod's name is nginx-with-tailscale in this example:
$ curl http://nginx-with-tailscale
<!DOCTYPE html>
<html>
<head>
<title>Welcome to nginx!</title>
Subnet Router Deployments
Deploying Tailscale in subnet router mode lets your Tailscale devices connect to any of the cluster IPs in your Kubernetes cluster—without having to manually create a proxy or sidecar for each one.
The following manifest creates a pod that starts Tailscale in subnet router mode. Copy the manifest and save it to tailscale-subnet.yaml in your working directory, ready to add to your cluster:
apiVersion: v1
kind: Pod
metadata:
  name: tailscale-subnet
spec:
  serviceAccountName: tailscale
  containers:
    - name: tailscale
      image: ghcr.io/tailscale/tailscale:latest
      env:
        - name: TS_KUBE_SECRET
          value: tailscale-auth
        - name: TS_AUTHKEY
          valueFrom:
            secretKeyRef:
              name: tailscale-auth
              key: TS_AUTHKEY
        - name: TS_ROUTES
          value: "<POD_IP_RANGE>,<SERVICE_IP_RANGE>"
        - name: TS_USERSPACE
          value: "true"
      securityContext:
        # Run as a non-root user to mitigate privilege escalation attack attempts
        runAsUser: 1000
        runAsGroup: 1000
This time, the Tailscale container has an extra TS_ROUTES environment variable, which should be a comma-separated list of the pod and service IP address CIDR ranges enabled for your cluster. Tailscale will create routes in your tailnet that cover these ranges.
To find the correct values for <POD_IP_RANGE> and <SERVICE_IP_RANGE>, you'll need to check the documentation from your cluster's provider or CNI networking plugin. The minikube cluster used in this tutorial defaults to a pod IP range of 10.244.0.0/16, while the service range is 10.105.0.0/16:
- name: TS_ROUTES
  value: "10.244.0.0/16,10.105.0.0/16"
Unlike the proxy and sidecar modes, subnet routing depends on the TS_USERSPACE environment variable being set to true so that Tailscale switches to userspace networking mode. It's required because subnet routing normally uses a VPN tunnel device, but it's not supported in container environments. Userspace mode makes Tailscale use a SOCKS5 or HTTP proxy instead.
Deploy your pod using kubectl:
$ tailscale apply -f tailscale-subnet.yaml
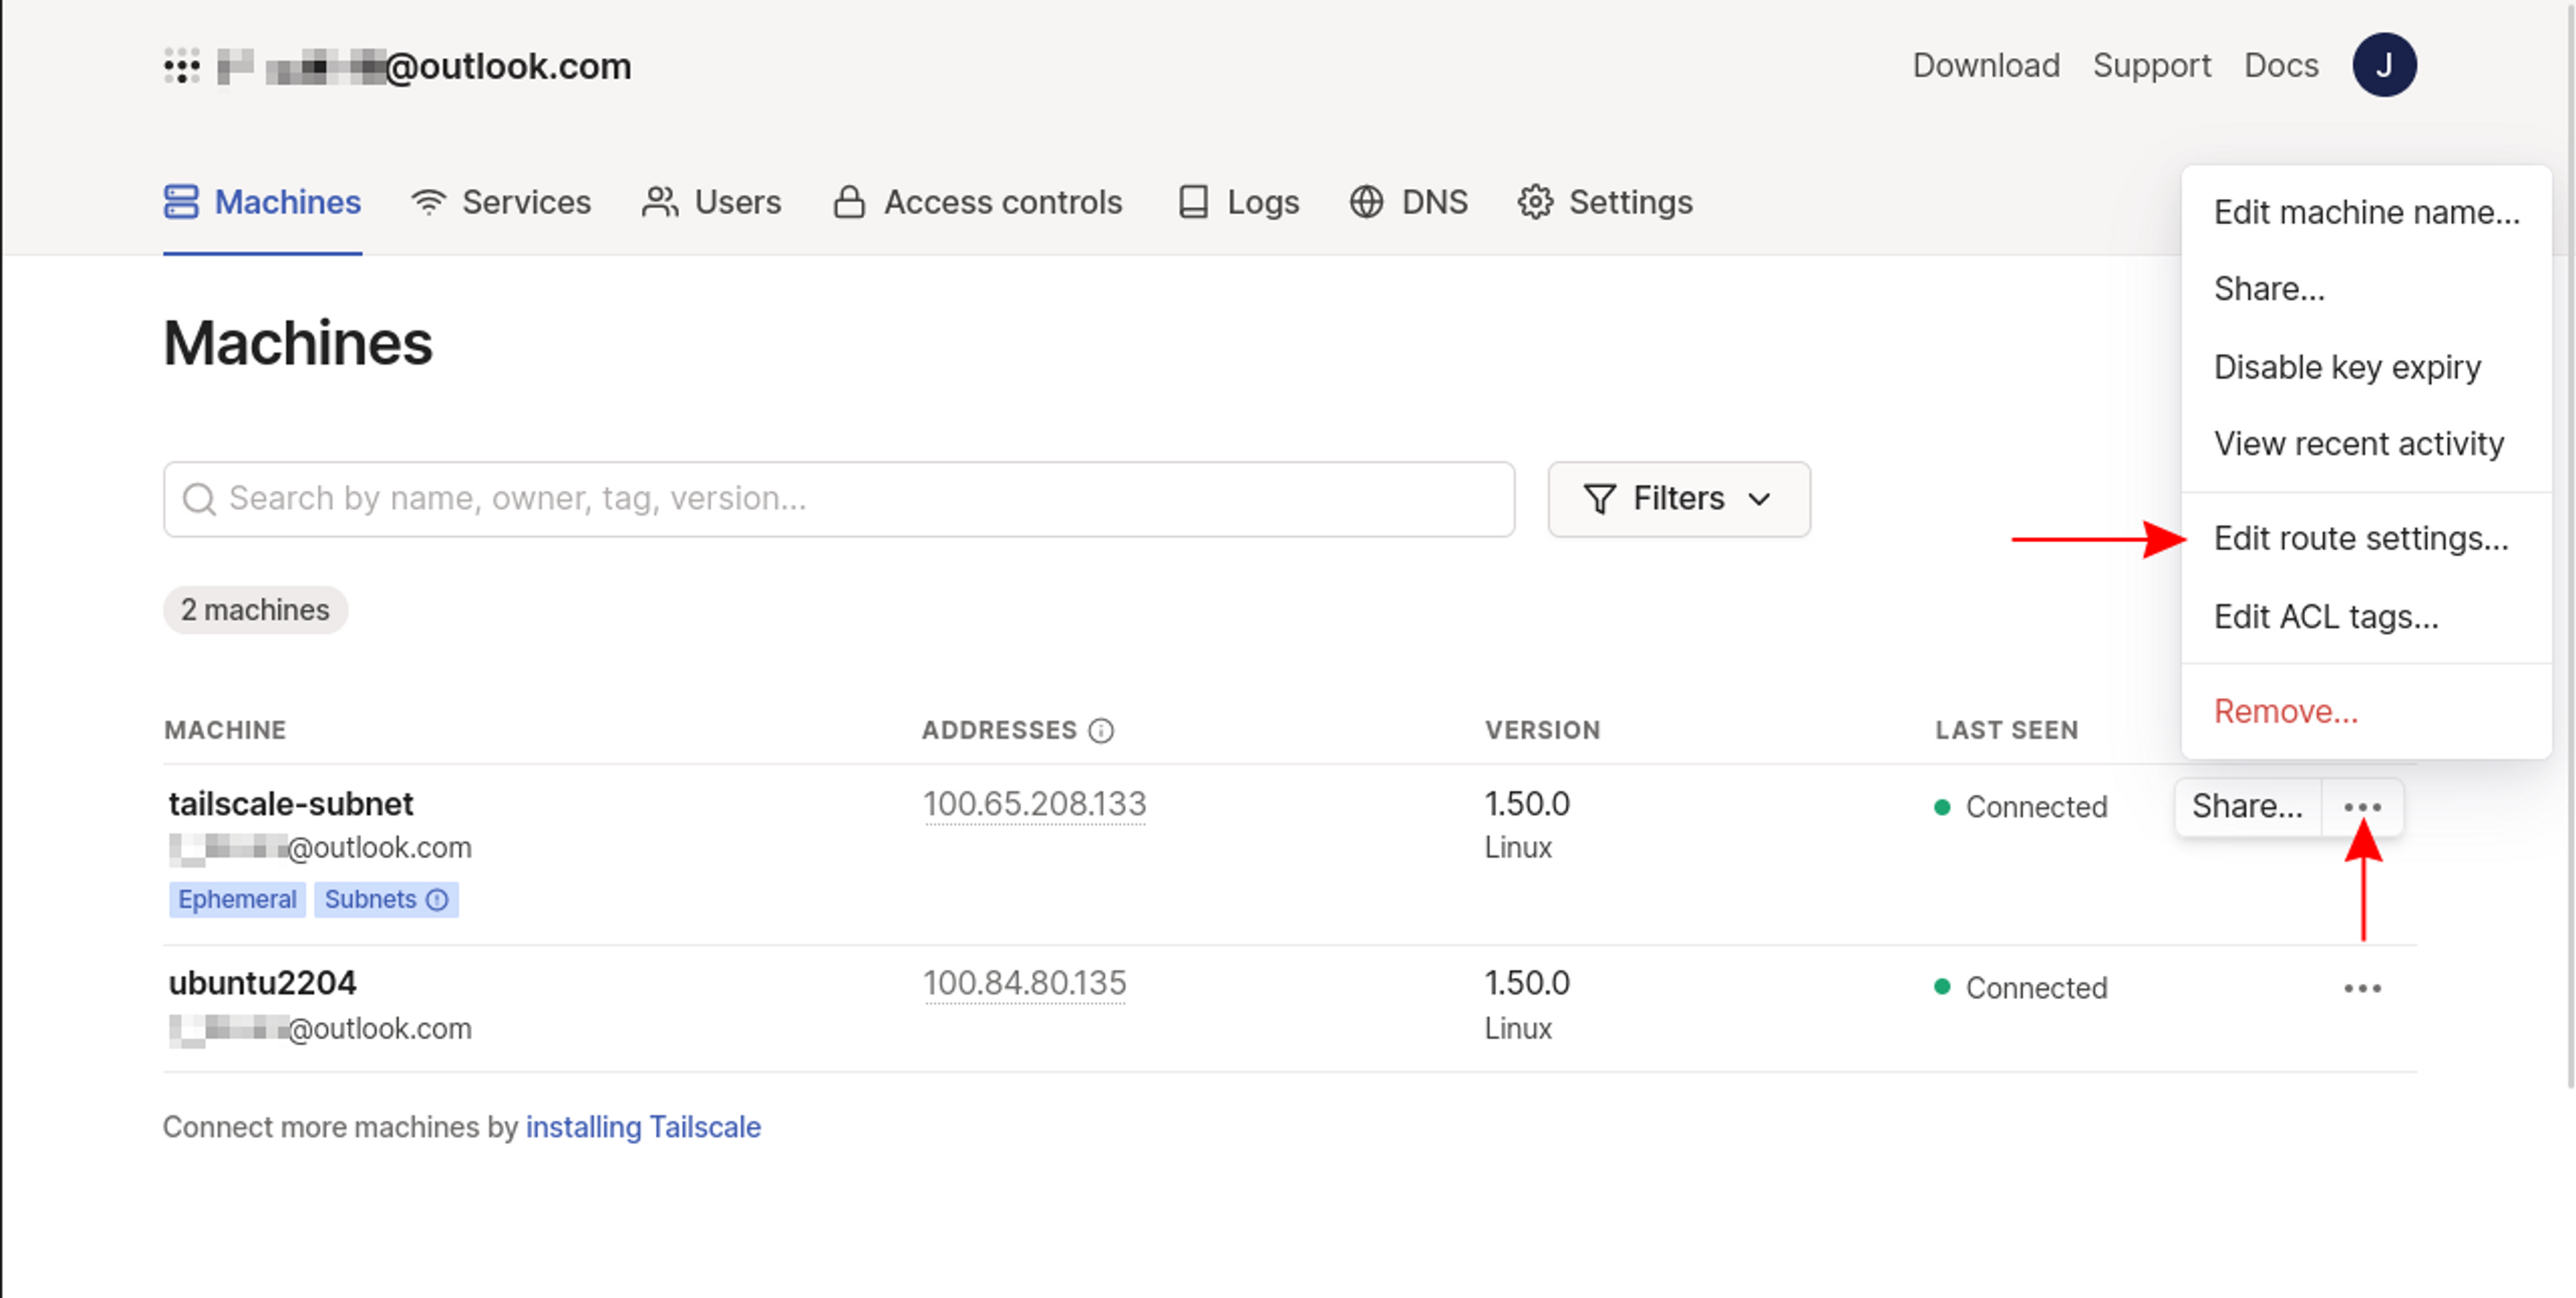
pod/tailscale-subnet createdYour new subnet should appear in Tailscale's Machines list. You'll need to manually approve the subnet routes by clicking the three dots to the right of the device's table entry and then selecting Edit route settings…:
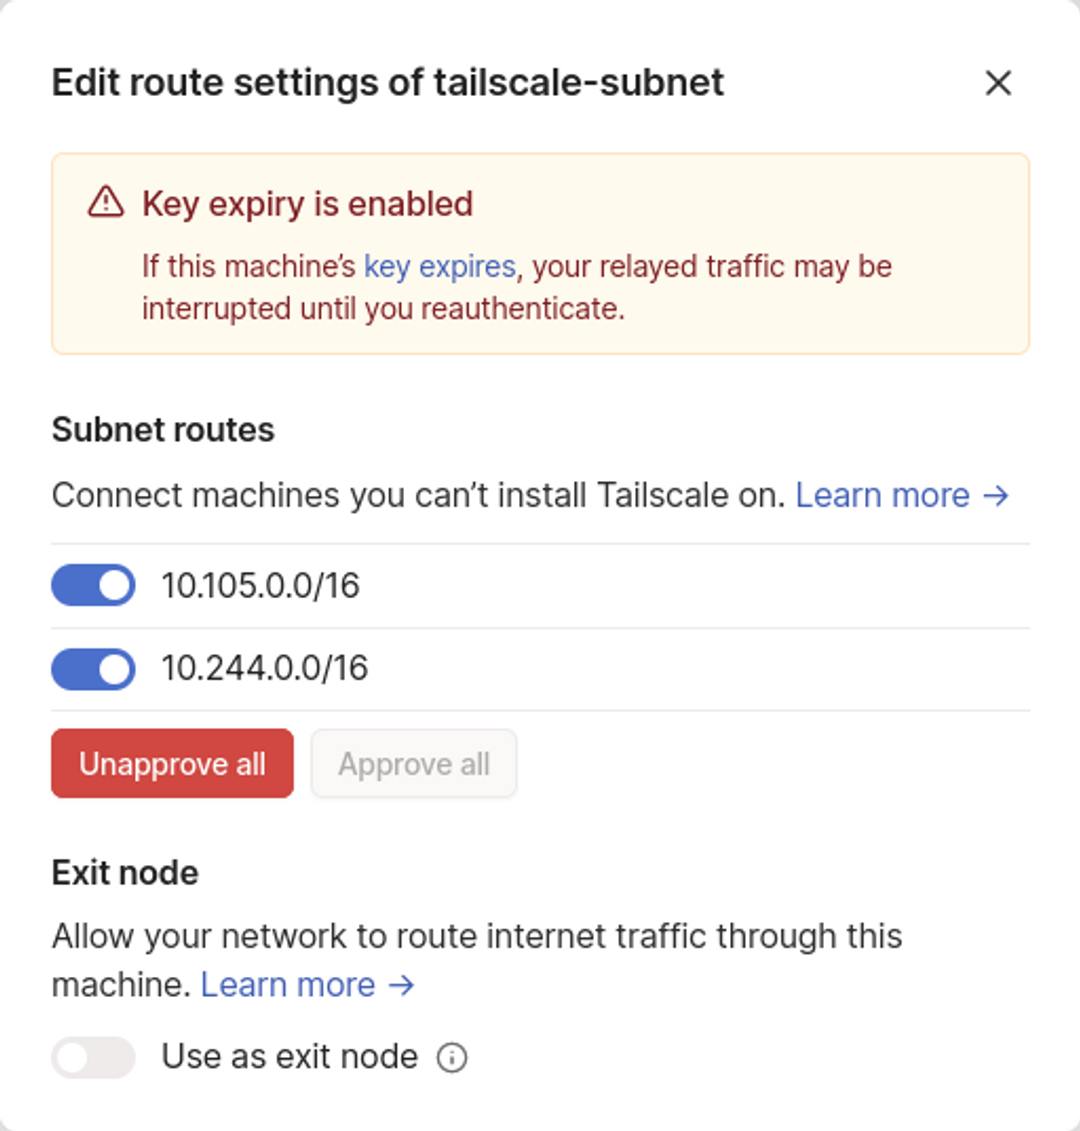
Use the toggle buttons to enable both the routes that you defined:
Now you can connect to your Kubernetes pods and services using their in-cluster IP addresses from any device in your Tailscale network:
$ kubectl get service
NAME         TYPE        CLUSTER-IP      EXTERNAL-IP   PORT(S)   AGE
nginx        ClusterIP   10.105.15.225   <none>        80/TCP    2d22h

$ curl http://10.105.15.225
<!DOCTYPE html>
<html>
<head>
<title>Welcome to nginx!</title>Note: If the IP address doesn't resolve, check that your Tailscale client is configured to accept subnet routes. Linux devices must explicitly pass the --accept-routes flag each time the tailscale up command is used.
Controlling Kubernetes Resource Access with Tailscale ACLs
Once you've connected your Kubernetes resources to your Tailscale network, you can limit who can access them by setting up Tailscale access control lists (ACLs).
ACLs are configured as JSON files that contain your policies. To edit your ACLs, head to the Access Controls page in your Tailscale account. Type or paste your rules into the editor pane, then click Save to apply your changes.
The following sample ACL enforces that only the example@example.com user can access routes that fall within your cluster's service IP range:
{
  "acls": [
    {
      "action": "accept",
      "src": ["example@example.com"],
      "dst": ["10.105.0.0/16:*"]
    }
  ]
}
The Tailscale documentation provides more detailed information on managing ACLs.
Deploying Tailscale into Kubernetes makes your cluster resources part of your Tailscale tailnet, which simplifies securely using Kubernetes with multiple team members across different working locations. Instead of modifying Kubernetes RBAC rules by hand, you can use existing Tailscale features such as access control lists (ACLs) to limit which users and devices can interact with your Kubernetes workloads.
FAQs
How do I enable MagicDNS for a Kubernetes container?
By default, Tailscale does not set DNS for containers. To enable MagicDNS for a Kubernetes container, you need to export TS_ACCEPT_DNS=true in the environment.
Learn more in this doc.
How do I access the entire Kubernetes cluster network over Tailscale?
Running a Tailscale subnet router lets you access the entire Kubernetes cluster network (assuming NetworkPolicies allow) over Tailscale.
For step-by-step instructions, starting with identifying the Pod/Service CIDRs that cover your Kubernetes cluster, visit this doc.
Can I also run the sidecar in userspace networking mode?
Yes, you can also run the sidecar in userspace networking mode.
This doc contains that information.
The obvious benefit is reducing the amount of permissions Tailscale needs to run.
The downside is that for outbound connectivity from the pod to the tailnet you would need to use either the SOCKS5 proxy or HTTP proxy.


