
Tailscale can do a lot of clever things, but it cannot physically turn on a device that is asleep or powered off—not by itself, anyways. With some help from another system, a little board, or a container, however, we can rouse slumbering devices and bring them back up and onto our Tailnet.
Today, we'll look at how Wake-on-LAN (WoL) and Tailscale can work together, and walk through a couple of useful tools for waking sleeping desktops, servers, and other devices. Wake-on-LAN typically only works on a local network, but working through Tailscale, we can send wake-up signals nearly anywhere the power button is out of reach. We'll dig into:
- Using other devices to wake up your gear, like a Raspberry Pi
- Running a dedicated little wake-up web app you can access from anywhere
- Creating a Tailscale-infused Docker container for that web app
First, let's talk about why Tailscale can’t just wake up the devices on your home network—even though we’ve messed with that idea a bit.
What Wake-on-LAN is, and is not
The standard way to wake a sleeping device that is out of arm’s reach is by sending it a Wake-on-LAN packet. WoL packets contain the globally unique MAC address of a Network Interface Card (NIC), where a device’s ethernet port is found. WoL packets are broadcast on the data link layer, or Layer 2.
If a sleeping or shut-down device is properly configured, its NIC listens for a packet sent to its IP address and containing its MAC address. “Hey, you—yes, you, very specifically, among all the network cards in the world—time to get up.” After receiving this, the NIC can nudge its host system awake and fully rejoin its local network (and its tailnet).
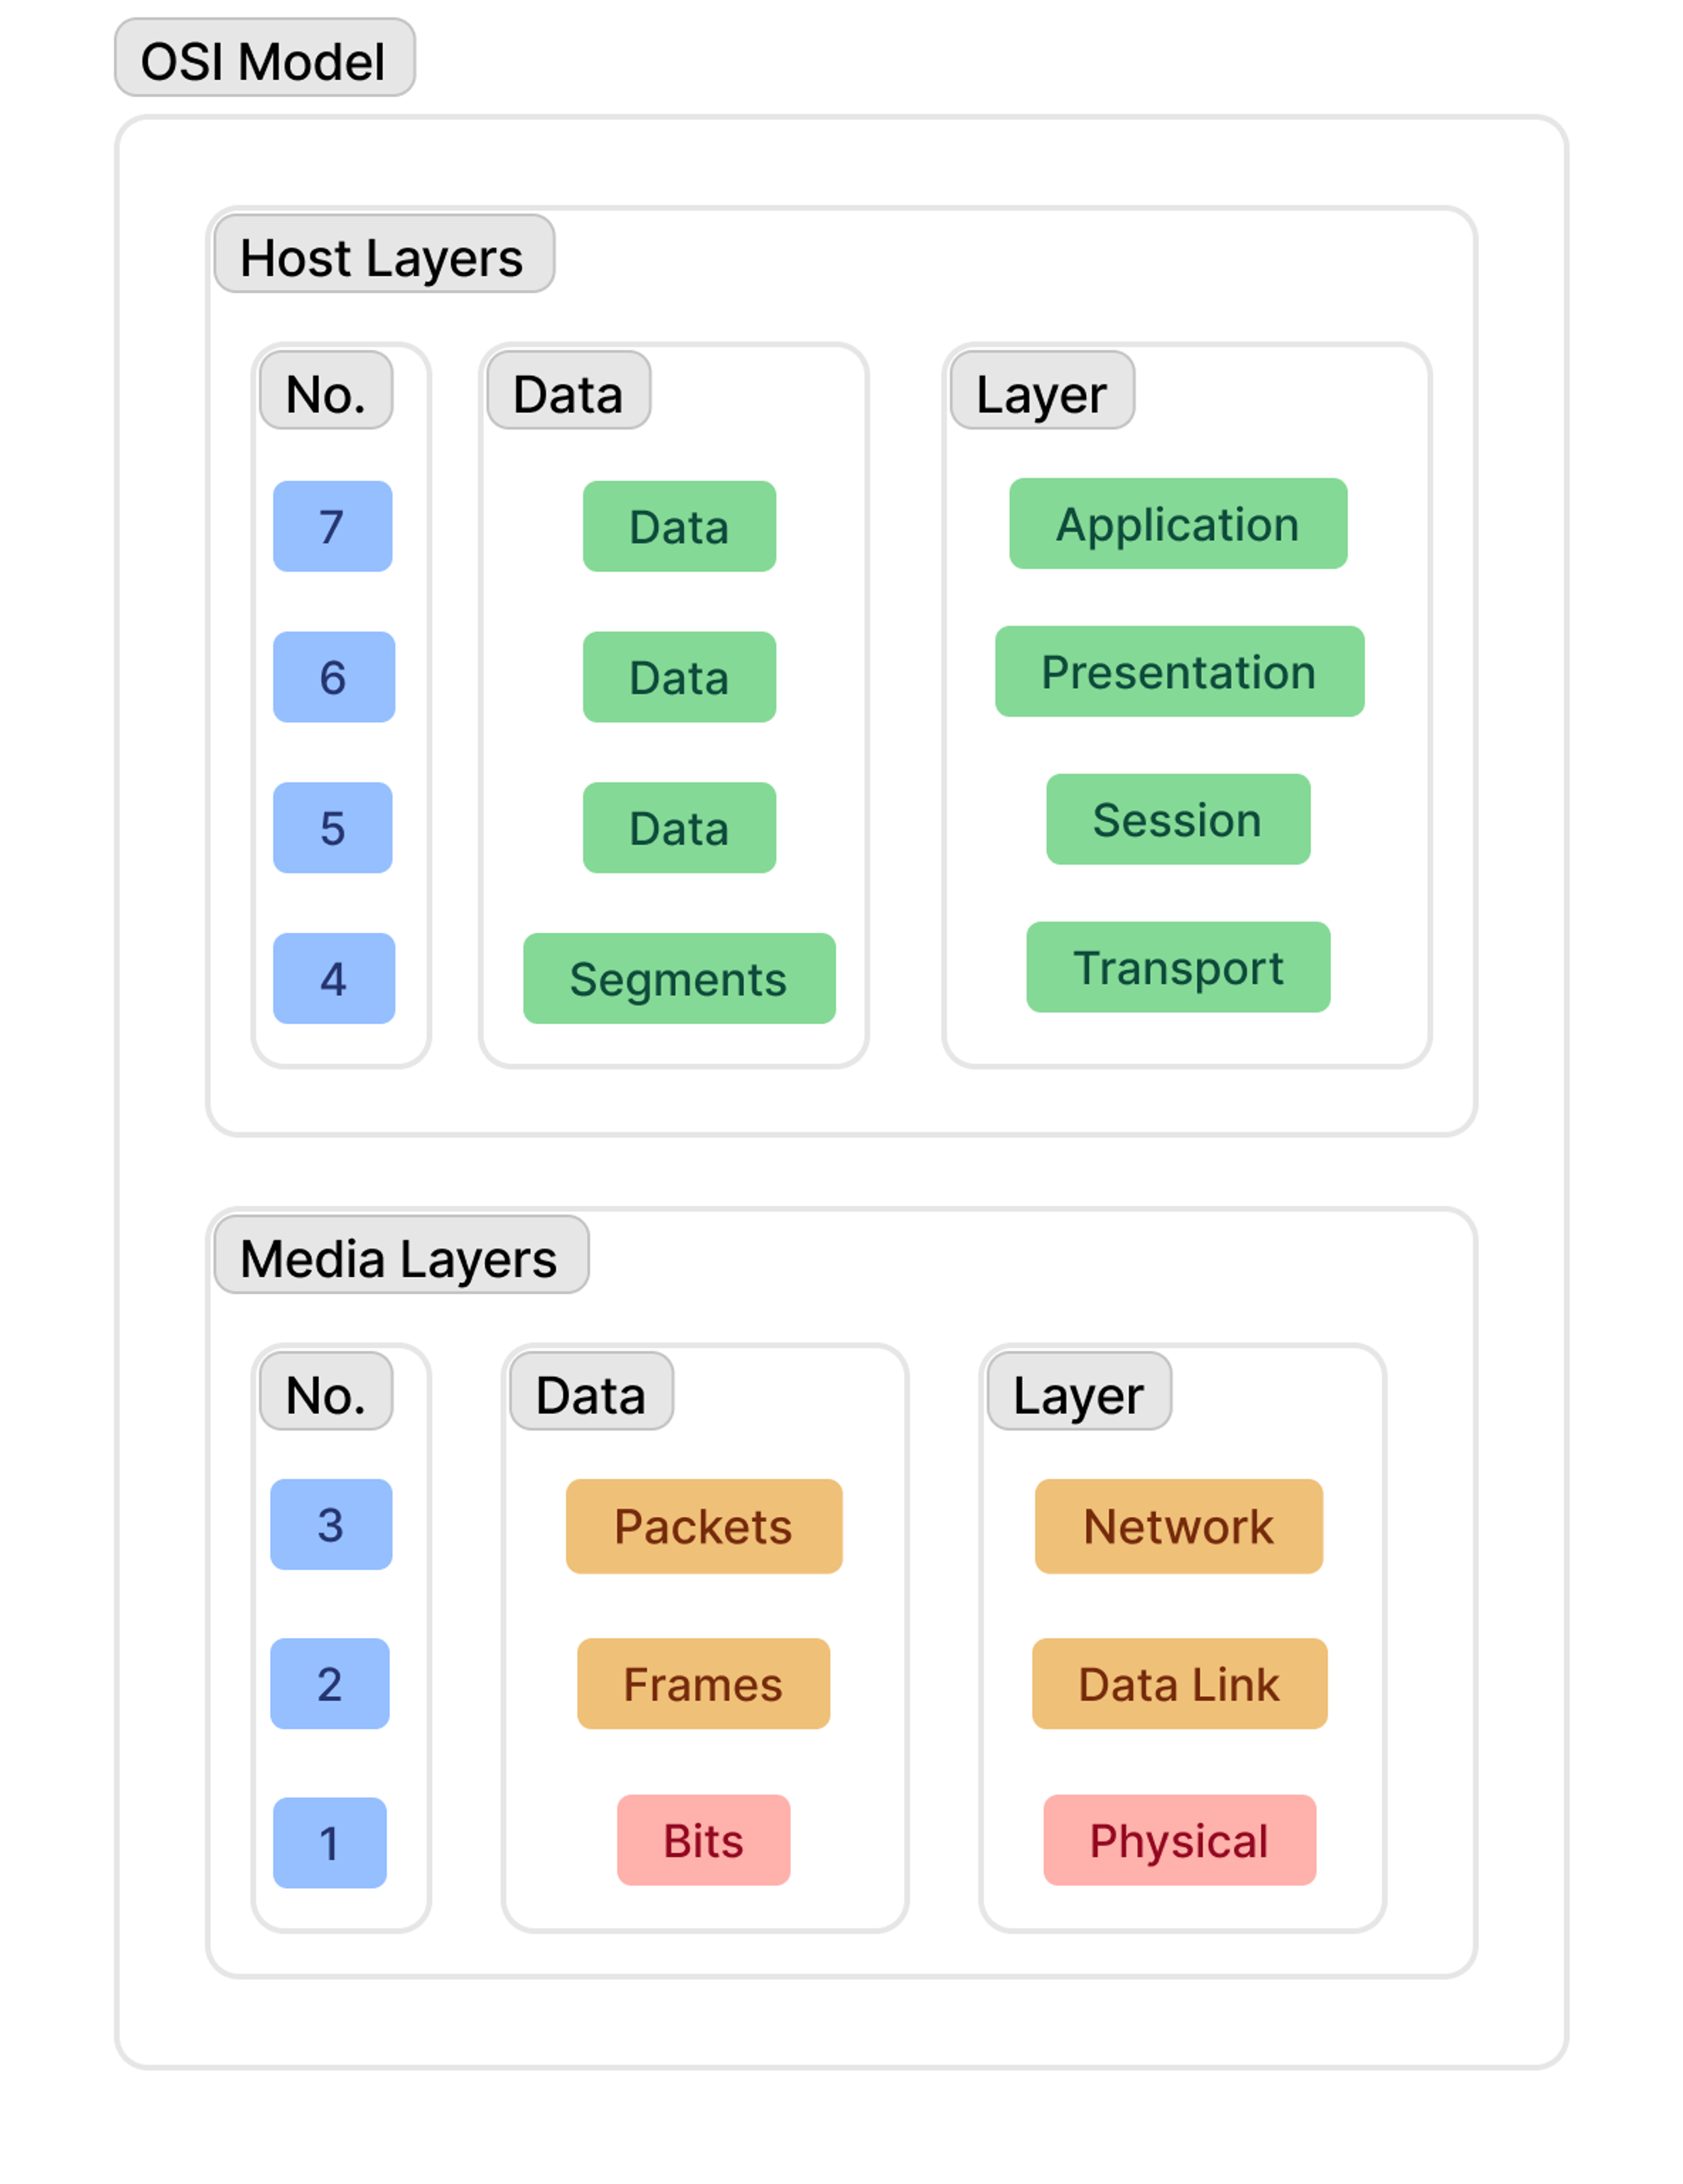
These packets, MAC addresses, and wake-up calls are necessary because Tailscale operates on the network layer (Layer 3) of the OSI model, one layer up from the raw data frames and physical hardware addresses of devices. Tailscale can't send WoL packets (sometimes called "Magic Packets") over a Layer 2 connection, even if you have enabled subnet routing and it feels like you’re on your local network (though we’ve been tinkering with work-arounds since early days).
Still, even if Tailscale can’t make the wake-up call, so to speak, it has lots of ways it can reach the front desk and ask for that call to be placed.
Note: All of the solutions in this post assume that you have properly configured your device for Wake-on-LAN. It will not work otherwise.
Option 1: Command-line tools, and maybe a Raspberry Pi
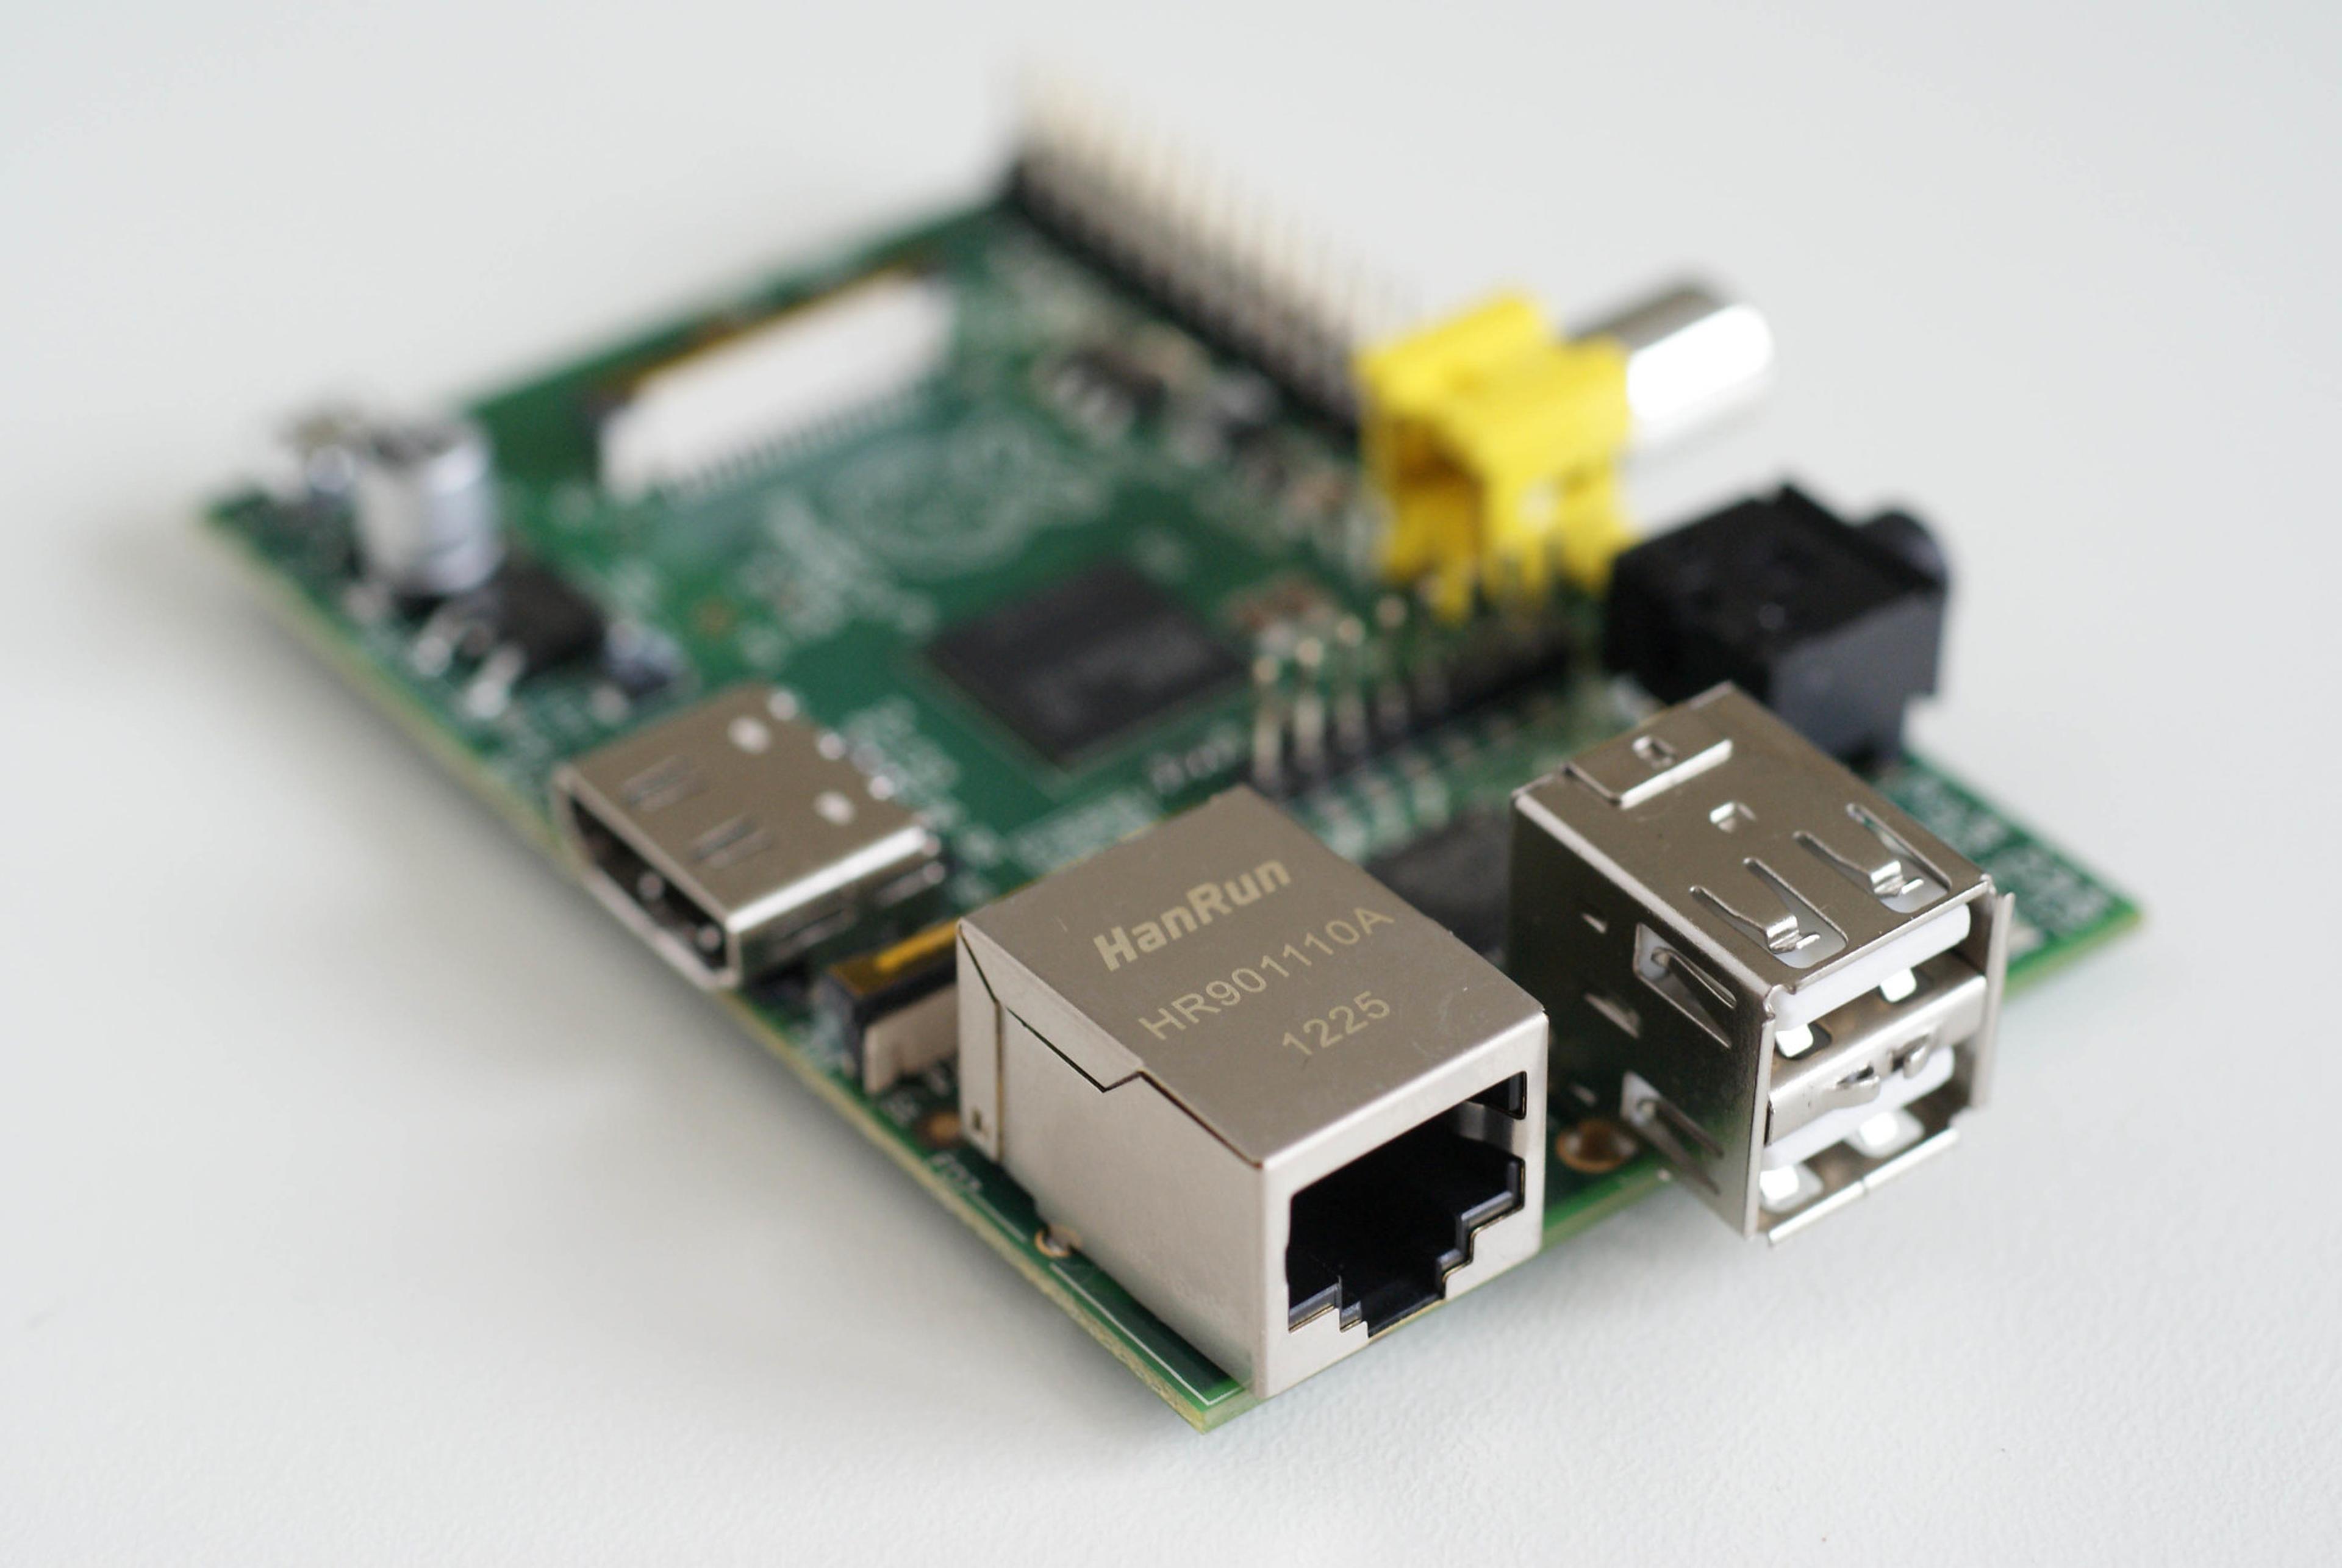
Image via Gijs Peijs (CC by 2.0)
If you need to wake up a device that’s on your home or work network, and you have full access to another computer that’s always running and connected to the same network by ethernet, you’re most of the way there. Set up Tailscale SSH to make finding and logging into that always-on device much easier, or use Tailscale and a remote desktop tool like RustDesk to get into that always-on device. Then send a terminal command or use a Wake-on-LAN app to nudge that napping system. Et voilà—Tailscale handles the tricky bits, and you do the waking part.
If you don’t have something on all the time, consider making an exception for a Raspberry Pi. Plugged in by ethernet and connected to our Tailnet, the Pi sips very little power while it awaits our commands. Even better, nearly any age or model of Raspberry Pi with an ethernet port (or USB-to-Ethernet solution) will do for this modest job. Let's set it up to be our Vice President of Waking Operations.
You'll need to get a Raspberry Pi set up with either Raspberry Pi OS (32-bit or 64-bit variant) or another Linux distribution. You’ll also need to enable SSH during the Pi setup process and find its IP address. You can connect to the Pi via SSH through the terminal on Mac or Linux, from Windows’ PowerShell prompt, or an app like PuTTY. You could also hook the Pi up to a temporary display/keyboard/mouse setup. This is the last time you’ll deal with this rigamarole; once Tailscale is installed, you can jump into your Pi from a browser.
Note that you can also use nearly any single-board computer running Linux for this job; a Pi is just a popular starting point.
Once our Pi is plugged in, powered up, and on your network, SSH into your Raspberry Pi and install Tailscale with a single command:
curl -fsSL https://tailscale.com/install.sh | sh
Then launch and authenticate the Pi on our Tailnet:
sudo tailscale up
You should get a web address to copy from your SSH terminal and paste into your browser, which prompts you to log into (or set up) your Tailscale network. Alternatively, see our manual installation instructions.
Next, we're going to install etherwake, a tiny command-line tool that sends WoL packets, on the Pi. While still connected to your Pi over SSH, enter:
sudo apt install etherwake
With this installed, we're ready to wake up our devices, provided we know their MAC addresses. While connected by SSH to our Pi wake-up device, we can run this command to test it (replacing the last bit with a real MAC address for a computer other than your Pi):
sudo etherwake AA:11:BB:22:CC:33
Your device will wake up. You could then automate this function with scripts, tools, and scheduled tasks. Just keep in mind that devices needing a wake-up have to be on the same local network, and connected by ethernet.
Now we have a way to access a Raspberry Pi by SSH from any terminal, or Tailscale’s admin panel in the browser, and then run commands to wake up a device. But we can make this even easier.
Option 2: A wake-them-up web app, reachable from anywhere
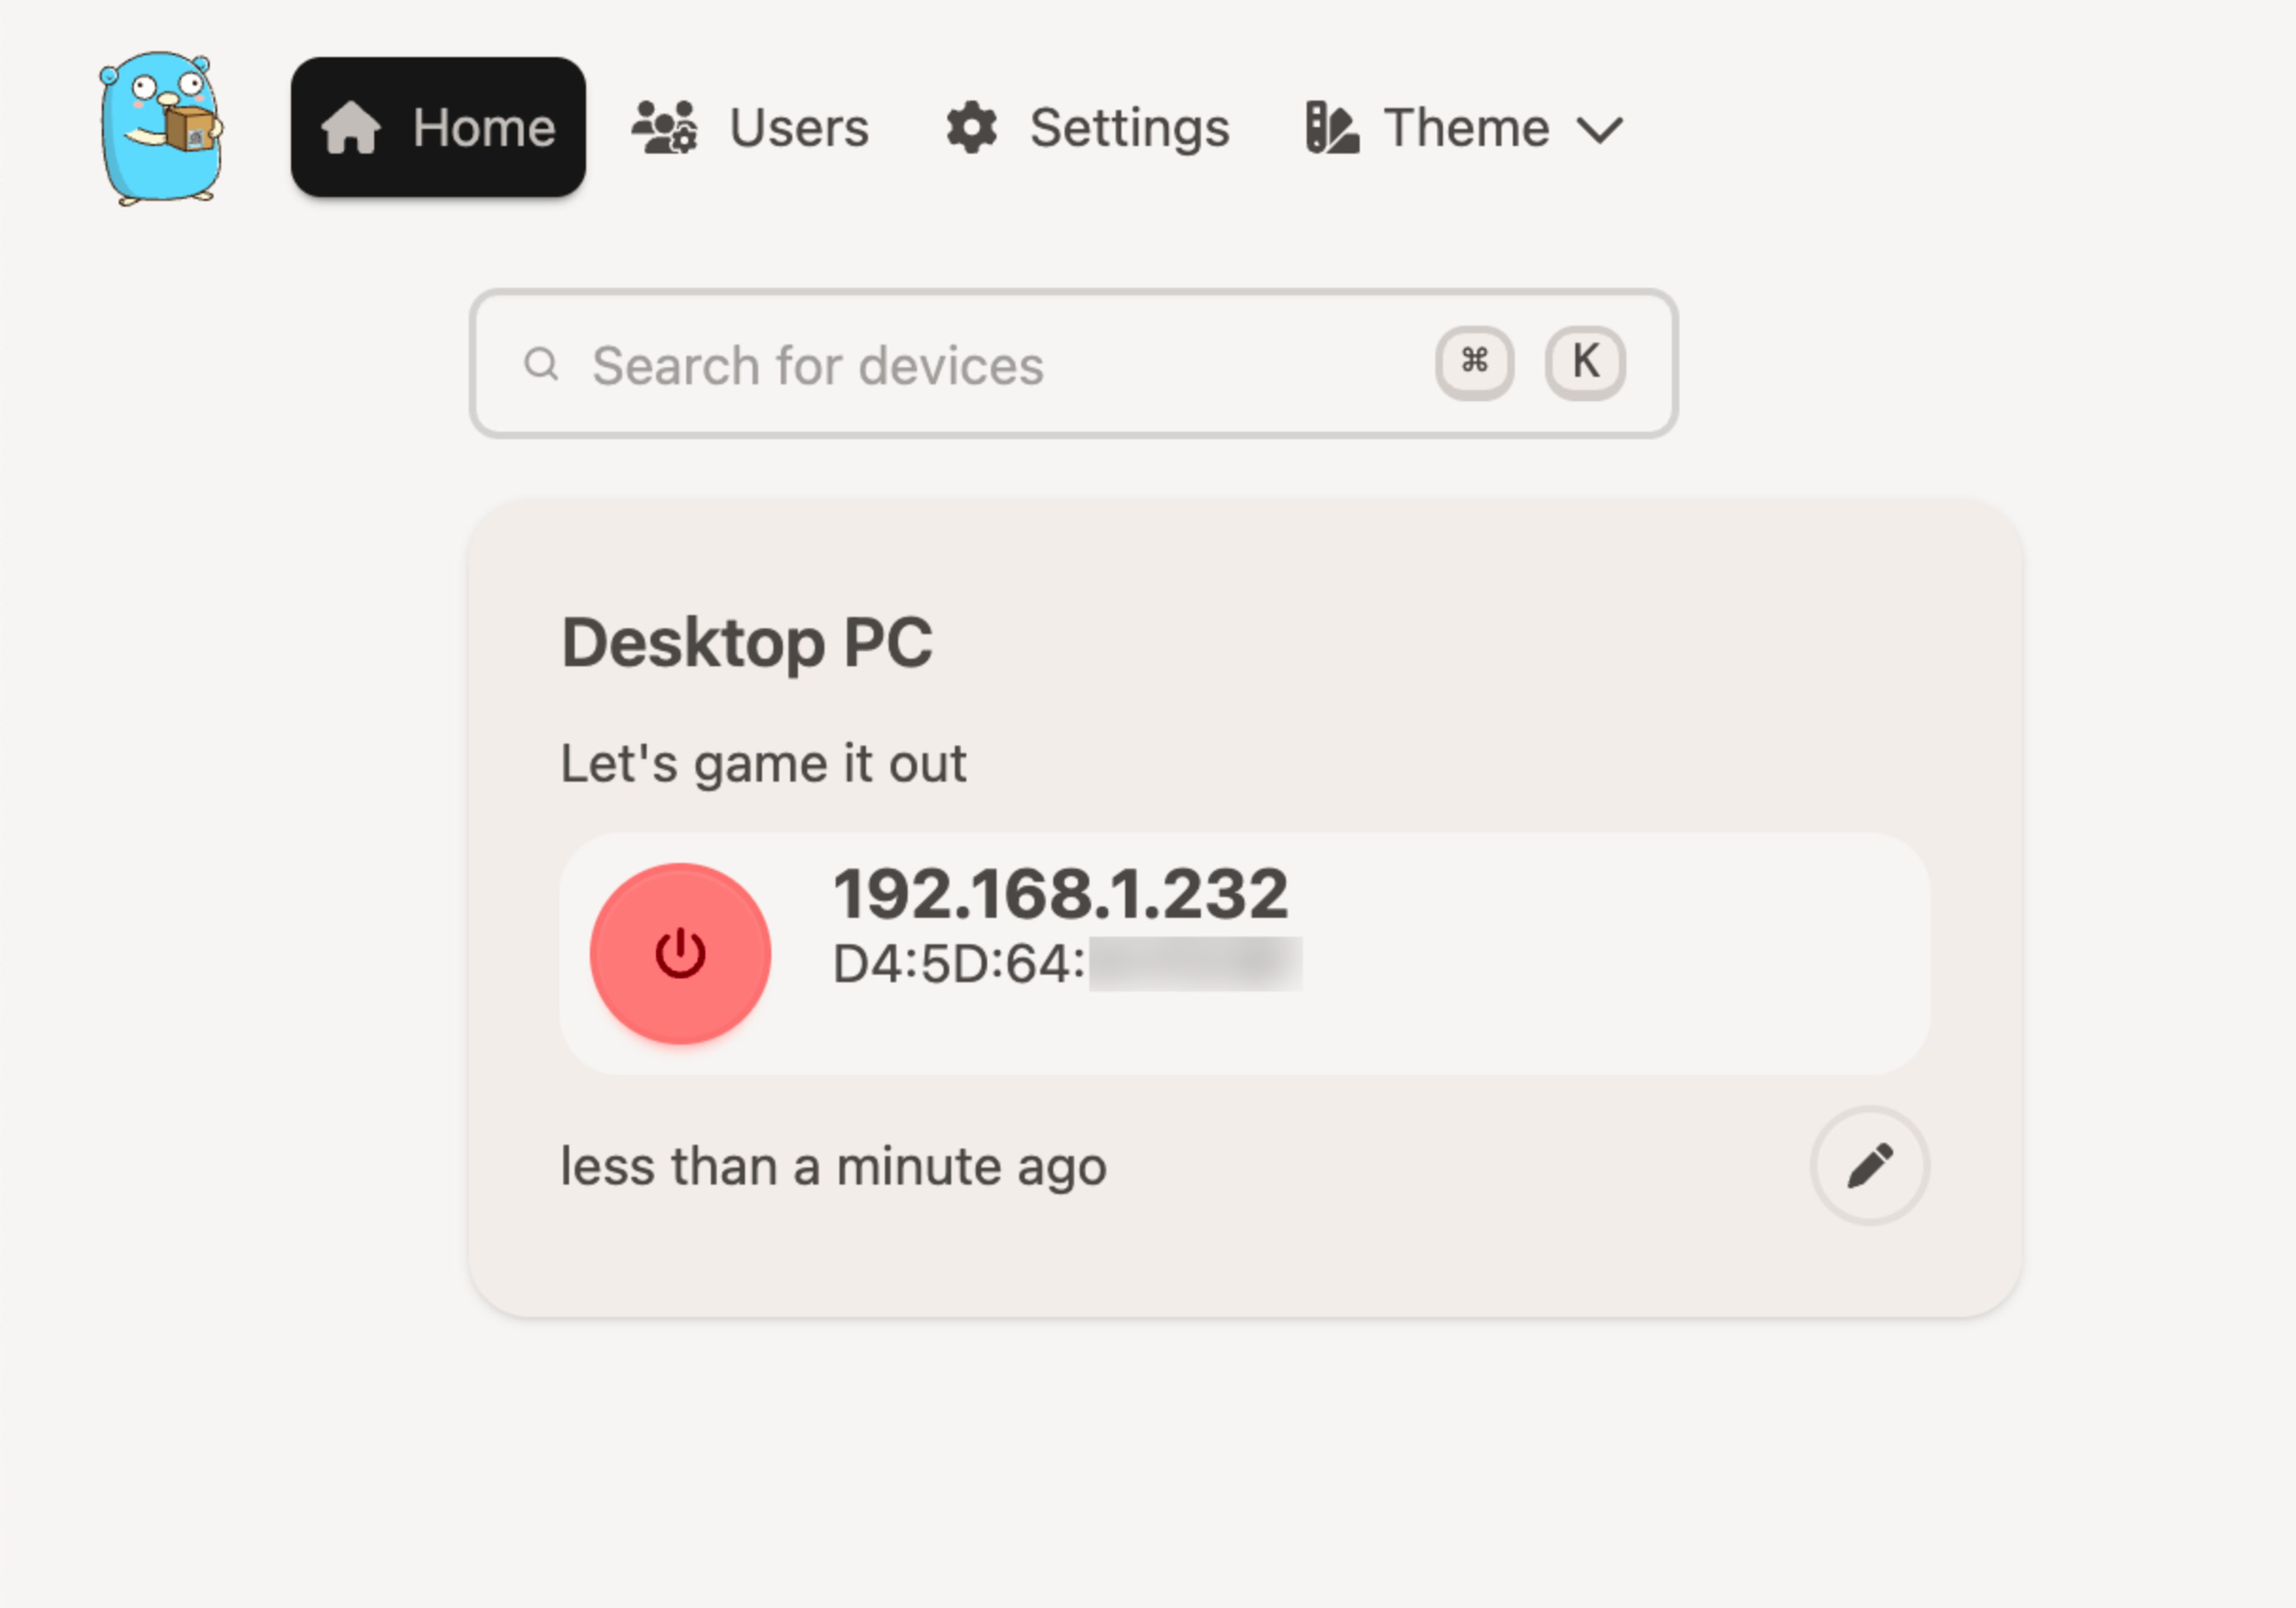
UpSnap is a slim little webapp that you host yourself. Once set up, it provides a browser-based dashboard for sending Wake-on-LAN packets from the system it runs on. We can use Tailscale to reach the Pi running UpSnap. This can be done from nearly anywhere, without having to configure and open up ports on our home network. UpSnap provides a simple interface, can remember your devices's local IP addresses (the 192.168.x.y kind), can do power-off operations (if a device allows for it), and can also scan the network for devices to wake, rather than make you hunt them down.
There are a few ways to get UpSnap running, if you already have Tailscale installed on a Pi or other system:
- As a stand-alone binary (app) running on a Linux system (including a Pi)
- From the container manager of your Network-Attached Storage system (Synology, QNAP, Ugreen, etc.)
- As a Docker container, using UpSnap’s Docker Compose example
Once installed, connect to your device at its tailnet address, with UpSnap’s port added (like 100.xxx.yy.zz:8090), and you’re ready to do some waking. We’ve gone from terminal commands to a bookmark you can reach on your phone, which is a nice upgrade. And there’s a cute mascot, too, which is nice.
Option 3: Just type "upsnap" into a browser
You can make wake-ups even simpler, by setting up UpSnap as its own Tailscale node using a sidecar container configuration, similar to how Alex set up the recipe app Mealie. Like Mealie, Upsnap serves its webpage on a single port, and we can use Tailscale Serve to make that port securely accessible across our whole tailnet. No more complaints from the browser about an insecure site, no port number required. You can even give this node an easy MagicDNS name, like upsnap, and get to it from any browser on a Tailscale-connected device.
I've put an example UpSnap/Tailscale sidecar Docker compose file, and Tailscale Serve configuration, in a GitHub repository. A few things to note:
- The
network_modeenvironment variable for UpSnap is changed tohost; this is necessary for UpSnap to access our device's physical LAN port. - The
upsnap.jsonfile assumes the use of UpSnap's default port, 8090. If you change the port in your compose file, make sure to change it in this config file, too.
There's something about using your tailnet to wake up other devices, so they can rejoin your tailnet, that feels so clever and orderly. If you have your own Wake-on-LAN solutions, especially those using Tailscale, tell us about it on Reddit, Bluesky, Mastodon, or LinkedIn.
 Kevin Purdy


