Okay, so: let’s say you’ve got some kind of service you want to connect to through Tailscale. That service can be just about anything — let’s say it’s a dashboard that you want to view remotely in a browser. Some kind of backend updates the data and makes it look nice; maybe you wrote this dashboard from scratch or maybe it’s some open-source package you found. You want to bring it online so that you can reach it from any authorized device in your tailnet.
Maybe you already know how you’d connect to this service, maybe you’ve got a bunch of similar services on your tailnet already, maybe you’ve got a plan to configure access in your Tailscale ACLs. Maybe, maybe, maybe! It's easy for decision paralysis to set in here, so let's consolidate some of the possibilities in one place. Each of these approaches is perfectly valid depending on your needs and preferences. Here, they’re arranged in a classic Galaxy-Brain-meme ladder in terms of how Tailscale-y you want to get.
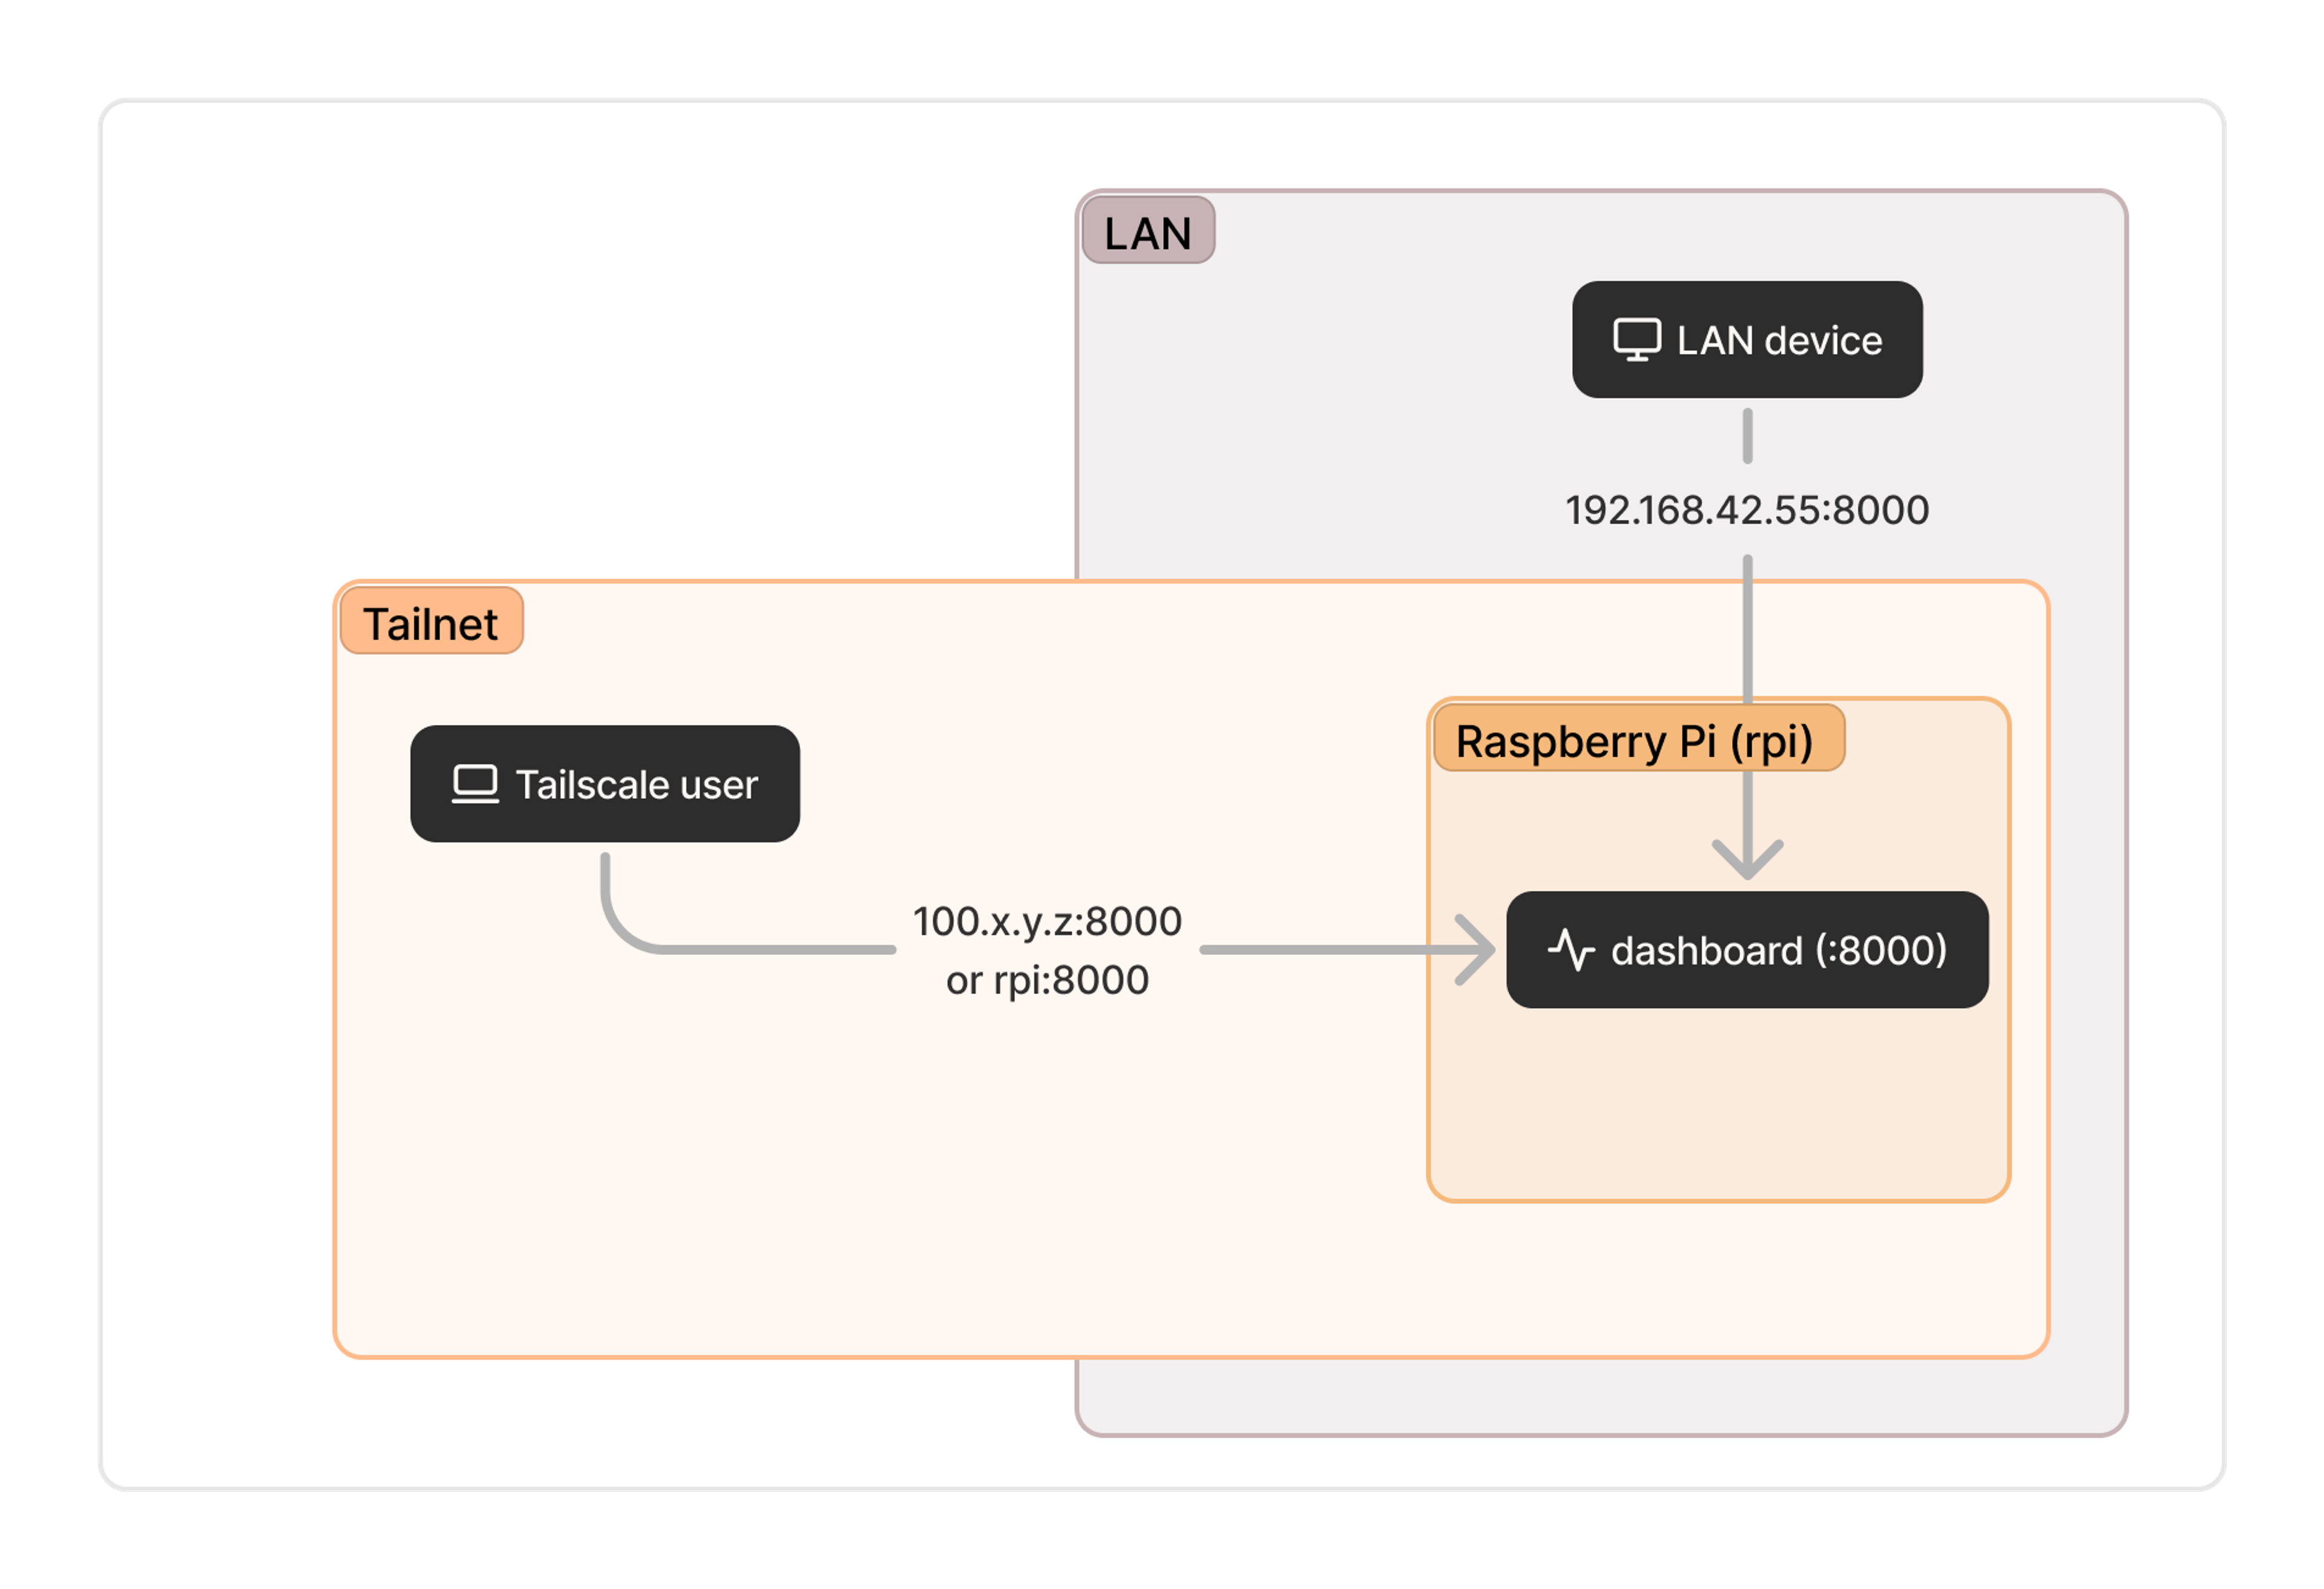
1. Install Tailscale on the device (or subnet) and connect with a hostname and port number
If you are the kind of person who already uses a LAN to connect to network devices, this first approach may seem like the most straightforward. (Even if you’re just “Remembering the LAN,” there may be some nostalgic reasons to go this way.) This technique tightly couples the service and the device, so we often see people use it with a dedicated machine like a Raspberry Pi. The hostname might be easy to remember, but you’ll have to keep track of the port number. This service might have an address like rpi:8000.
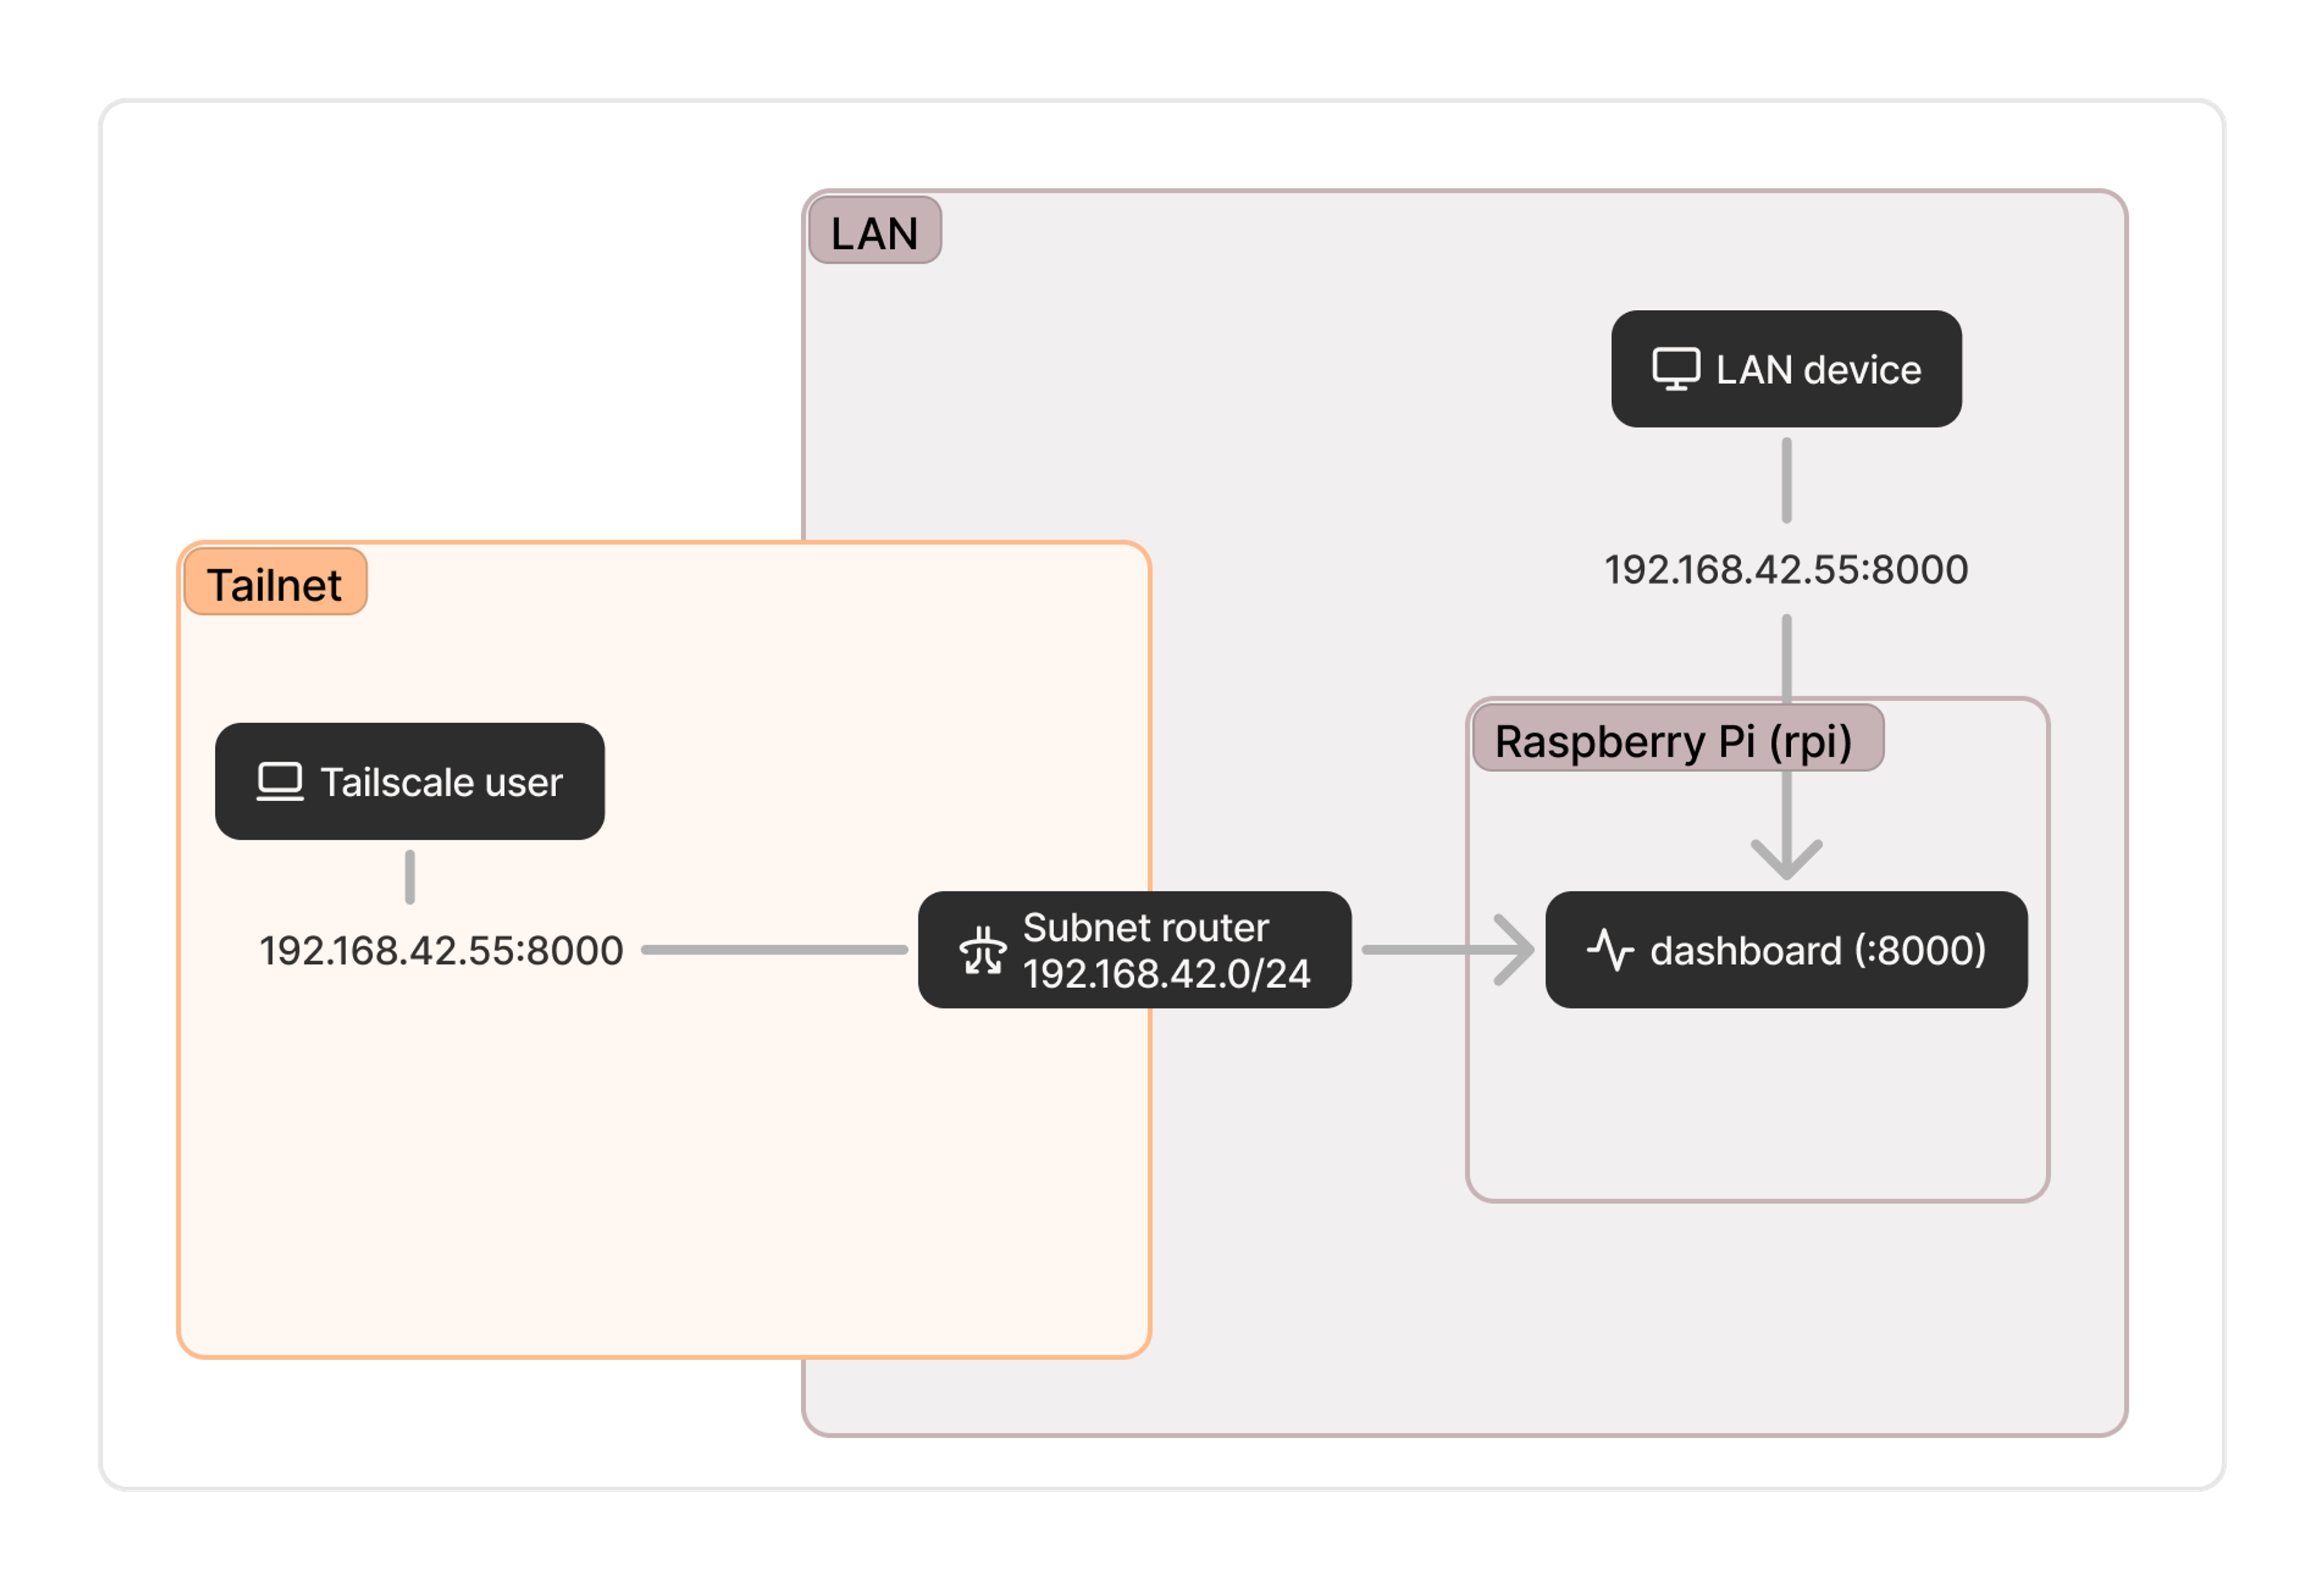
If you can’t or don’t want to install Tailscale on the endpoint itself, you can use a subnet router on another device on the network to advertise the relevant routes to other machines on your tailnet. You won’t be able to use the nice hostname, but if you’re going with this option the address (something like 192.168.42.55:8000) is probably one you’re already using in existing configurations.
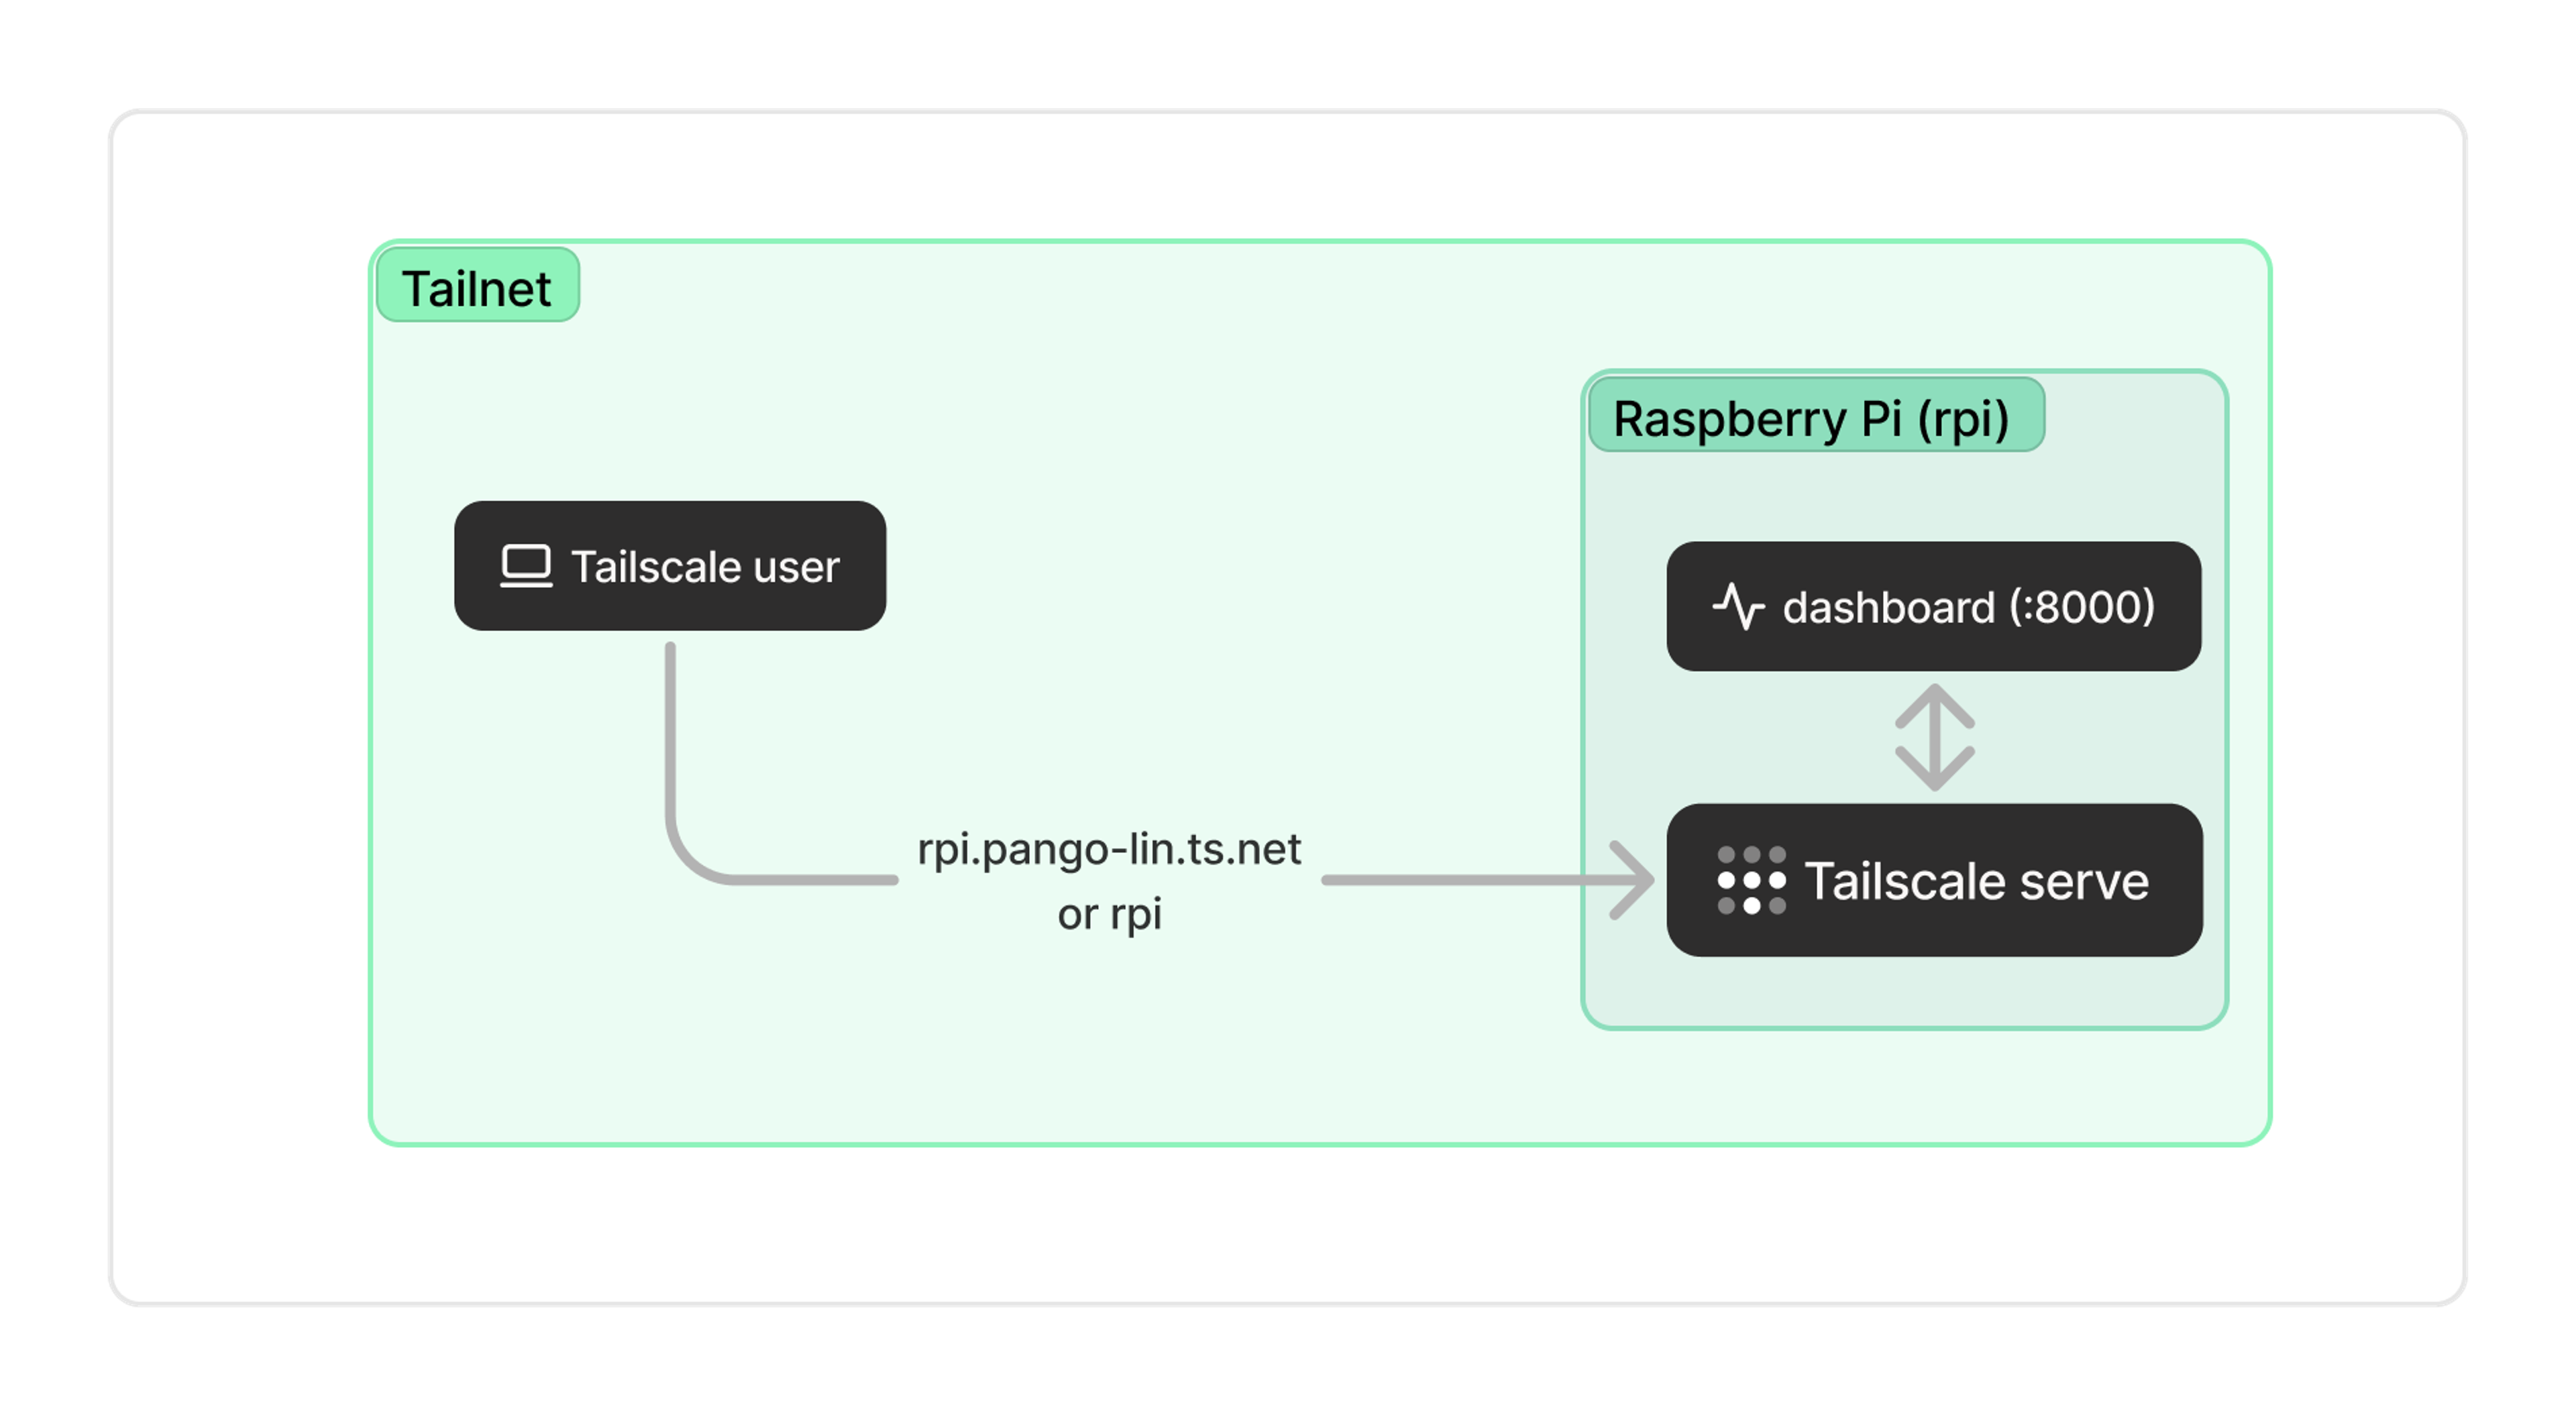
2. Install Tailscale on the device and use serve
If you’ve done the above steps and your dashboard is available on your tailnet, you might consider using Tailscale serve to enhance the experience. Running the serve command gives you two major benefits:
- By default, you automatically get HTTPS support and easily automated certificates. (Every Tailscale connection is an encrypted and authenticated WireGuard connection under the hood, but your browser doesn’t know that, and some browser features are restricted without TLS.) Also by default, Tailscale proxies the service to port 443, so you won’t have to specify it in the browser bar.
- You can access Tailscale identity headers. If you want to customize the page based on who is viewing the dashboard, you can build right on top of Tailscale’s identity layer without needing an entire auth system.
The same stack that powers our serve command also powers Funnel—if you want to make this service publicly available on the web, it’s just one more command. In any case, your service is accessible at an address like rpi.pango-lin.ts.net.
3. Install the service in a container and use a Tailscale sidecar
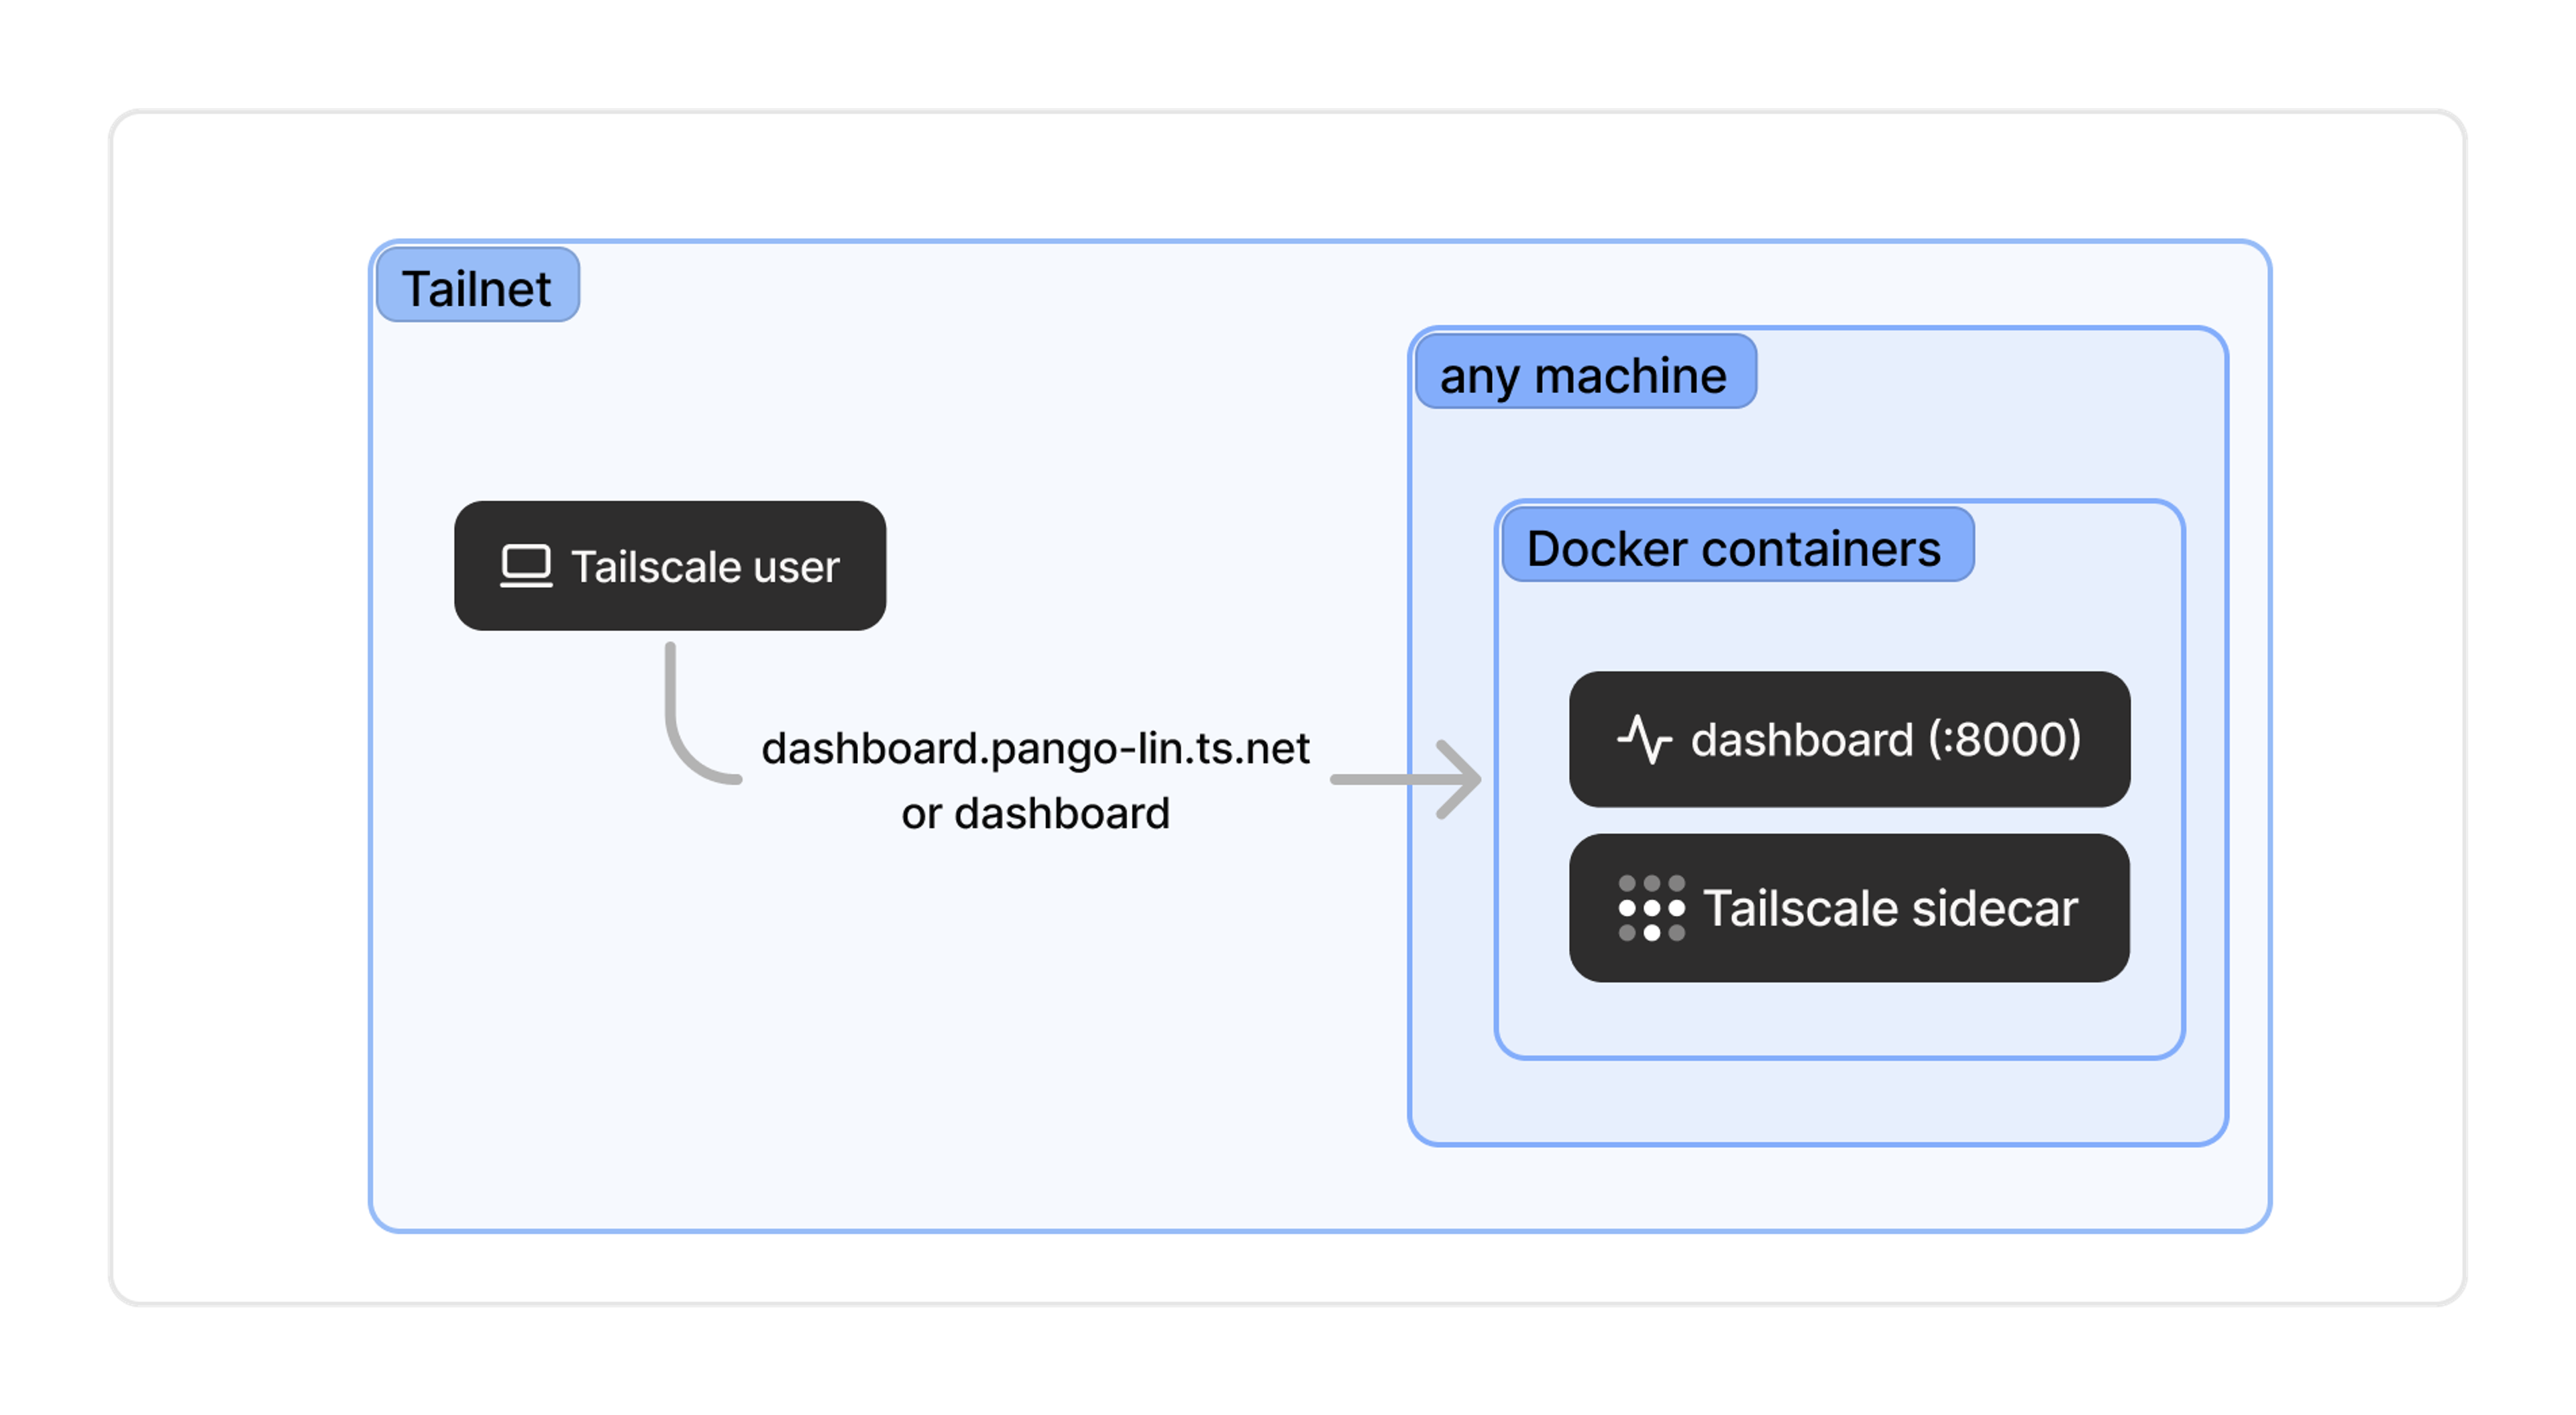
The previous two approaches are conceptually pretty similar. Both have a “device” or a “machine” that runs Tailscale, and the “service” is available by connecting to that device. This third approach is a bit more sophisticated and that distinction starts to break down. Instead, your service can itself be the “device” and get its own tailnet IP address and domain name.
One common way to do that is to run the service in a Docker container with a dedicated Tailscale container alongside it providing networking. By making each service a device, you can write cleaner ACLs and simpler network architectures. And regardless of what host device the service is running on, you get a memorable address such as dashboard.pango-lin.ts.net.
Now, how to actually do this? Our recommendation is to run a dedicated Tailscale sidecar for each service, and we’ve got tutorials available for some straightforward ways of doing that with Docker Compose. There are other approaches too: the community project TsD Proxy, for example, runs a single Tailscale instance and a reverse proxy to direct traffic to individual containers.
4. Integrate Tailscale directly into the service with tsnet
If you’re ready to roll up your sleeves and work on a little bit of Go code, we can go deeper. You can use our Go library, tsnet, to give your service native Tailscale capabilities. Internally at Tailscale, we use this with all sorts of services. For example, the service that powers our internal link-shortening tool is a tsnet app, and so is the internal secrets management software our infra team recently blogged about.
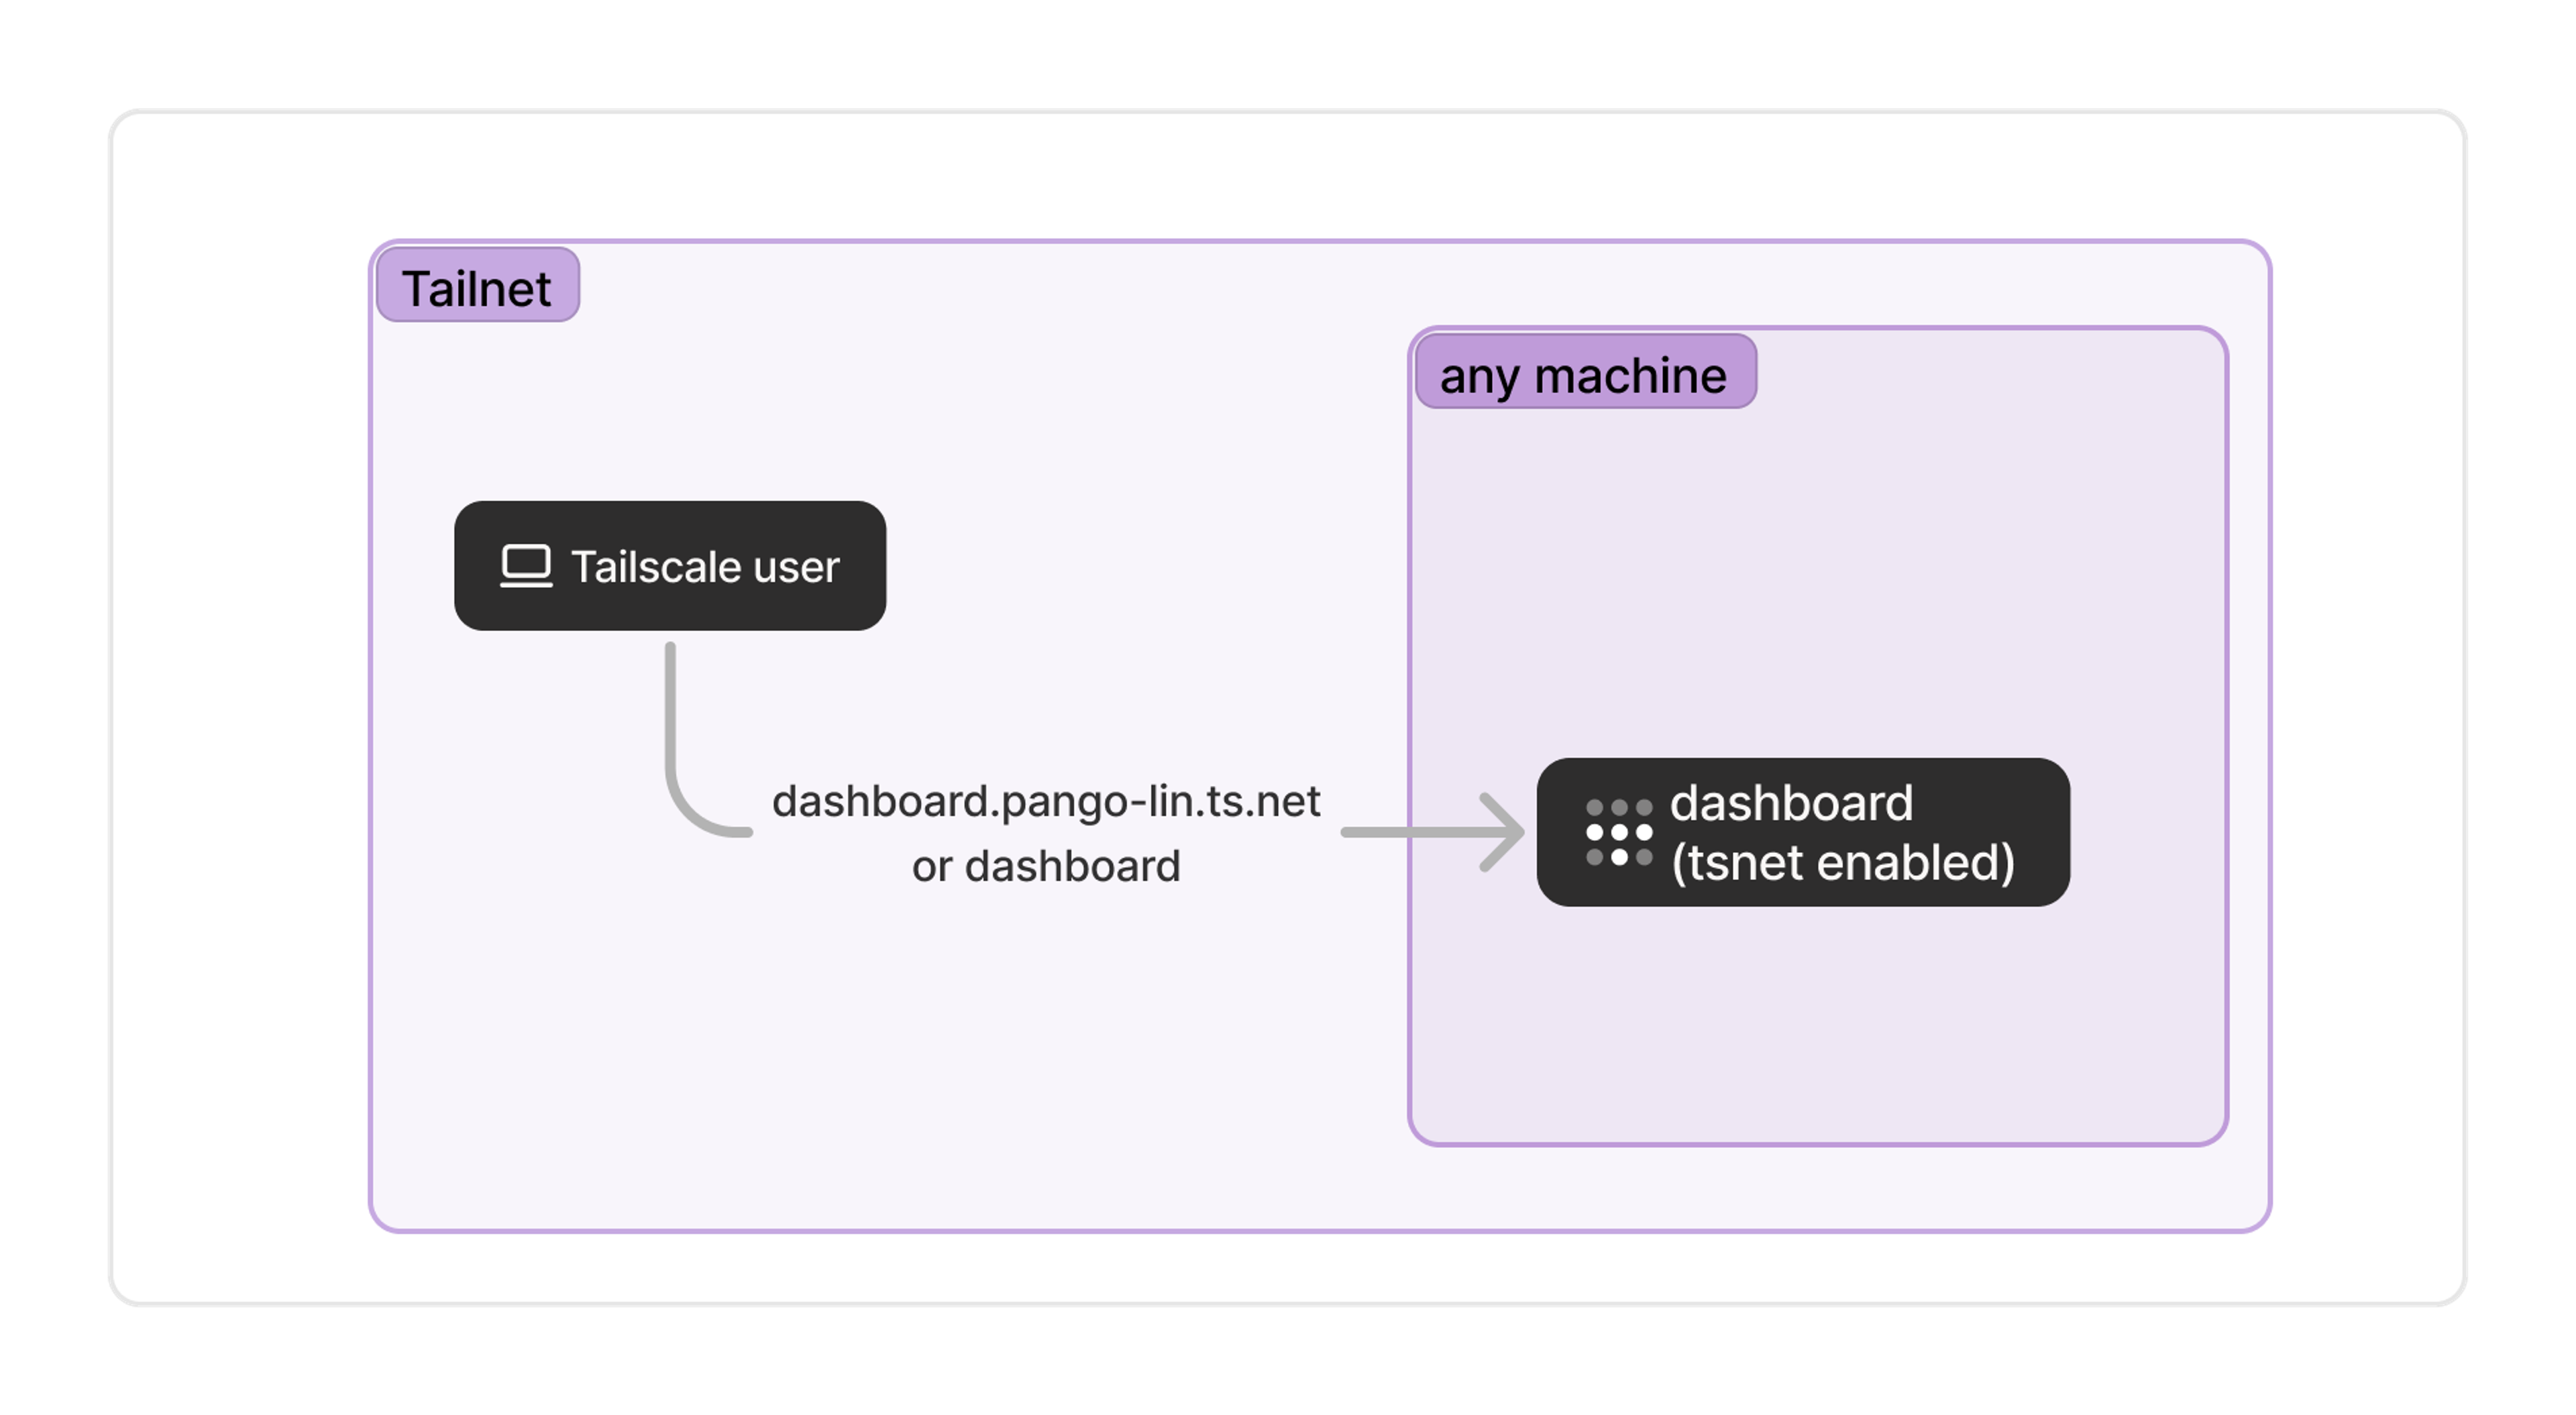
The advantage here is total flexibility: your service is a device on your tailnet, and can be configured however you like. We’ve aimed to keep the tsnet library user-friendly and well-documented. Using it does require writing a bit of Go code, which is not comfortable for everyone. We’re working on adding support for more languages, but it’s still pretty experimental.
As a Tailscale user, I’ve taken each of these approaches at different times, and continue to mix and match on my own tailnet. We’ve designed Tailscale to be flexible enough to plug in to your network however you like — and to allow incremental upgrades, if you decide you want to move a single service up this sophistication ladder.


 Parker Higgins


