I have a soft spot in my hardware-stuffed heart for Chromebooks. I’ve been using one ever since the 2010 prototype Cr-48, and I’ve kept one handy ever since. They are just enough computer to get life’s non-intensive keyboard tasks done, and their OS quietly upgrades itself between reboots, staying relatively safe.
But using a Chromebook, especially while you’re away from home or work, introduces some friction. Google Chromebooks, naturally, want you to use Google Drive for all your file syncing and sharing. You’re dependent on web apps for most non-browsing functions—especially with Google phasing out stand-alone Chrome Apps in July 2025. And getting at the media, computers, or other stuff you’ve got at home requires either punching holes in your router, keeping a dedicated VPN running, or paying for web-based services.
You might see where this is going: Tailscale solves a bunch of these problems. But you might not know how easy it is to get a Chromebook connected to Tailscale. Or how tools like Taildrop and Taildrive make it easier to send, receive, and sync files between a Chromebook and Windows, Mac, iOS, and Linux devices, fully encrypted. And if you dig deeper into Tailscale-powered self-hosting, you can fix a whole bunch of your Chromebook’s shortcomings, the way it wants you to: in a browser.
Let’s hook a Chromebook into our Tailnet, make it more cross-platform and convenient, and gaze unto further, quirkier realms from there.
Install Tailscale on a Chromebook with an Android app
First things first: you need a Tailscale account. They’re free for up to 3 users and 100 devices, and provide all the features mentioned in this post.
The other requirement is that your Chromebook needs to be able to install and run Android apps to connect to Tailscale. At the moment, there is no way around that.
The simplest way is to install Tailscale from the Google Play Store. The F-Droid project maintains its own builds of the Tailscale app, built from source. There are also APK files on F-Droid you can manually download and install. Note, however, that only the Play Store version is verified or maintained by Tailscale. Install the app and launch it on your Chromebook.
![Image from a Chromebook, with the Tailscale Android app pushing a prompt: "Connection request: Tailscale wants to set up a VPN connection that allows it to monitor network traffic. Only accept if you trust the source. [Key symbol] appears at the top of your screen when VPN is active." Cancel and OK click prompts at the bottom of this window.](https://cdn.sanity.io/images/w77i7m8x/production/4171beeecdfb0d0d737de58673013085972a5f3b-1406x841.png?w=3840&q=75&fit=clip&auto=format)
Open the Android app you installed, and approve the “Connection request” dialog noting that Tailscale wants to set up a VPN connection. Tailscale will open a browser tab so that you can sign into your Tailscale account with an identity provider, like Apple, Google, Microsoft, or GitHub. If your Chromebook is your first device logging into Tailscale, you’ll create a new Tailnet from there. (Welcome!)
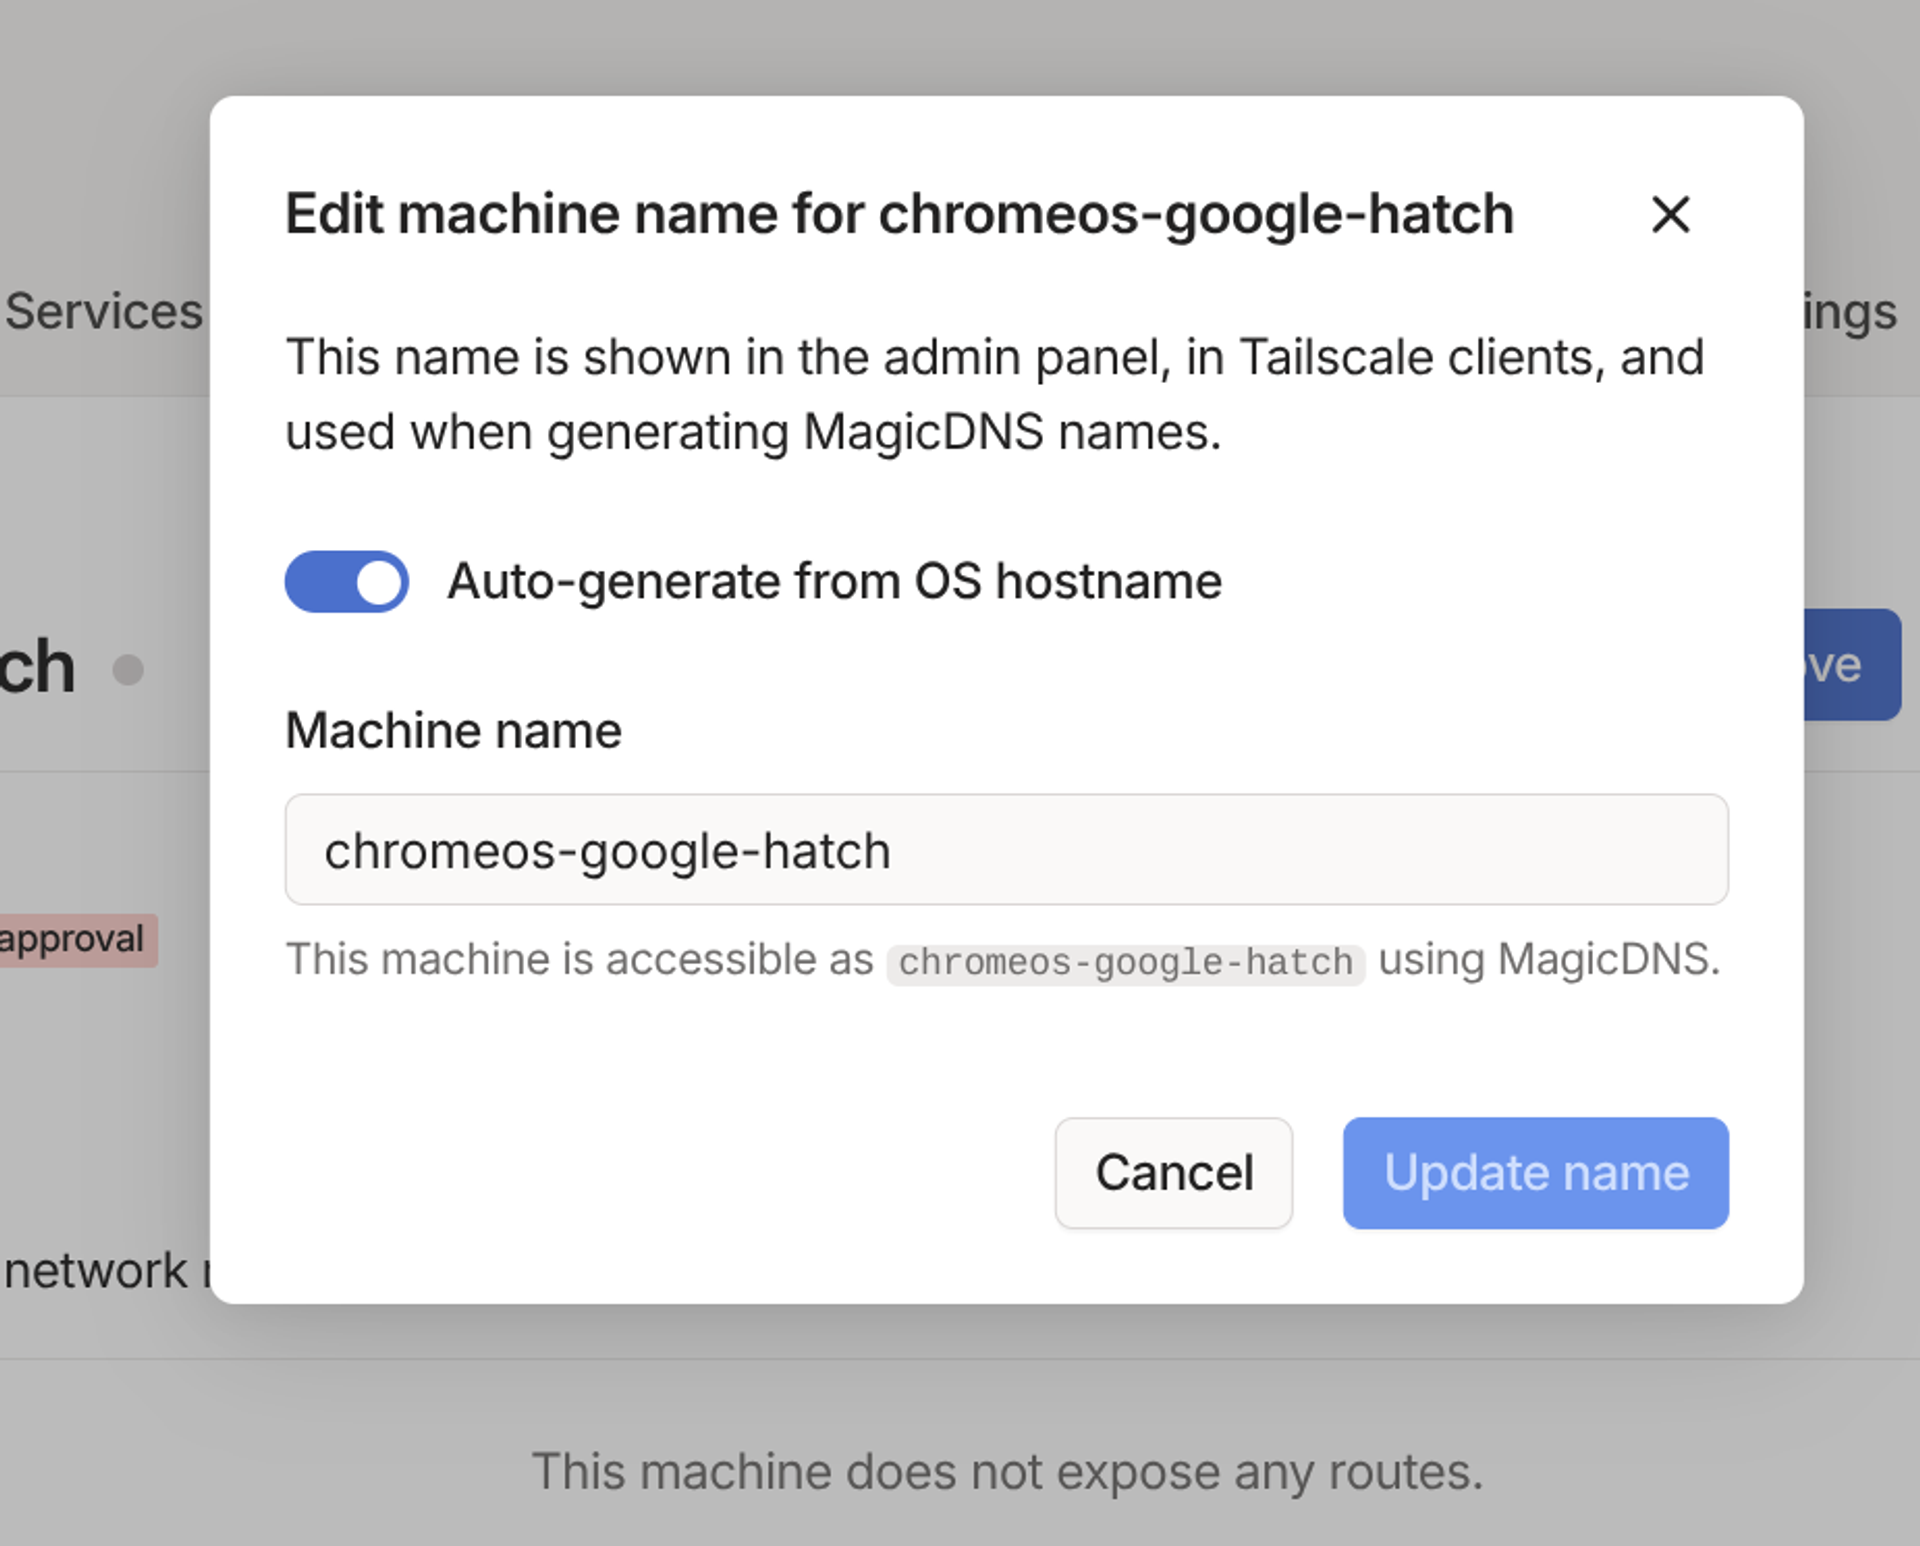
Depending on your Tailscale settings, you might need to approve the device. I’d also recommend renaming the device (“Machines” -> “Machine Settings” -> “Rename” in your Tailscale admin console), since the defaults are akin to chromeos-google-hatch and not as memorable as, say, "chromebook."
So long as the Tailscale Android app is open and connected on your Chromebook, you have access to Taildrop, Taildrive, and all the other devices on your Tailnet.
Taildrop-ing files to a Chromebook
Chromebooks can share files with nearby Android devices and store them in Drive, but let’s extend this snappy sharing to iPhones, Windows devices, and anything that can run Tailscale. Taildrop is in alpha, so you don’t want to send or stash anything mission-critical with it. But it’s available on Tailscale’s free plans, it’s simple to use, and it lets you send files with end-to-end encryption between devices.
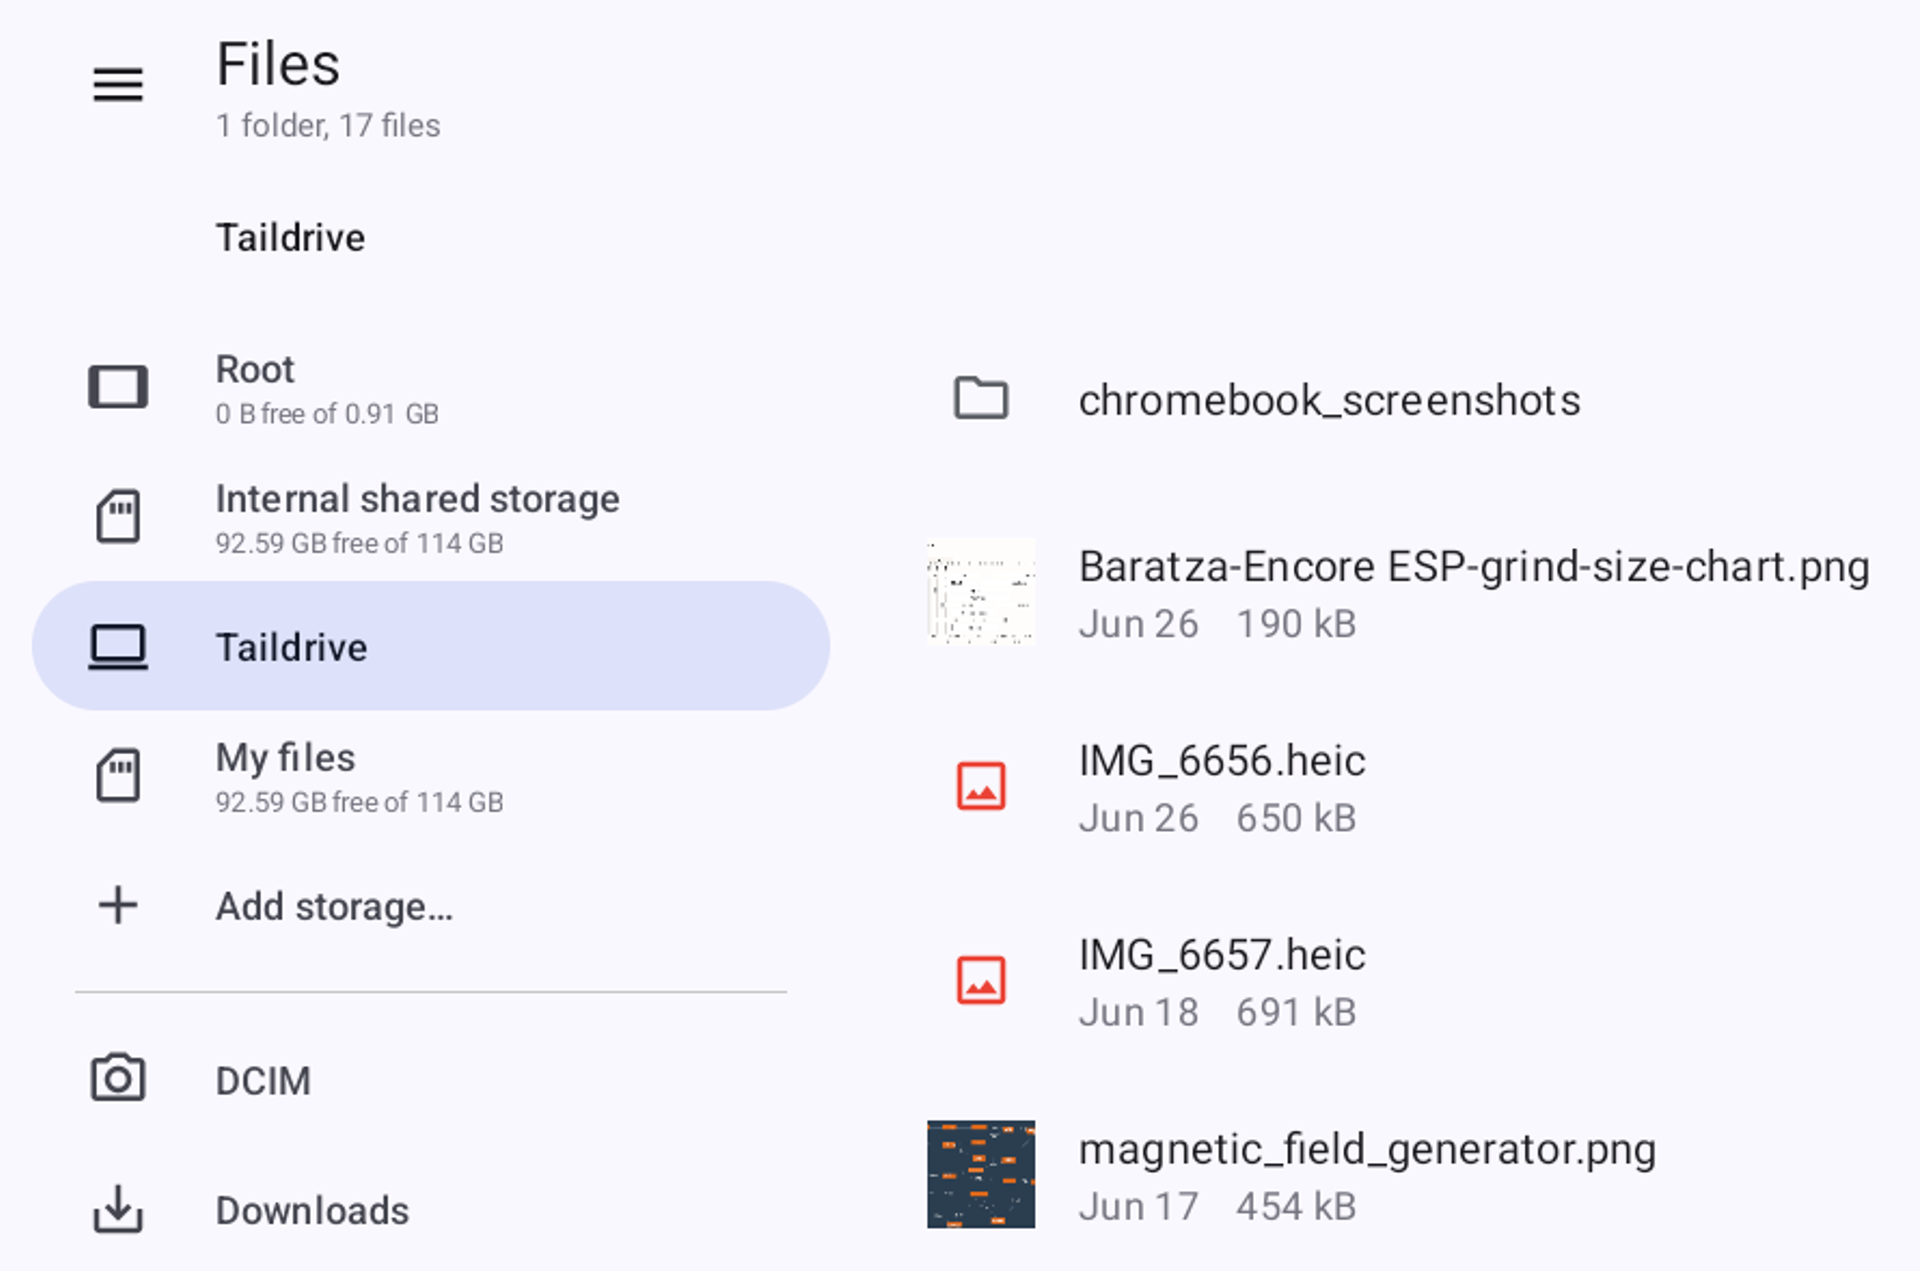
First, enable Taildrop in the General settings of your Tailscale admin console by toggling on “Send Files.” Once that’s done, you can open the Files app on your Chromebook, right-click on any file (press and hold if you're using fingers), and choose the Tailscale app. It might be hidden under the “More apps” section the first time you try, but using it should ensure it shows up next time. After you choose Tailscale, you get a list of devices you can send to—pick one, and off it goes.
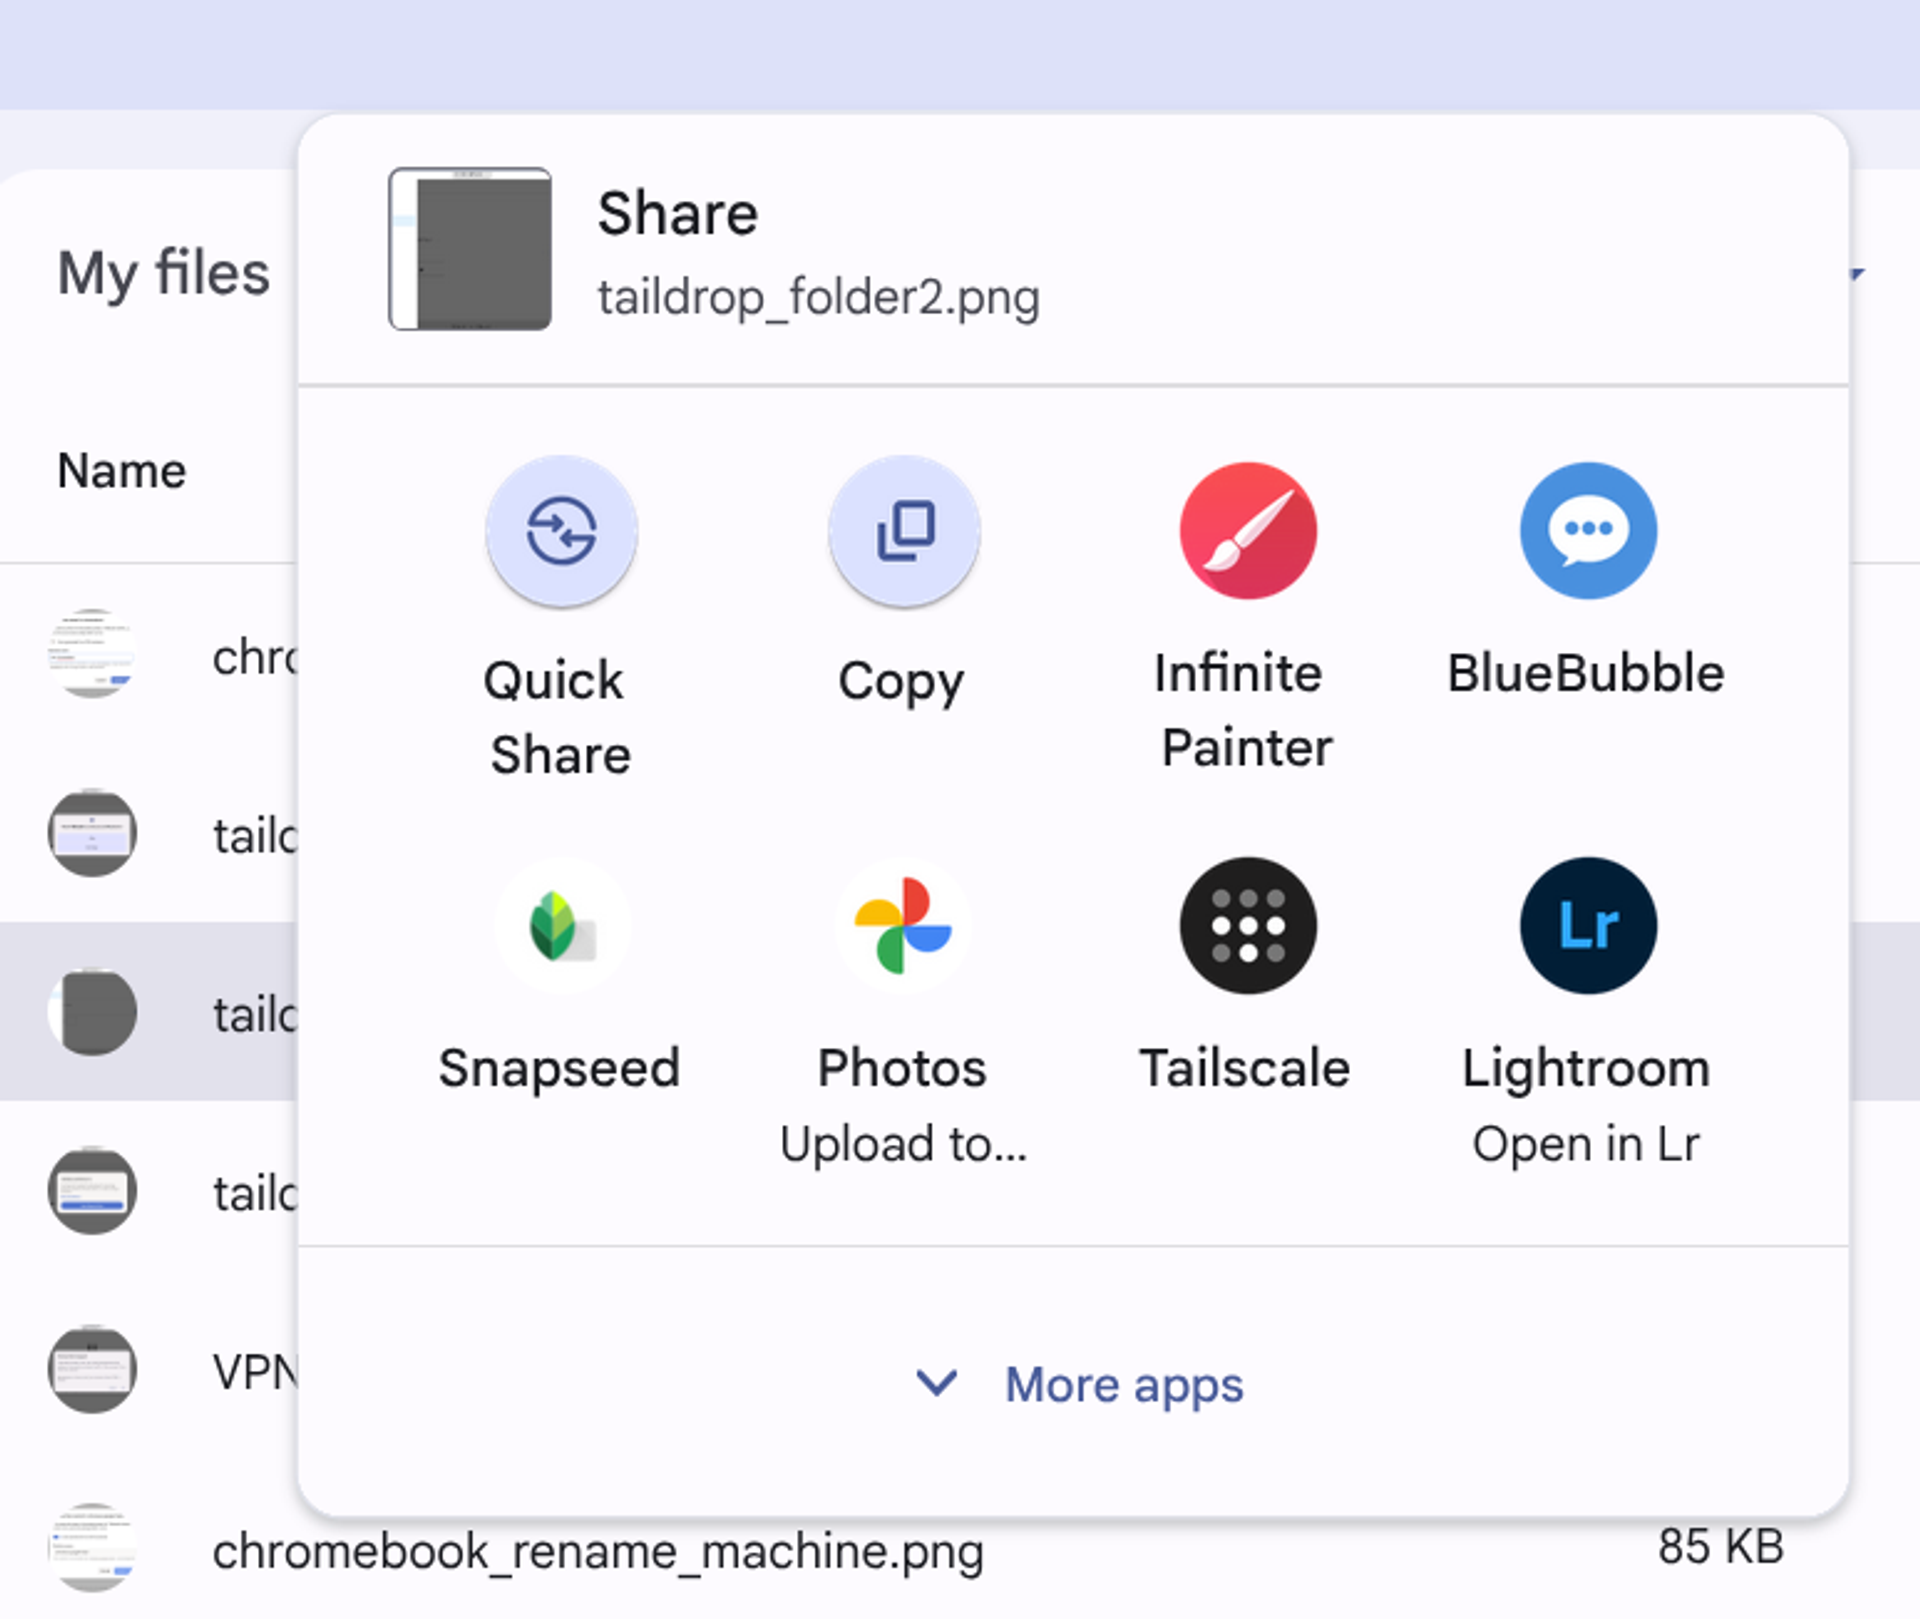
I just sent the above screenshot from a Samsung Galaxy Chromebook 2 to an iPhone 15, and it arrived in the Tailscale folder on my phone nearly instantly. There was no need to send it to my Google Drive and feel bad about how disorganized that whole space is.
Sending files to your Chromebook through Taildrop requires a one-time setup, and then transfers happen instantly after that. With your Chromebook connected, send it a file via Taildrop from one of your other Tailscale-connected devices. As soon as your Chromebook gets the ping, the Tailscale app will prompt you to choose a folder for your Taildrop files.
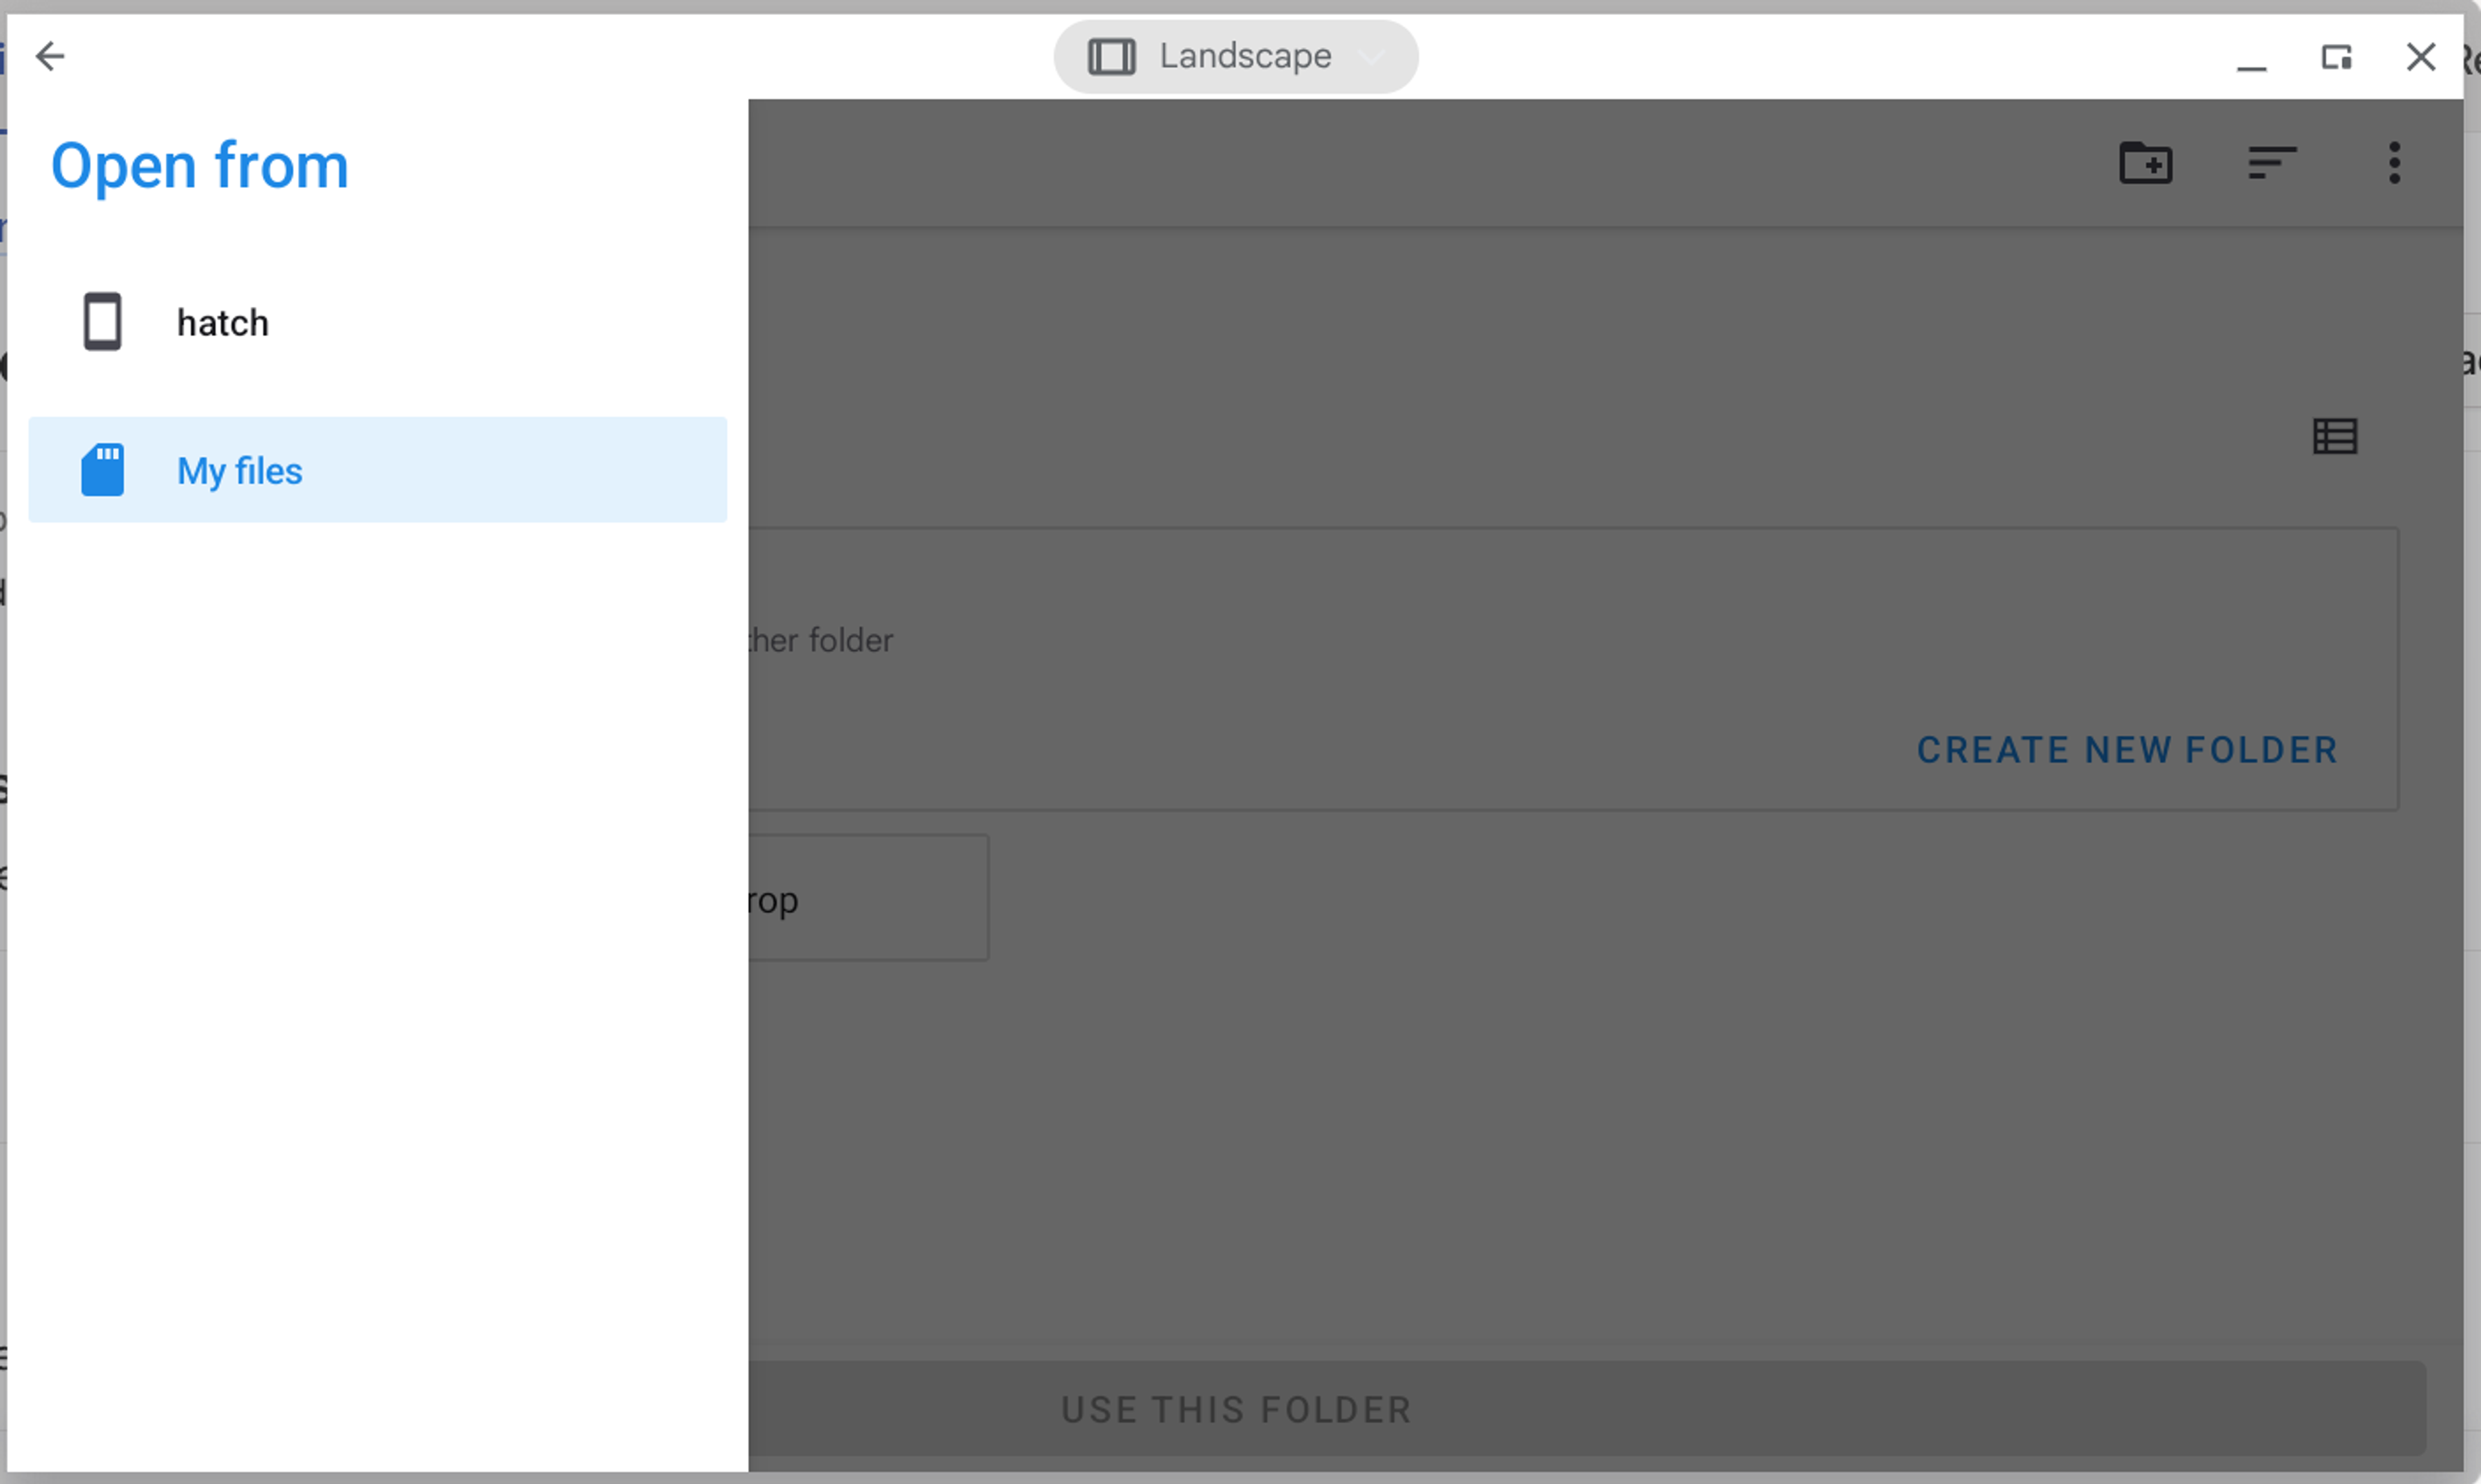
Like me, you might first try picking “Downloads” or a pre-existing folder, but you cannot, due to wonky Chrome OS reasons. Instead, click the upper-left menu (“hamburger”) button, and choose the “My files” option instead of the default machine storage. Then click “Create New Folder” and choose a name, like “Taildrop.” This is where your Tail-sent files will go. You can right-click the folder you made in your Files app and add it to the sidebar for quick access.
If you’re running a Linux container on this Chromebook, you can set up access to this folder. Right-click on the Taildrop folder in your Files app, and then choose “Share with Linux.” The next time you start your Linux install, it will be mounted. Right-click on the Taildrop folder you created in Files and choose “Manage Linux sharing,” and you can see exactly where it was mounted. On my model, a linked version of the folder shows up at /mnt/chromeos/Taildrop.
You can’t send files through Taildrop while inside a Chromebook’s Linux container, but you can use the same “Share” prompt in the Files app while digging through the “Linux files” section.
I’ve previously used tools like PairDrop to fling the occasional file to a device on the same local network. With Taildrop and Tailscale, you are essentially on your “local” network wherever you are, and you don’t need open a browser and click to receive each file. Once you add a device to your Tailnet, it’s automatically ready to send and receive files with your other Tailnet devices, no config necessary.
Sync files with Taildrive (and WebDAV)
Sending files one by one is pretty cool, but you know what’s even cooler? A policy-based WebDAV server that can share folders with globally unique path names.
That is to say: Taildrive. Taildrive takes a folder you share from any of your devices and makes it available to all the others. You become the administrator of a tiny, little file server (at http://100.100.100.100:8080), with all the security and connectivity stuff sorted for you.
Like Taildrop, Taildrive is in alpha, so you should be cautious about putting irreplaceable things on there (at least without solid backups). But as a cross-device file stash, I find Taildrive very useful, especially when working from a Chromebook. I have a Windows desktop, an iPhone and iPad, I use a MacBook for work, and I have a few Linux-based computers and storage devices always running on my home network. I’ve already hooked them together with Tailscale, so if I make a folder on the always-on NAS and share it to Taildrive, every device can access it.
To make use of Taildrive, you’ll need to enable access to it in your Tailnet’s policy file. Doing so requires being an Owner, Admin, or Network admin. If this is your personal Tailnet, you’re already all of those things. Otherwise, you need to be granted access. You’ll also want to have shared at least on Taildrive folder from one other device (one usually powered on and connected) before connecting to your Taildrive from a Chromebook.
Google previously offered direct support for mounting WebDAV folders in Chrome OS, but has since removed it. And, as noted earlier, support for the WebDAV-friendly Chrome apps will end in July 2025. That leaves us with one convenient way to access your Taildrive files from a Chromebook, a couple of quirky ways, and then a pile of further experiments. Note that you cannot share folders from your Chromebook into Taildrive (whether via Android or Linux), but you can access existing folders served up from other computers.
The best way: Using an Android file browser, like Material Files
Many Android file browsing apps allow for listing and syncing webDAV servers, like the kind created by Taildrive. As noted in our documentation, Material Files is a free, open-source file browser and a great starting point. Install the app, open its sidebar menu from the upper-left corner, then follow these instructions to get your Taildrive mounted.
The default name given to your Taildrive shortcut in Material Files is its full URL, and your account name/email if you've linked further inside your account. Click and hold (with mouse or finger) on the shortcut in the sidebar to give it a better name, like "Taildrive."
The Linux way, if you must
Because Chromebooks give us access to Linux files (at least when the Linux container is running), we can access our Taildrive folders on the command line and then see them in a Chromebook’s native Files app. It’s not easy, and it requires a fair amount of terminal knowledge. But it’s possible.
As described in our documentation, you can mount your Taildrive in a Linux directory. Make sure davfs2 is installed. To install it while inside a Chromebook’s default Debian-based Linux container, you can run this command:
sudo apt install davfs2
You’ll need to create a folder for mounting your Taildrive:
sudo mkdir /mnt/taildrive
Once you’ve done all that, you can mount your Taildrive in Linux, and then see it in the Files app.
How does it work? Honestly, it’s slow and fragile, especially if you’re doing other things on a Chromebook. You’ll have to run the mounting command every time you boot up Linux (You can’t add it to fstab inside its container), or create a script to automate it. And you might run into file permission issues.
If you’re working extensively in the Linux container, I would recommend instead getting familiar with the command-line tool cadaver. In my experience, cadaver feels much snappier navigating a Taildrive inside a Chromebook Linux session.
Loads of other WebDAV tools for Taildrive
You’ve now got a few ways to share files between systems, no cloud needed. But with a Taildrive running, you’ve got more options than just file shuffling.
The Unofficial WebDAV Support Team offers a weekend-consuming list of tools that work with WebDAV shares, including projects that, paired with Tailscale, could run on a self-hosted server, a virtual private server (VPS), or just a Windows, Mac, or Linux machine you leave on. Of particular note are the Android apps, which work on a Chromebook and open your Taildrive up to backups and syncing, music streaming (such as CloudBeats), note-taking and to-dos (Joplin), and more.
Self-hosting: DIY Chromebook features on your Tailnet
If you’ve got a Network-Attached Storage (NAS) device, a relatively modern Raspberry Pi, a small PC, or just a desktop system you keep on all the time, Tailscale makes it easier and more secure to start doing some self-hosting. That means putting tools and services on your Tailnet that are accessible from a Chromebook, but unavailable for prodding and peeking by the wider internet. There are a lot of self-hosted services that make a Chromebook feel a lot more capable, with no subscription required.
A selection of Chromebook-friendly, self-hosted tools to consider:
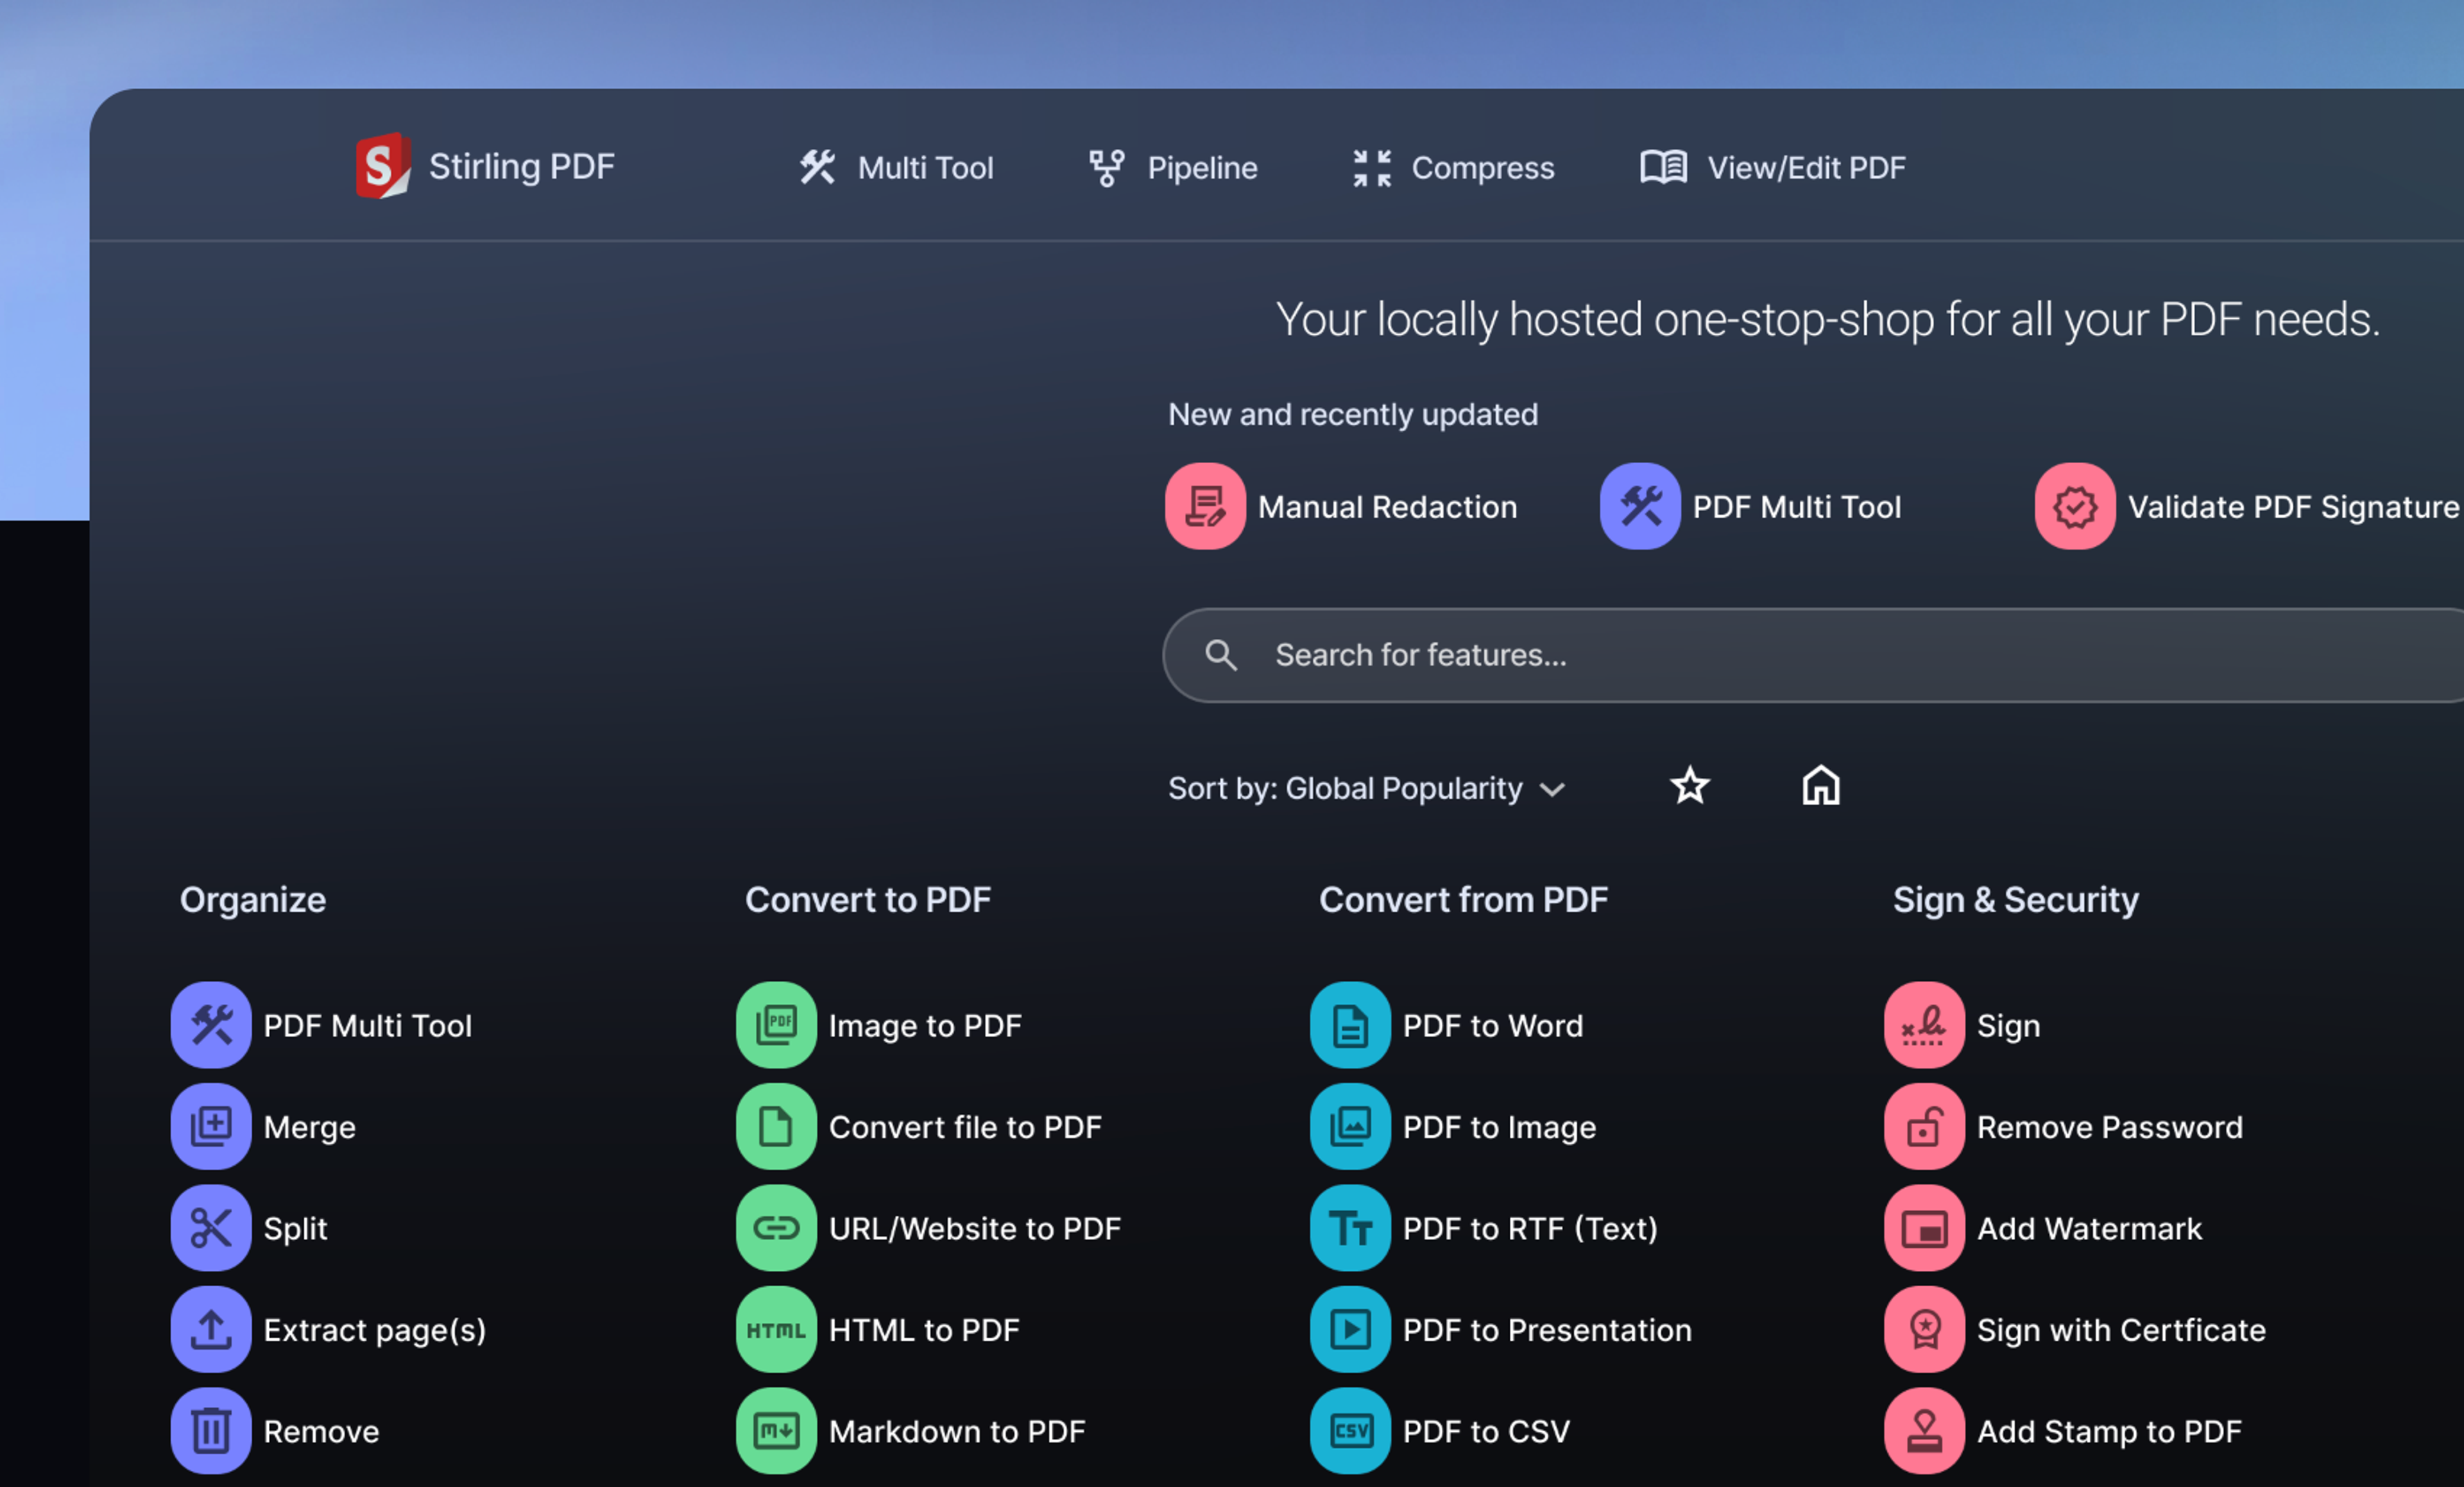
- Stirling PDF, a Swiss Army knife for working with PDFs, without uploading them to Some Random Site. (Kick the tires on their site)
- Filestash and File Browser for web-friendly storage (including Taildrive-friendly WebDAV)
- Koel or Plexamp for web music streaming
- Documenso, DocuSeal, or OpenSign for document signing
- Karakeep or LinkWarden for stashing bookmarks
- Code-server for a universal coding environment
Can you go further? Absolutely. I’m currently tinkering with NextCloud as a full-on personal Drive replacement. I’ve also got BlueBubbles running on a Mac Mini at home (connected through Tailscale), letting me trade iMessages on this decidedly non-Apple-made Chromebook. In the rare instances where I find myself with free time, a good internet connection, and just this Chromebook, I can use Moonlight’s Android app to stream games from my desktop (running Sunshine) at home. Tailscale makes these remote upgrades possible, without router port-forwarding, dynamic DNS setup, or most other advanced configuration.
If you’ve used Tailscale to help a Chromebook punch above its weight, or used Tailscale to give another device more features, let us know on Reddit, Bluesky, Mastodon, or LinkedIn.
 Kevin Purdy


