Remotely access Home Assistant via Tailscale for free
Author
Kevin Purdy
Contributor
Alex Kretzschmar
This blog post, originally published in April 2024, was updated in July 2026 to reflect the most modern and convenient ways to install a Tailscale app in Home Assistant and use it for remote access, to accompany a newer video tutorial. You can see the original video here.
An update to Home Assistant in August 2026 changed some of the setup instructions for this post; they have been noted in the text.
Home Assistant brings the connected devices in your home into one interface, where you can control, connect, and automate them. It's an incredible open-source project, especially given that it can run on modest hardware. And with Tailscale added into your Home Assistant setup, you can control all your devices from anywhere you can run Tailscale, without opening ports or setting up proxies.
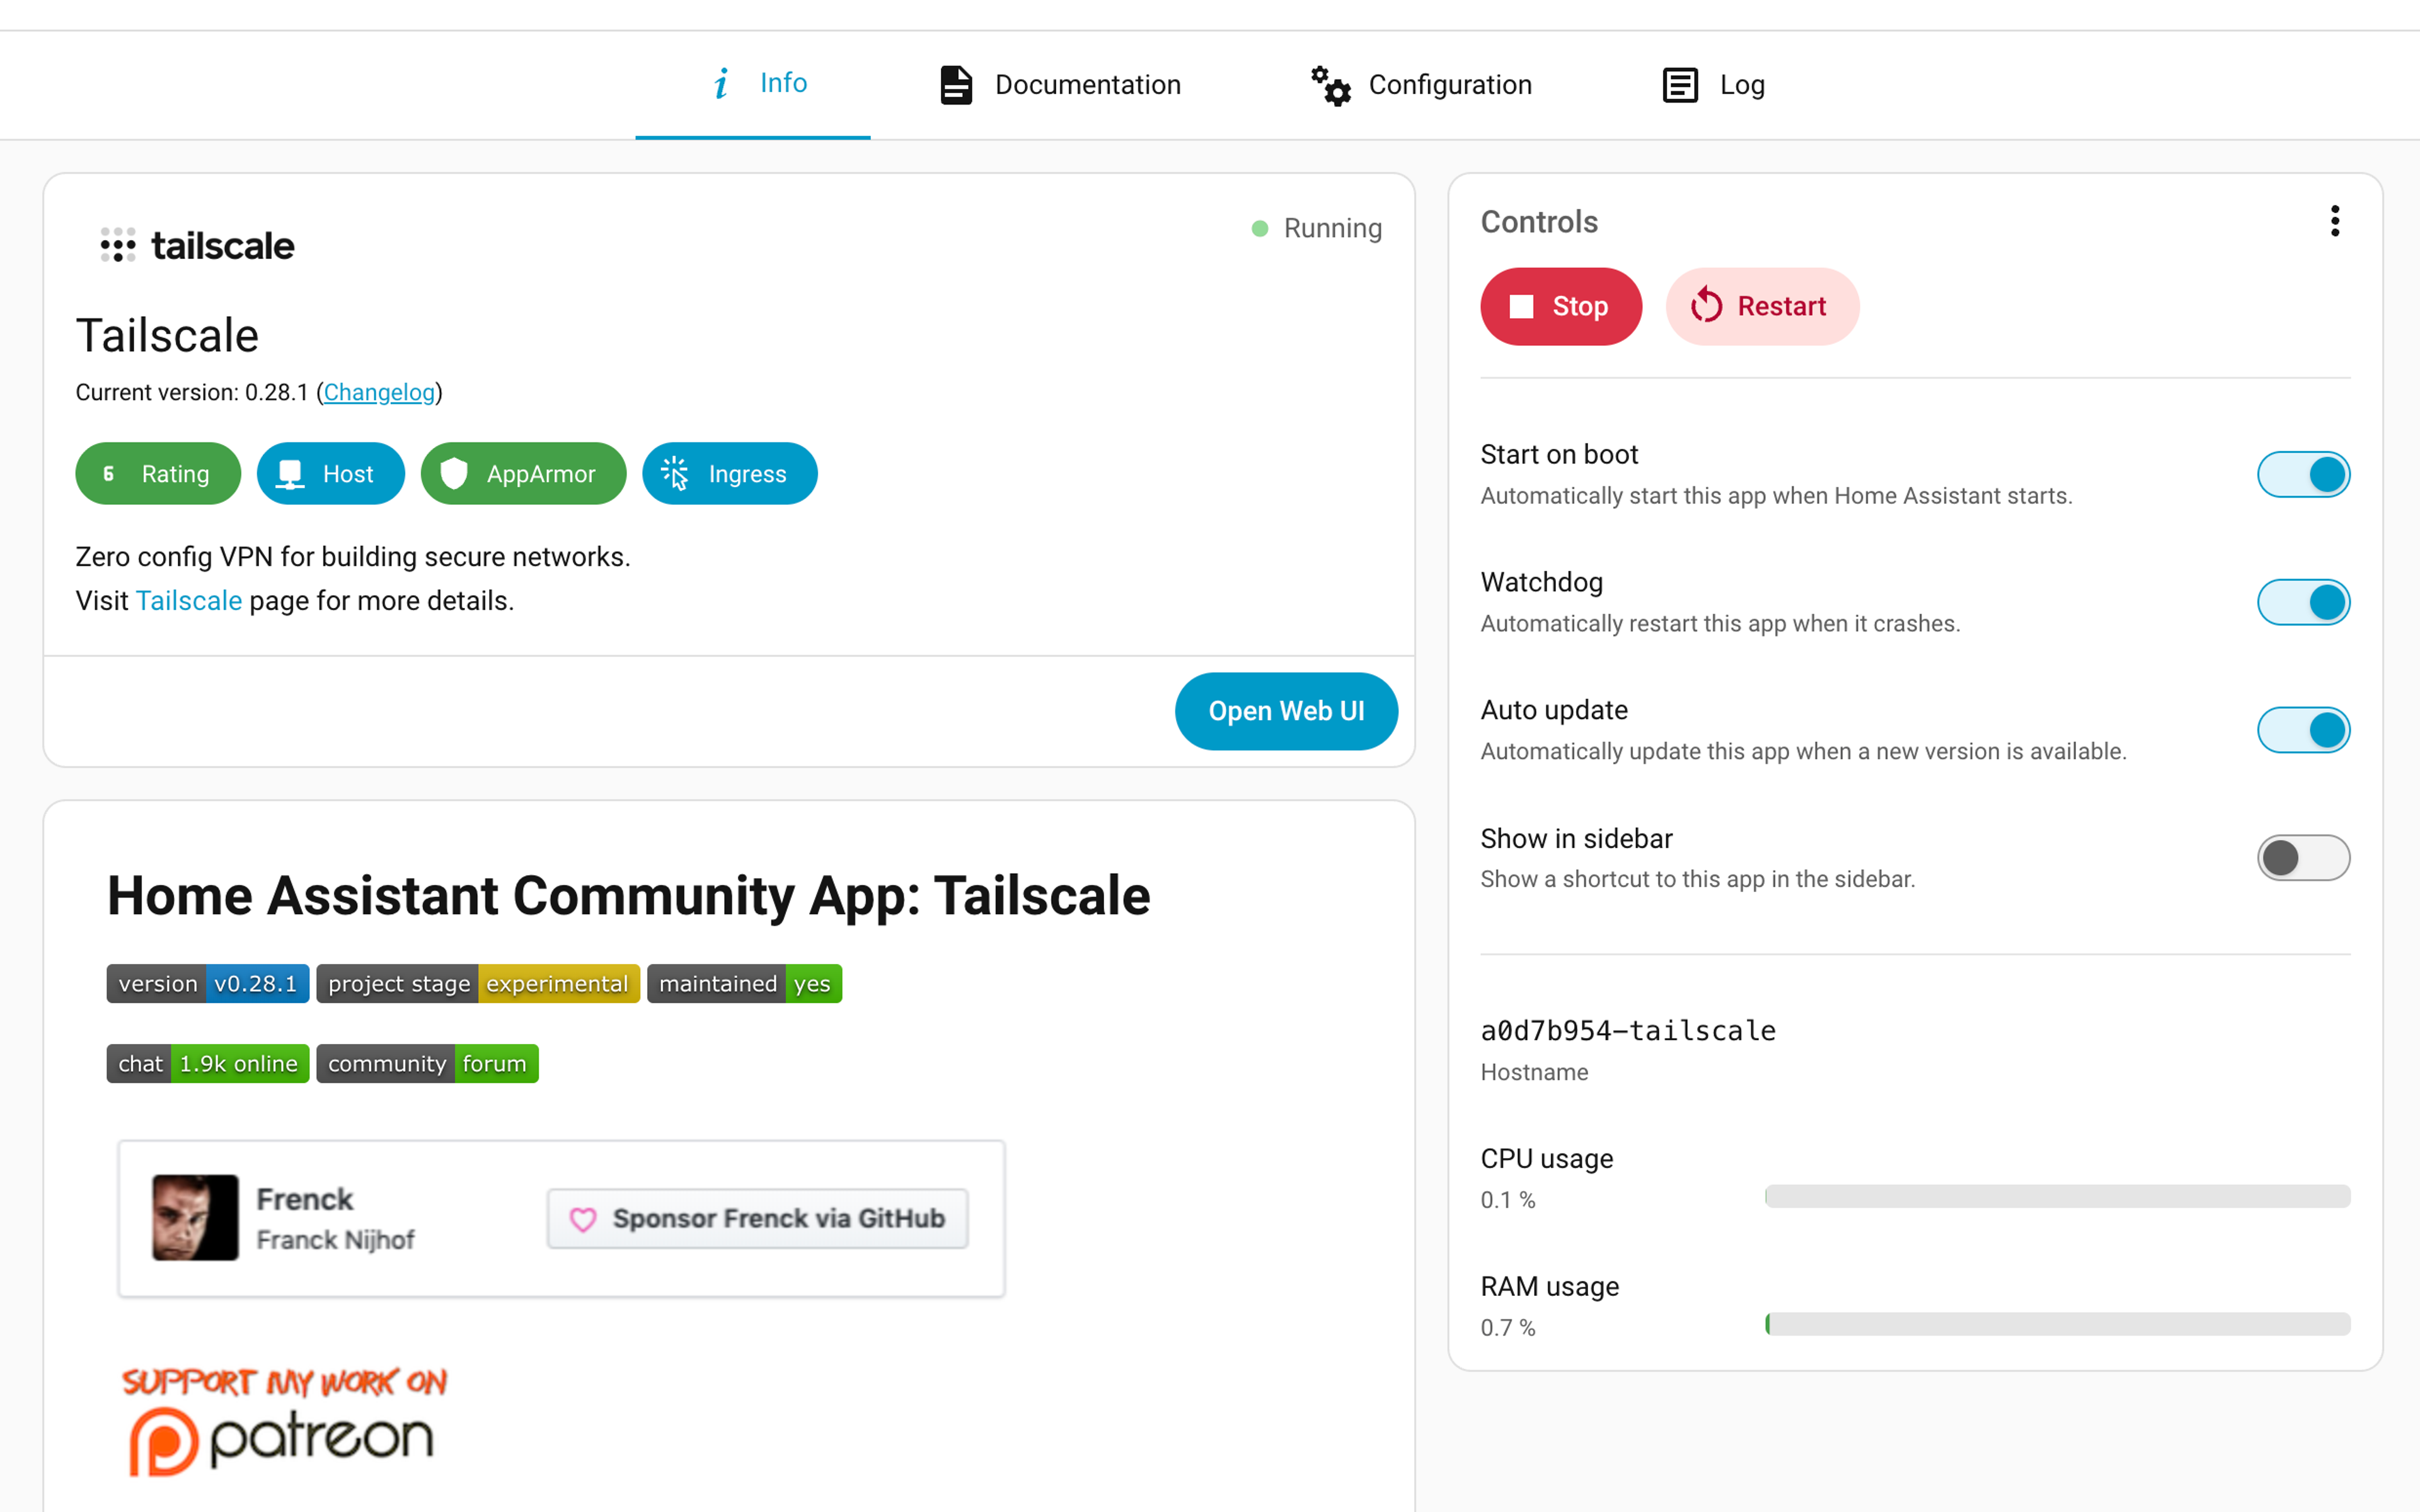
In your Home Assistant dashboard, click Settings (in the lower-left corner), then choose Apps (renamed from "Add-ons" in prior versions). Look for the Install app button in the lower-right corner. Search for Tailscale, select it, and then click Install. You'll use this app (maintained by core Home Assistant developer Frenck) to configure Home Assistant as a device on your Tailscale network, known as a tailnet.
Back in the Apps menu of Home Assistant, click on Tailscale > Info> Start. You can also turn on Watchdog, Auto update, and (less necessary) Show in sidebar.
Because this is Home Assistant, you might want to provide this convenient access to your controls and dashboards to other folks in your home. With Tailscale's Personal plan, you can have up to six users on your tailnet, along with unlimited user devices—and that's before you even consider device sharing. If you've made it this far into the guide and haven't set up your Tailscale account, now is the time to start.
Once you've got a Tailscale account and tailnet, you'll also have a Tailnet DNS name. The default is something like tail6e5bf.ts.net, which is not easy to type or remember. Click on DNS in your Tailscale web admin console, then click Rename tailnet. Click to re-roll your name until you land on a combination of things with a tail and scales that strikes your fancy. While you're in the DNS section, check that MagicDNS and HTTPS Certificates are enabled, so you can give Home Assistant a memorable address with a proper certificate.
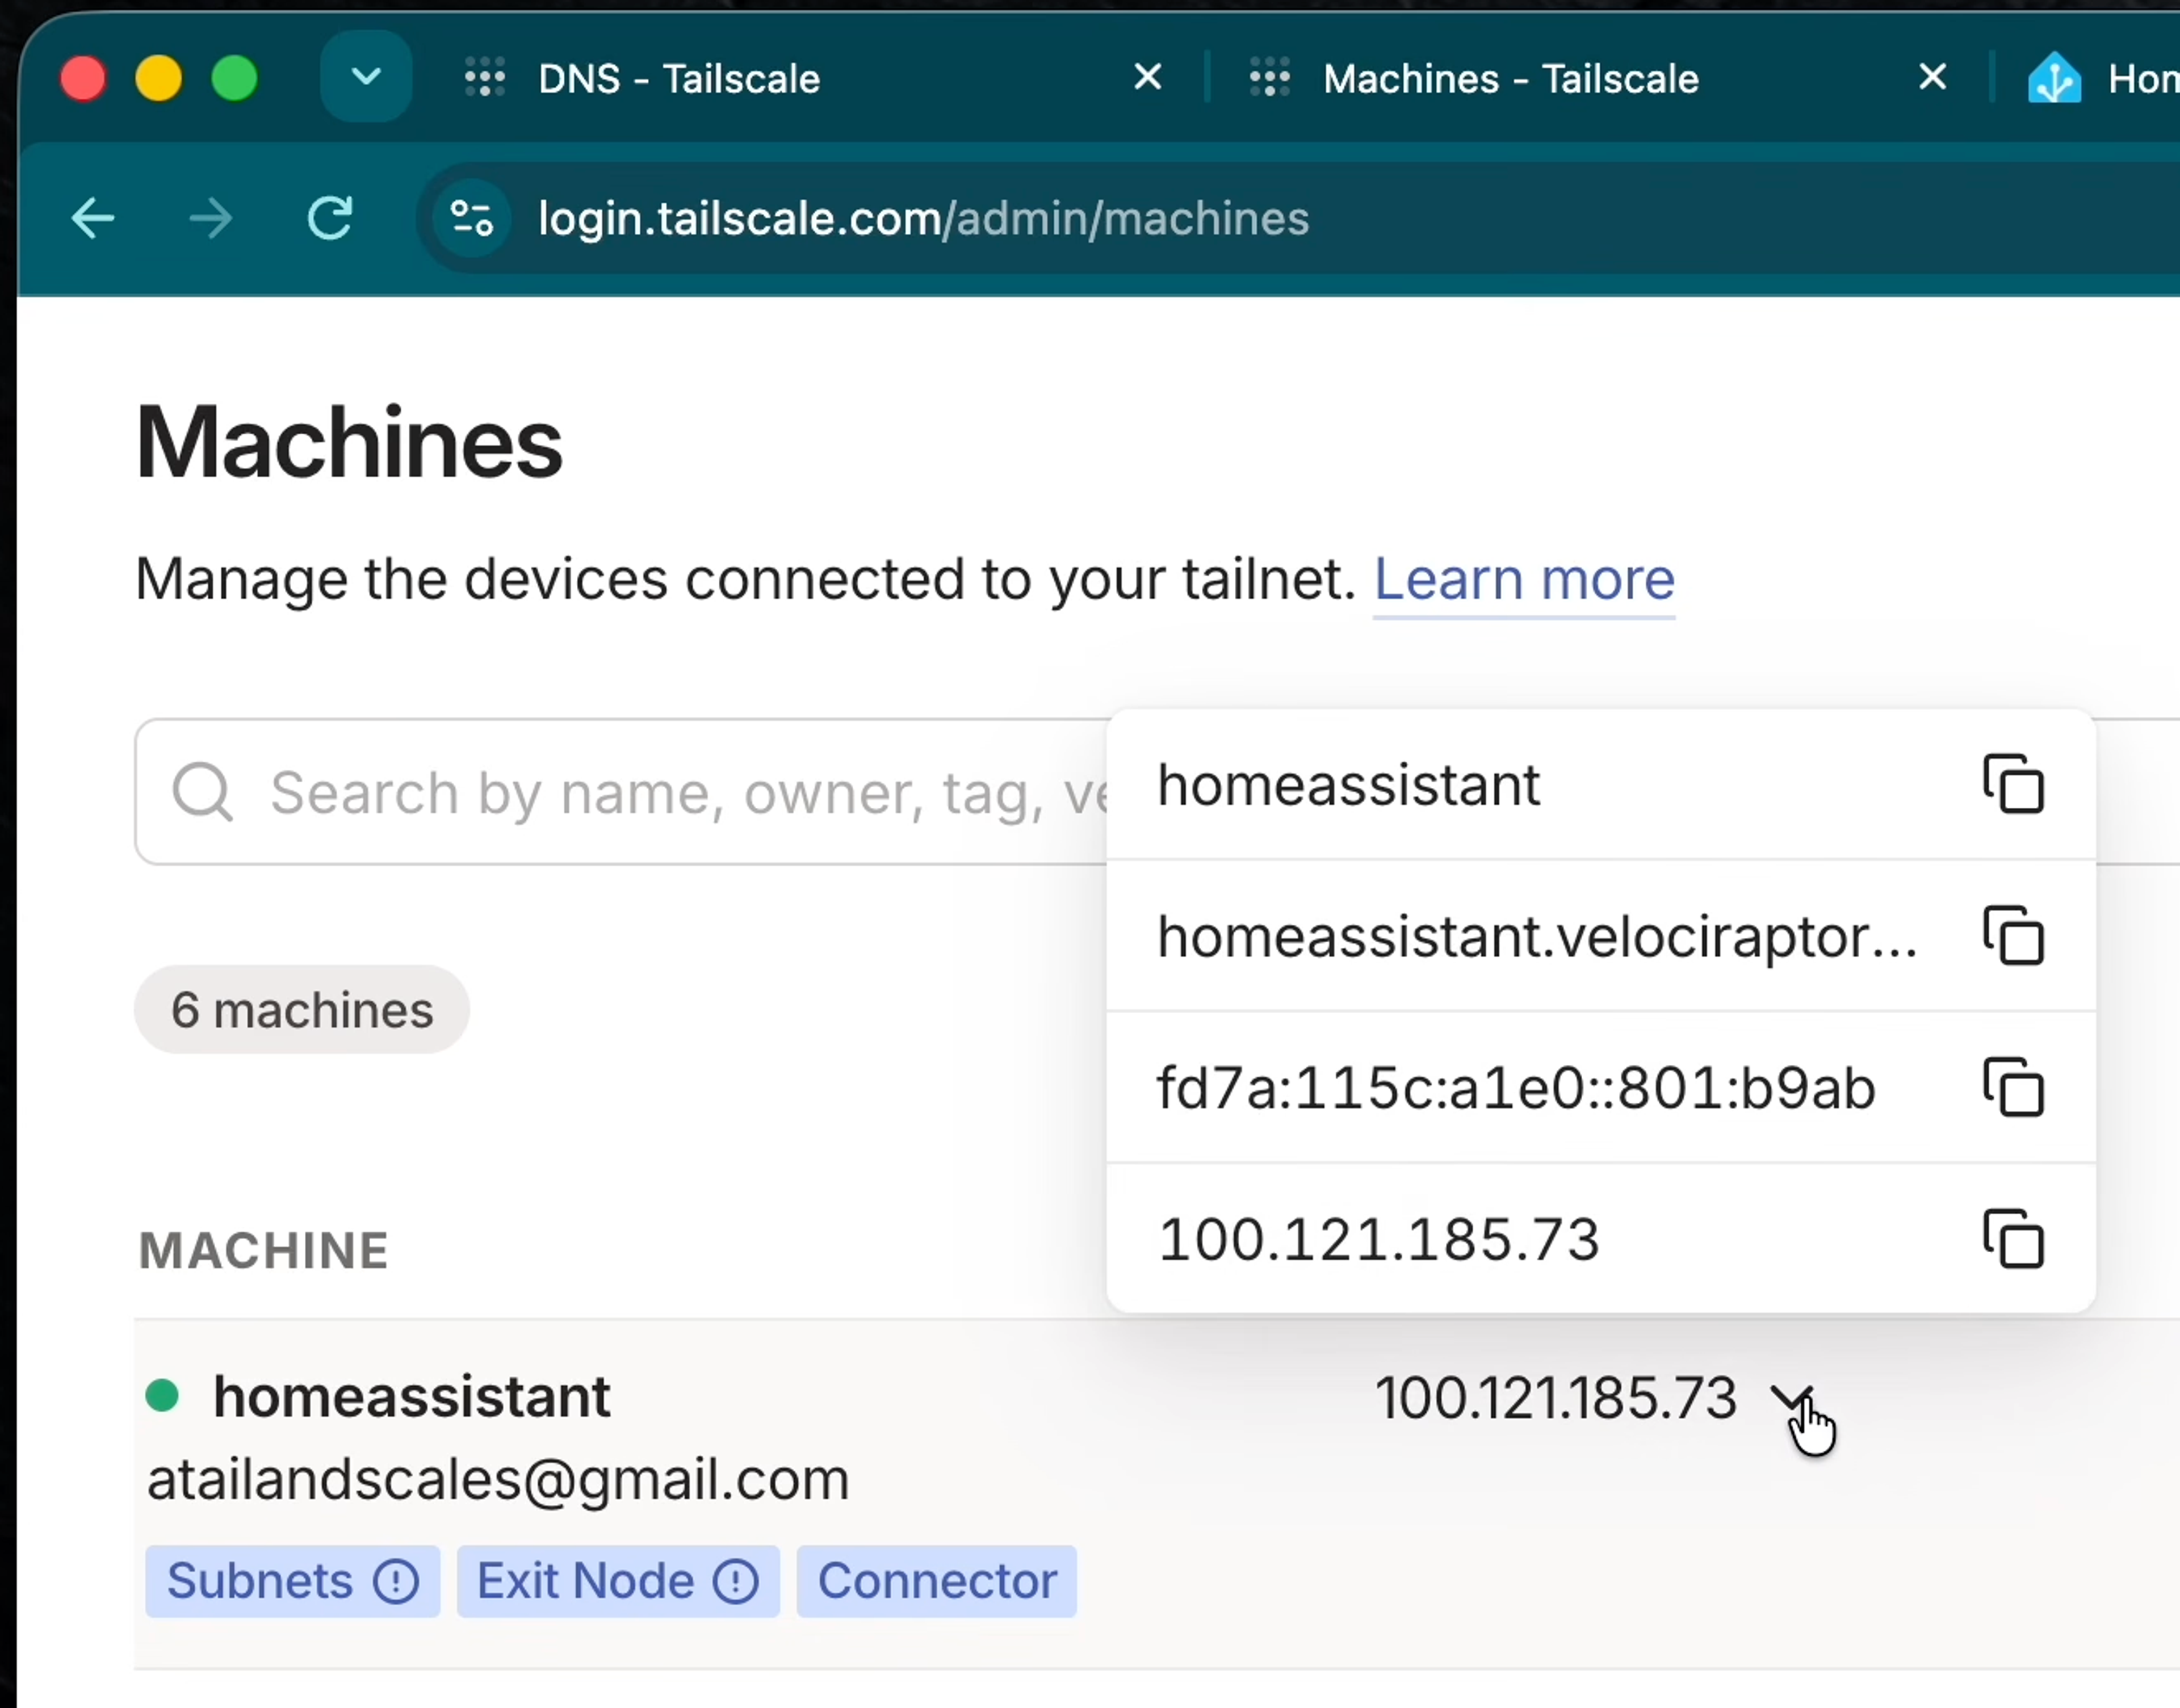
Back inside Home Assistant, in the Tailscale app settings, select Open Web UI button. You'll be prompted to log in (and may have to click to allow a pop-up in your browser), and then confirm that you want to connect your Home Assistant to your tailnet. Once you see "Login successful," you can head back to your web admin console, and you should see your device (likely named homeassistant) on your Machines list, with a green dot next to it to indicate it is connected.
Note: As of version 2026.8, Home Assistant now manages HTTP server proxy settings in its standard dashboard interface, rather than a block added to the configuration.yaml file. If you set up Tailscale using the YAML file method prior to this update, it should move itself over to Settings > System > Network > HTTP server. If not, updated instructions are below.
Inside Home Assistant, head to Settings > System > Network and look for the HTTP server section. Click open the Reverse proxy drop-down. Enable Trust X-Forwarded-For, then click Add Trusted proxies. Add 127.0.0.1 as a proxy, then click Save in the HTTP Server box. You'll get a notification that saving this will restart your Home Assistant interface; click to confirm and move on.
Once your Home Assistant comes back online, head back to the Tailscale app inside it. Scroll down and look for Share Home Assistant with Serve or Funnel. You almost certainly do not want Funnel; that puts your Home Assistant setup on the public internet. Using Tailscale Serve makes more sense, so that you can reach Home Assistant from devices running Tailscale, like your phones and laptops.
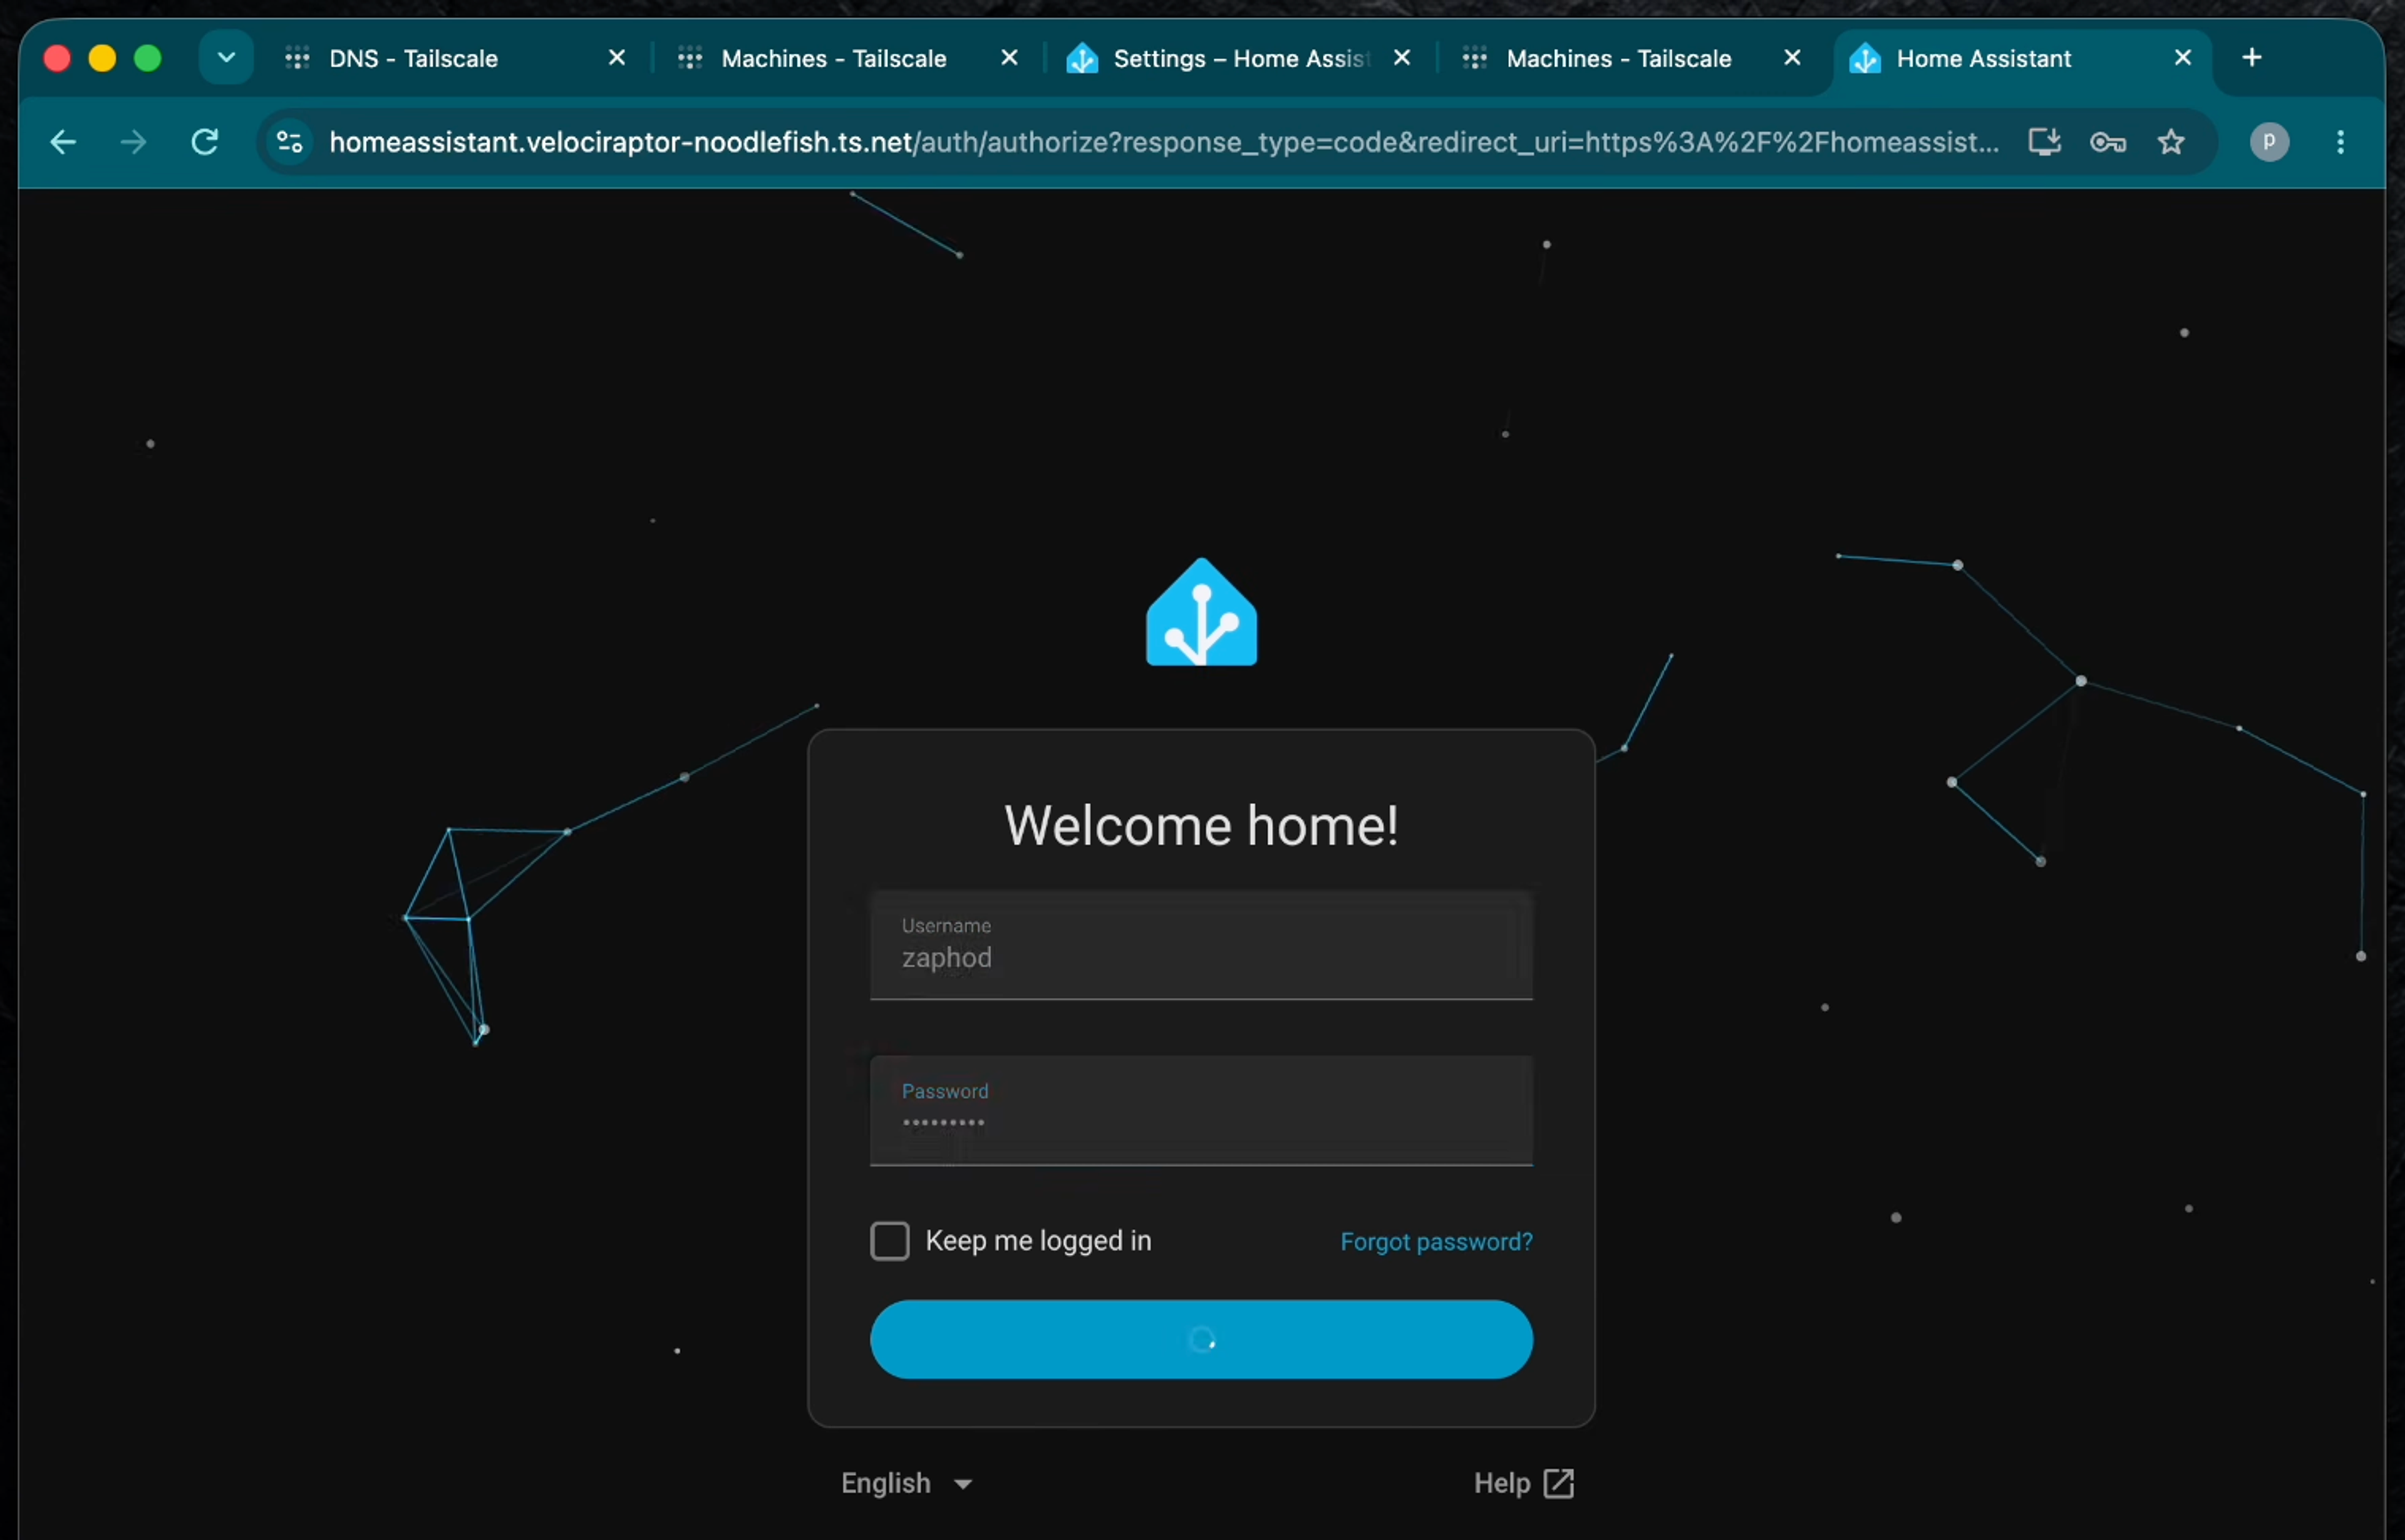
With the Serve option enabled, you should now be able to reach your Home Assistant over Tailscale: https://homeassistant.velociraptor-noodlefish.ts.net, in the case of our YouTube host's tailnet. You can see your Home Assistant URL in the web Admin Console by clicking the arrow next to the Tailscale IP address for your Home Assistant, then clicking to copy the full URL with your tailnet name in it. Paste that URL into a browser and, after Tailscale does a little background handshaking to set up the certificate, you can reach your Home Assistant from anywhere you can run Tailscale, just like it was on your local network.
The Tailscale app in Home Assistant has a number of switches you can turn on or off. Alex runs through them in his video, but, in brief:
Accept DNS: This would allow Home Assistant to talk to other devices on your tailnet. It's on by default, and probably okay to keep it there.
Advertise as exit node: If your Home Assistant device is one of your only always-on computers, this could be quite useful. Exit nodes let you route all of a device's traffic through the exit node over an encrypted connection. It's useful for foreign travel, security and privacy on public networks, and access to geo-limited services.
Advertise subnet routes: Similar to exit nodes, a subnet router allows you to access all the devices that are on the same network range as that routing device. So if your Home Assistant box is on your home network at 192.168.1.50, and you set it to offer routes at 192.168.1.0/24, you could then access all the devices on your home network, whether they run Tailscale or not. Like an exit node, it could be useful in this always-on device.
Tailscale can provide free and secure access to your Home Assistant, with no port-forwarding or complicated reverse proxies required. And Home Assistant itself is free. You can still support the development of Home Assistant—and we recommend you do—with a visit to their merch store or, more functionally, with a Nabu Casa subscription. That subscription adds easy access to third-party voice assistants, like Google Assistant and Amazon Alexa, fast and powerful voice control tools, cloud backups, and easy webhook setup.
Be warned: Easy access to Home Assistant can lead to increasing amounts of home automation thinking, tinkering, and even tiny gadget purchases. If you've used Tailscale to expand your Home Assistant setup, let us know how it's going on Reddit, Discord, Bluesky, X, Mastodon, or LinkedIn.
 Kevin Purdy