

Recently, I’ve started blogging, and to serve the raw Markdown into delicious HTML and CSS, I wrote a basic web server in Go that compiles Markdown and then injects it into a template and serves it over HTTP. The biggest annoyance in this server is deployment; every change I make needs to be pulled on the server-side, potentially recompiled if the Go code changes, and restarted.
Automating all this should be DevOps 101 — which is convenient for me since being a university student is about the time I figure I should be doing DevOps 101. Armed with this confidence, I devised a plan — a GitHub Action that builds the binary, packages it along with the pages and static files, then pushes the package and restarts the server automatically. The only problem is that my server’s SSH is accessible only over Tailscale.
It sounds like a great idea security-wise; expose SSH only over Tailscale, so the only devices that can access your server at all are the devices on your trusted network. But that means that for the GitHub Action to be able to access my server, it too must join my Tailscale network. That works for me, but there are a couple of reasons why you can’t just tailscale up.
Firstly, when you do tailscale up, you’re given a URL on your terminal that you need to open and sign into Tailscale on in order to authorize this node to join your network. It would be very inconvenient to have to manually approve your CI every time it runs. This is a solved problem, though — with authentication keys, you can tailscale up without any user interaction.
Secondly, the moment you sign onto your Tailscale network, your device is registered there permanently, at least until you go to the admin console and remove it. This sounds like it could be fine, until you realize that Docker containers are supposed to be stateless. The container itself forgets its identity with every fresh boot, but your Tailscale network doesn’t. So you end up with a new machine registered on your network every time a container spins up.

Not pictured: 36 more of these that I deleted by hand.
This issue can be somewhat resolved with a very clever hack, like the one Tavian Barnes used with his FreeBSD CI GitHub Action. He generated the machine-specific key once, stored it as a GitHub Actions secret, and then piped it into the container before starting Tailscale. So every time it starts up, the container uses the same identity as last time. That’s great, that’s exactly what we want. Right? Well, almost.
The thing about this machine-specific key is that it’s supposed to be unique — only one machine is supposed to have it at any given time. So while the GitHub Action would work great as long as there was only one instance of it running, as soon as another Action starts concurrently, the two containers would start battling each other as the One True Machine represented by the key. While that may be acceptable in a lot of cases, it’s not ideal.
So we devised another solution: ephemeral authentication keys. The idea is that since multiple container instances can be running concurrently, it makes sense to treat them all as different machines. So we generate a new machine key, and sign these containers into Tailscale as normal. But when signed up with an ephemeral key, Tailscale will assume that these machines themselves are “ephemeral”, or temporary. This means that if such machines go offline for a short period of time, they are assumed to be gone forever, and Tailscale will automatically remove them from your network.
Generating an ephemeral authentication key will be simple, once the feature is available to use. You simply create it in the admin console, on the Keys page, like any other key:
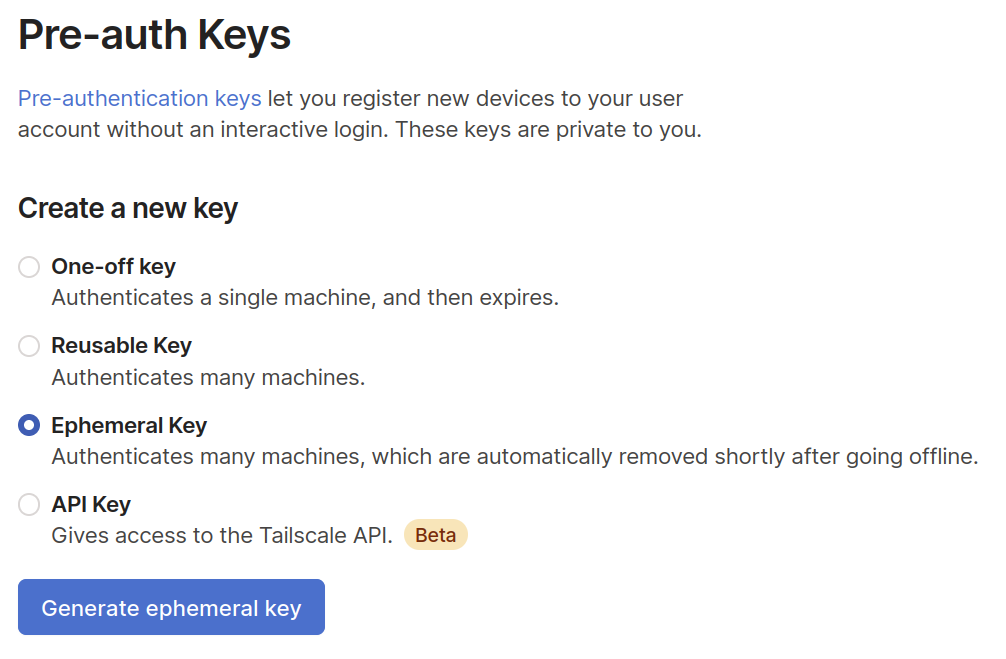
Side note: the best part about creating a new feature is clicking the big blue button and seeing it work.
And then, you tell your containers to tailscale up using this key:
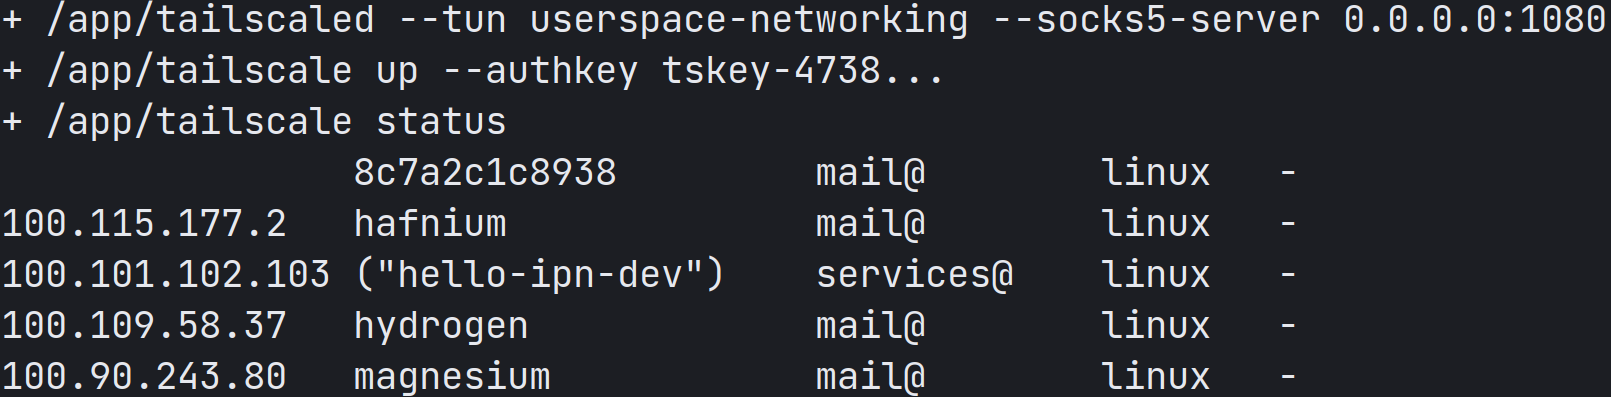
I like to name my devices after periodic table elements. Remind me again, what’s the atomic number of 8c7a2c1c8938?
Now we have our key, and we can sign onto the network with it. Time to make some GitHub Actions!
To use GitHub Actions to accomplish our task, we need to create a job, which is a list of steps that the job needs to do. To quickly recap, my workflow needs to:
- Build my blog binary
- Package it up along with static resources
- Push it to my server over Tailscale
Breaking it down further, we get:
- Build my blog binary 1. Install Go 1.17
- Build the blog binary
- Package it up along with static resources 1. Run tar with the right magic incantations
- Push it to my server over Tailscale 1. Connect to Tailscale
- Send the tarball to my server
- Remotely extract the tarball and restart the blog process
Each of these can be a distinct step. For most of them, I can quickly write a shell script that will do the thing I need it to. For the Go install step and the Tailscale connect step, however, my job essentially boils down to “fetch a binary and set it up”. Here, it would be really nice if the people who provided those binaries could do this for me.
For Go, GitHub provides an Action called actions/setup-go, which you can include as a step, and have it take care of everything. All I need to do is provide the Go version I need.
For Tailscale, no such Action existed. Fortunately, I work at Tailscale so I can justify spending the time to make it happen! Now, using tailscale/github-action, you can include “connect to Tailscale” as a step, after which your CI will have access to your Tailscale network. All you need to do is include the action and provide it an ephemeral authentication key. (A regular authentication key will also work, but then you have to do all that removing-nodes business.)
- name: Setup Tailscale
  uses: tailscale/github-action@main
  with:
    authkey: ${{ secrets.TAILSCALE_AUTHKEY }}
And with this, we’re done! My workflow is saved, and all is well. This is how it looks today:
on: [push]

jobs:
  deploy:
    runs-on: ubuntu-latest
    name: Deploy blog to hydrogen
    if: github.ref == 'refs/heads/main'
    env:
      MACHINE: hydrogen
    steps:
      - name: Setup Go 1.17
        id: go
        uses: actions/setup-go@v2
        with:
          go-version: '^1.17'
      - name: Setup Tailscale
        id: tailscale
        uses: tailscale/github-action@main
        with:
          authkey: ${{ secrets.TAILSCALE_AUTHKEY }}
          version: 1.7.359
      - name: Add SSH key
        id: ssh
        env:
          SSH_KEY: ${{ secrets.SSH_KEY }}
        run: |
          mkdir -p ~/.ssh
          MACHINE_IP="$(tailscale ip -6 $MACHINE)"
          ssh-keyscan $MACHINE_IP >> ~/.ssh/known_hosts
          printf "%s" "$SSH_KEY" > ~/.ssh/key
          chmod 600 ~/.ssh/key
      - name: Fetch code
        id: fetch
        uses: actions/checkout@v1

      - name: Compile blog binary
        id: compile
        run: go build -o prose .

      - name: Build tarball and ship it
        id: tarball
        run: |
          TIME=$(date +%Y%m%d-%H%M%S)
          FILENAME=prose-${TIME}.tar.gz
          mkdir -p static/css
          tar -czf $FILENAME prose static/ styles/ templates/ posts/
          MACHINE_IP="$(tailscale ip -6 $MACHINE)"
          echo $FILENAME "github@[$MACHINE_IP]:/home/github/"
          scp -i ~/.ssh/key $FILENAME "github@[$MACHINE_IP]:/home/github/"
          ssh -i ~/.ssh/key "github@$MACHINE_IP" "tar -C /var/www/blog -xzf ~/$FILENAME"
          ssh -i ~/.ssh/key "github@$MACHINE_IP" "sudo systemctl restart prose"
This was just one of the many possible use cases of ephemeral authentication keys. These keys, along with the recently added support for userspace networking, will allow Tailscale to run in a wide range of container-based cloud environments, like Heroku, AWS Lambda, Google Cloud Run, and more. My time at Tailscale as an intern is ending, but I’d love to see what you build with this. Tweet them to me @tendstofortytwo; you receive a free like and I receive the satisfaction of having built something useful to people. It’s a win-win. :)
 Naman Sood


