How to set up a private Minecraft server
Minecraft is a popular multiplayer game, in which players can connect to a Minecraft world hosted within one of the player’s running game or can connect to a standalone server hosting a world.
Without Tailscale, setting up a Minecraft server to be reachable from outside the home means either:
- paying for third party hosting, or
- opening ports in the firewall, potentially allowing access to any rando on the Internet
With Tailscale, you can share it from anywhere with just the people you want.
In this guide, we’ll show how to set up a Minecraft bedrock_server and connect
to the server from anywhere using Tailscale.
Prerequisite: a Linux server
You will need a server. These instructions assume a Linux server or VM running within the home, behind a firewall. Tailscale lets clients connect to computers wherever they are, so you do not need to worry about the accessibility of the machine. It just needs to be on the internet. If you sign up for a VM hosted by a cloud provider, please make sure to block almost all access in the firewall.
The instructions in this guide assume you are using Ubuntu or Debian, though the changes for other Linux distributions are small.
Step 1: Set up bedrock_server on Linux
The bedrock_server supports both Windows and Linux. We’ll cover Linux in
this guide.
We recommend creating a user to run the Minecraft server, and installing some packages we’ll need later:
adduser --system --home /opt/minecraft minecraft
addgroup --system minecraft
adduser minecraft minecraft
chsh --shell /bin/bash minecraft
apt install unzip curl tmux git wget
Download the current version of the Linux bedrock_server binary from
https://www.minecraft.net/en-us/download/server/bedrock. It is best to
do this as the minecraft user just created:
su -s -u minecraft
cd ~
wget "download path copied from https://www.minecraft.net/en-us/download/server/bedrock"
Minecraft bedrock_server is updated relatively frequently, and when the
Minecraft game app is updated it requires the new version of the server.
So we’ll prepare for future updates by storing the server files in git:
git init .
unzip bedrock_server*.zip
rm bedrock_server*.zip
git add -A
git commit -m "Initial bedrock_server"
Each successive bedrock_server update can be stored in git. Pay special attention
to permissions.json and server.properties, where any future bedrock_server
will overwrite any customizations you may have made.
systemd
systemd is a way to automatically start services when the system boots. We’ll
create a few files to have bedrock_server start automatically.
/etc/systemd/system/minecraft.service
[Unit]
Description=Minecraft Service
Wants=network.target
After=network.target

[Service]
User=minecraft
Group=minecraft

Type=forking

ProtectHome=true
ProtectSystem=full
PrivateDevices=true
NoNewPrivileges=true
InaccessibleDirectories=/root /sys /srv /media -/lost+found
ReadWriteDirectories=/opt/minecraft
WorkingDirectory=/opt/minecraft
ExecStart=/opt/minecraft/start.sh
ExecStop=/opt/minecraft/stop.sh
TimeoutStopSec=20
Restart=on-failure

[Install]
WantedBy=multi-user.target
/opt/minecraft/start.sh
#!/bin/sh
/usr/bin/tmux new-session -s minecraft -d
tmux send -t minecraft "LD_LIBRARY_PATH=. ./bedrock_server" ENTER
tmux send -t minecraft "gamerule showcoordinates true" ENTER
tmux send -t minecraft "gamerule keepInventory true" ENTER
/opt/minecraft/stop.sh
#!/bin/sh
/usr/bin/tmux send -t minecraft save-all ENTER
/usr/bin/tmux send -t minecraft stop ENTER
echo "Killing minecraft session"
/usr/bin/tmux kill-session -t minecraft
Also make the shell scripts executable: chmod +x /opt/minecraft/start.sh /opt/minecraft/stop.sh
As root you should now systemctl start minecraft and voilà, you are running
a Minecraft bedrock edition server.
As the minecraft user, you can connect to tmux to see the server console:
sudo -s -u minecraft
tmux attach
To detach from tmux and leave bedrock_server running, press Ctrl-B
then “d” for detach.
Step 2: Install Tailscale on the server
Tailscale is available for essentially any modern Linux distribution, though the installation instructions may vary slightly.
Once installed and active on the tailnet, the Minecraft bedrock_server can be
reached from any of your other Tailscale clients.
Step 3: Play Minecraft
You’ll need the Tailscale client installed, from the App Store for iOS devices and the Play Store for Android. You’ll also need the Minecraft app.
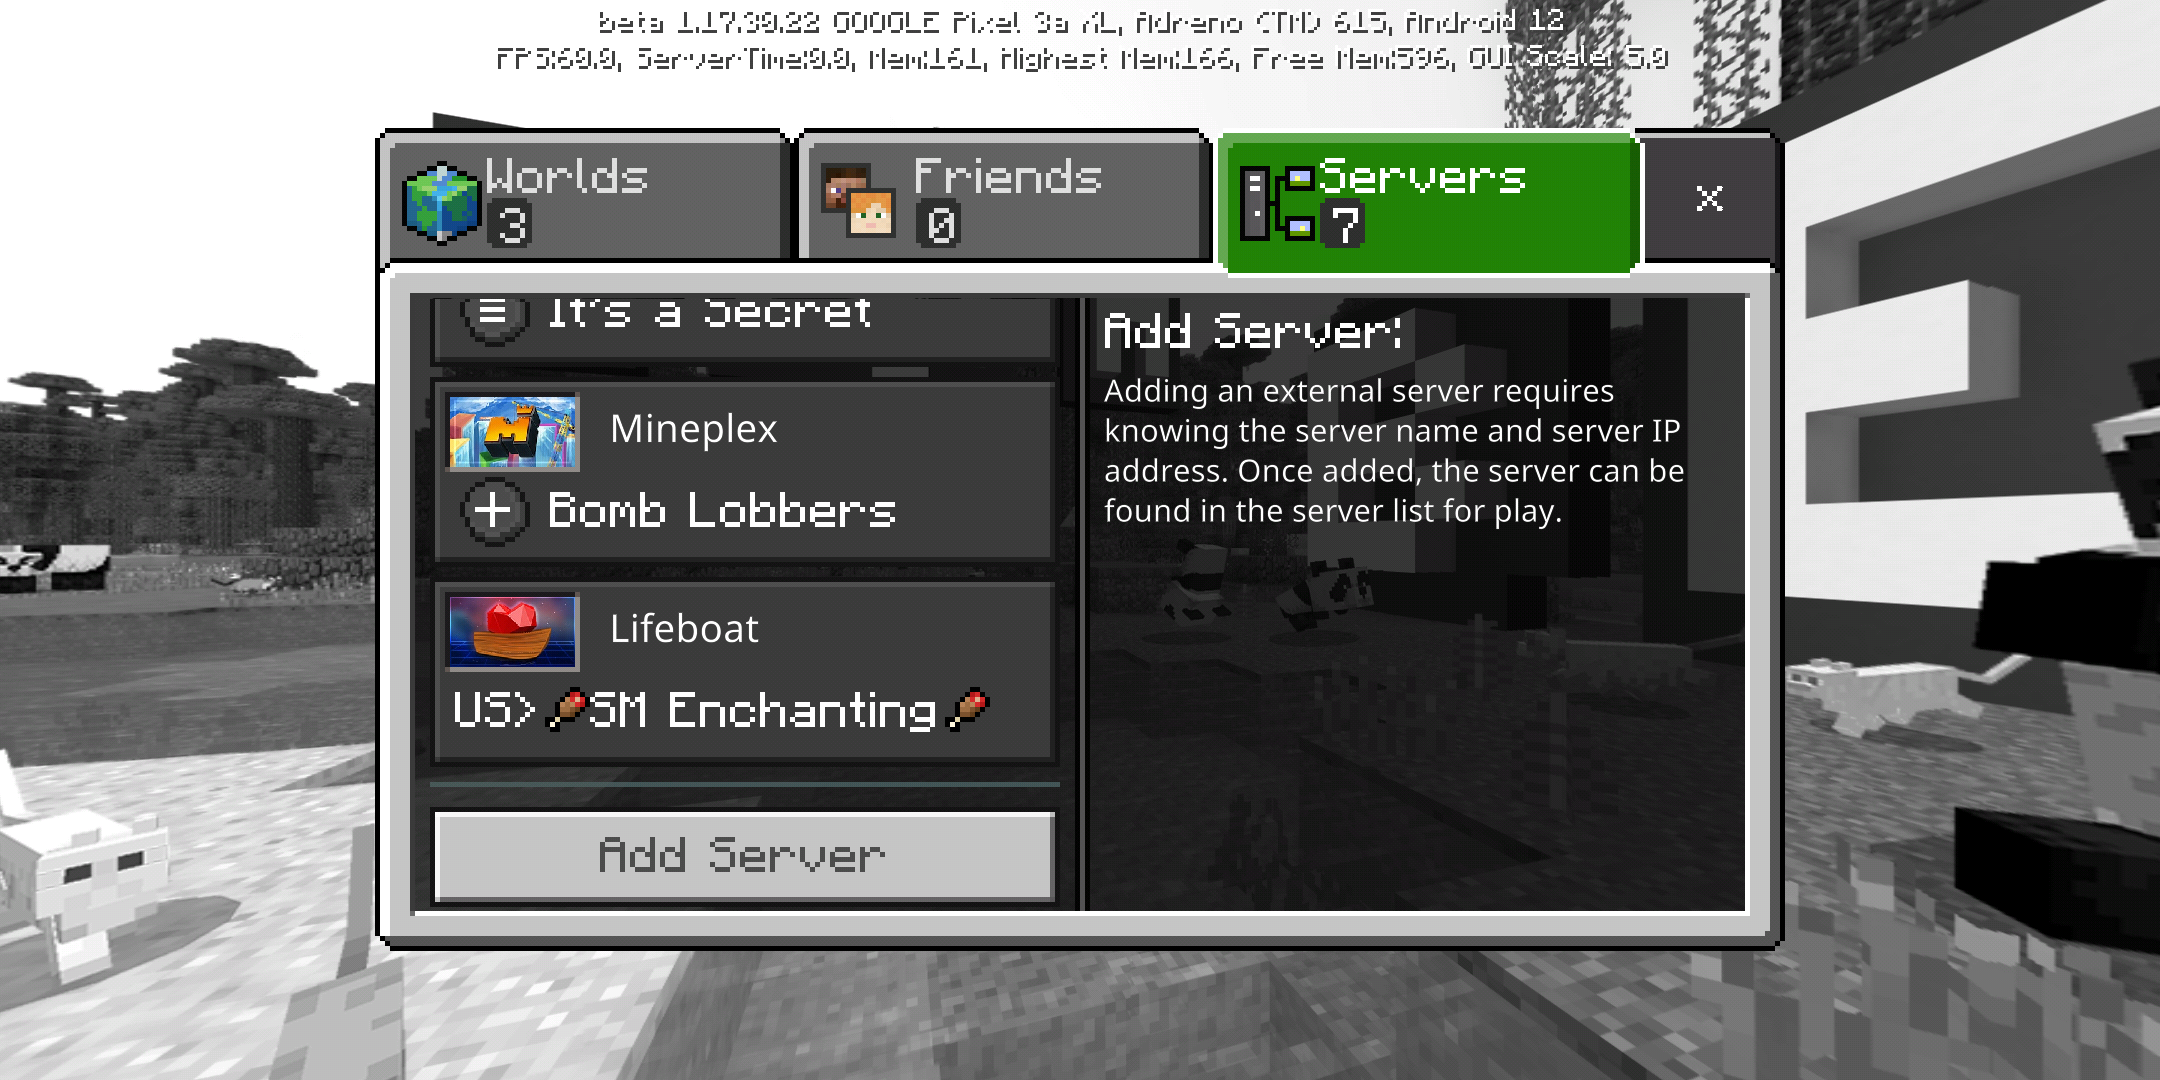
In the Minecraft app, select “Play” then the “Servers” tab. There will be a number of promoted third-party servers in the list, but scrolling to the bottom there will be a button to “Add Server”
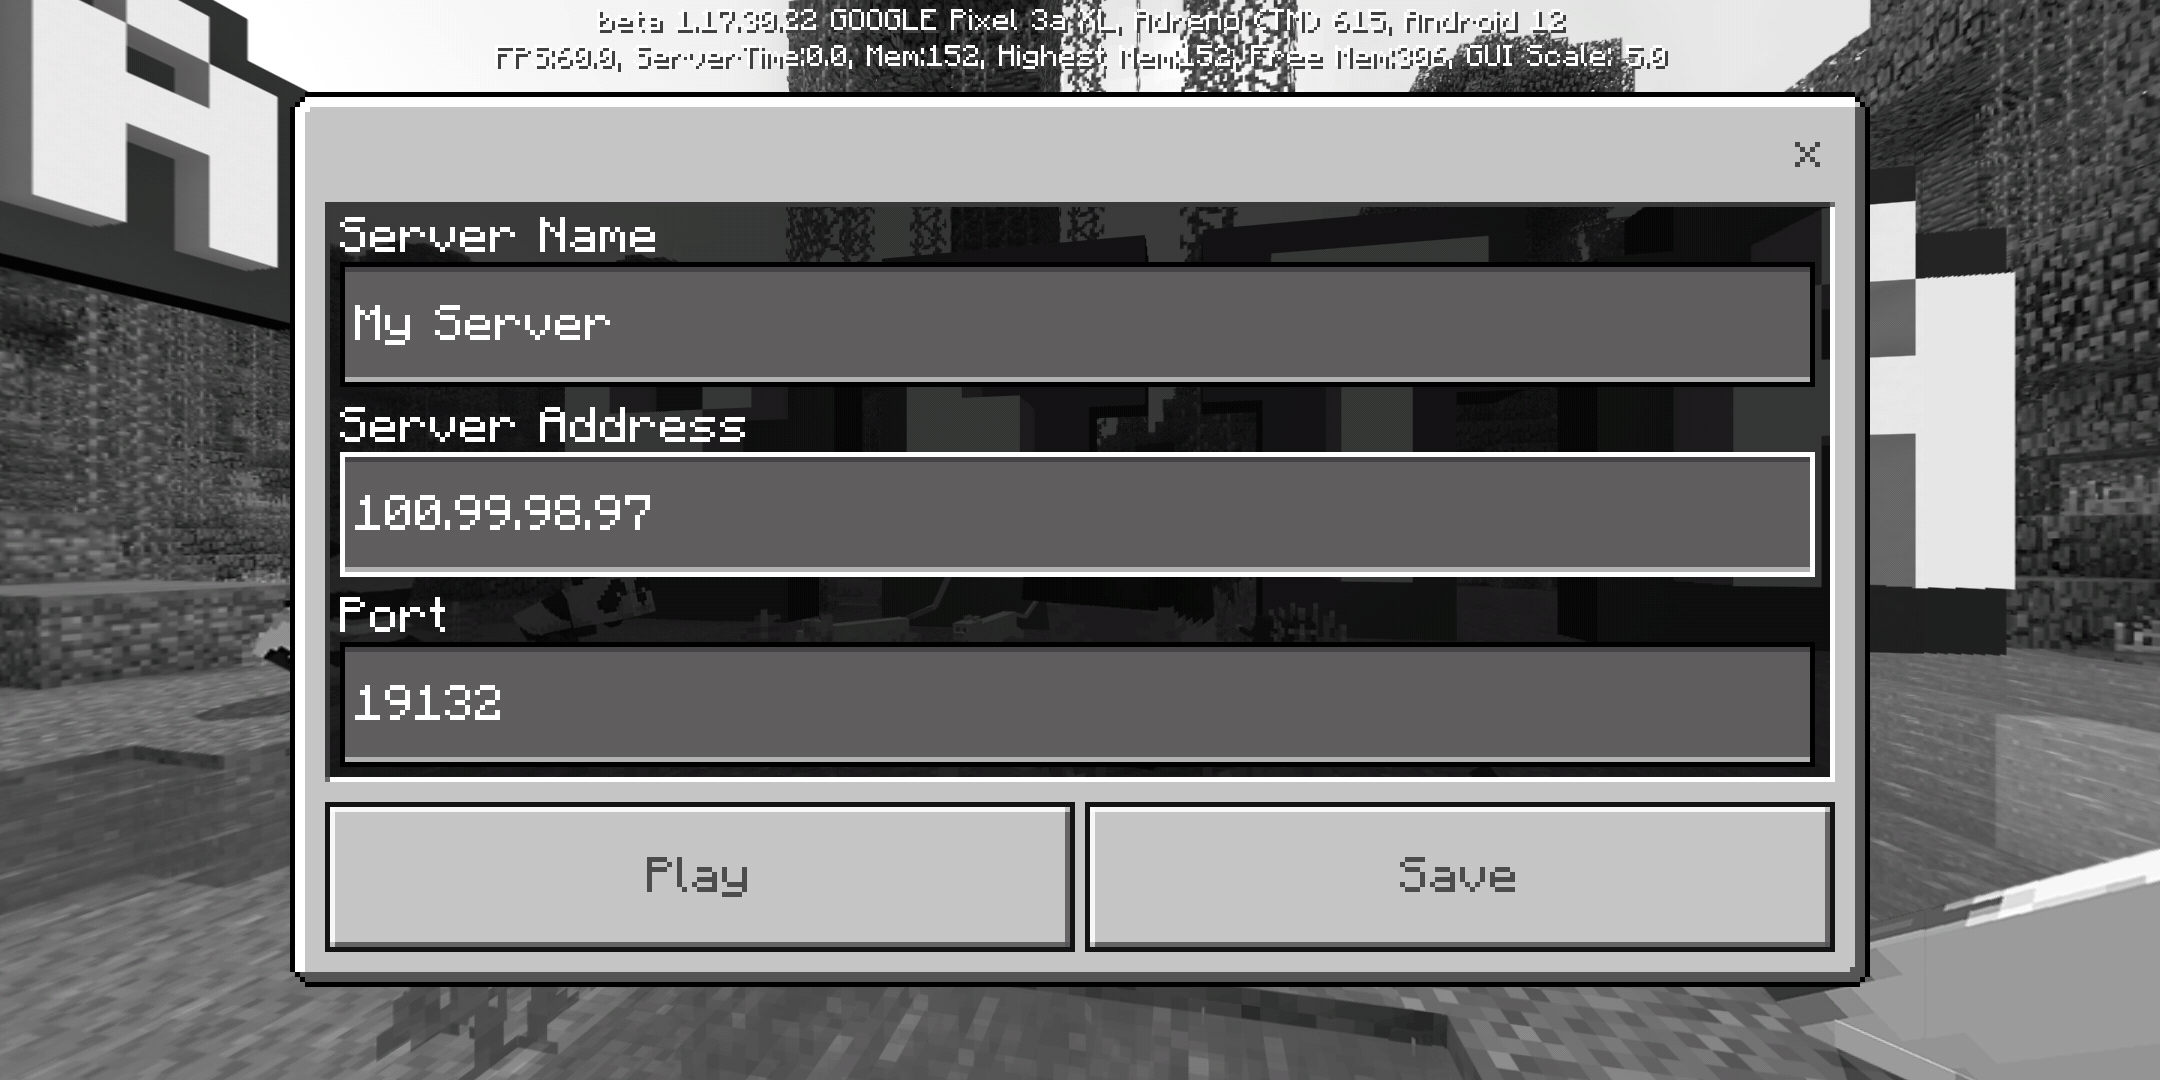
Add the details of the server just created, including the Tailscale IP address (the 100.x.y.z IP address, which can be looked up in the Tailscale app or in the admin console for your network)
You’ll be asked to login to XBox Live before being allowed to connect to the server. live.com accounts are free, and you don’t have to have an XBox to create one. Tailscale never receives the live.com account, Minecraft simply requires it before connecting.


