Putting Tailscale on the Steam Deck
Tailscale lets you connect your computers to each other so that you can use them together securely. As technology continues to advance, we’ll be carrying around more and more devices that, for convenience, we’ll call “computers.” Some of them are more limited than others, but today I want to talk about one device in particular: the Steam Deck by Valve.
The Steam Deck is a handheld Linux computer that is used for playing desktop-grade PC games. Its portability allows you to take your Steam library on the go with you anywhere, just like a Nintendo Switch. The Deck is also notable because it runs a variant of Arch Linux called SteamOS. Valve’s philosophy is that the Steam Deck is just a PC. It is open and hackable for anyone to modify to fit their needs. Valve even gives you the drivers to install Windows on the Deck, in case you want to.
Since the Steam Deck is essentially a PC, you can put Tailscale on it so that you can use it with your internal services, such as an NAS, and remotely access your home network when you’re on the go. You might also want to use Taildrop to copy files over to your Deck so you don’t have to mess with authentication and SSH keys just to copy over a Skyrim mod or two.
Tailscale is a low-level networking primitive, and as such it can be difficult to miss the forest for the trees when it comes to figuring out what to do with it. You can do anything with Tailscale that you can do with a normal network, and since you can do a lot of things with a normal network, it’s easy to suffer from decision paralysis because of all the options you have at your fingertips. I want to give you ideas inspired by my own experiences and setbacks that will inspire you to come up with your own uses for Tailscale. My posts are designed to help challenge your assumptions and preconceptions about what a network is supposed to be or do, so that you can really get out there and experiment with things. What could you do with a network if you didn’t have to care about the hard parts of networking?
It’s just a PC
One of the easiest ways to install Tailscale is to blow away SteamOS, install whatever Linux distribution you want, and go from there. This Just Works™️ because Valve lets you replace SteamOS with any other operating system you want, even Windows.
However, this isn’t in the spirit of making the Deck run Tailscale. That is just putting another OS on the Deck and then installing Tailscale on it. This won’t easily give you access to the features SteamOS gives you and is overall not as interesting as getting Tailscale running on SteamOS itself.
Let’s start this by taking a closer look at what the Steam Deck is and what it runs. The Steam Deck is basically a pair of game controllers glued to either side of a small, single-board computer and a screen. This single-board computer is set up to run SteamOS, and SteamOS is based on Arch Linux. Tailscale is already packaged for Arch Linux, so from here it’s tempting to think something like this:
Oh, it’s just spicy Arch Linux. I can
pacman -S tailscaleonce I get to a shell, and from there I can use Tailscale normally, right?
It’s not just a PC
Well, let’s see how that works.
At a high level you need to do the following things:
- Create a password for the
deckuser (the user that the Steam Deck UI and desktop mode use) - Crack open the SteamOS readonly seal
- Set up the package manager’s keyring
- Install programs with
pacmanas normal
Then you should be able to install Tailscale using the command pacman -S tailscale — right? In practice, it’s not really that easy. Sure — this will work. Your Steam Deck will become a weirdly shaped ultra-portable PC that just happens to ship with game controllers. However, this will not keep working the moment that the Steam Deck installs an update.
The Steam Deck has an A/B partition setup much like ChromeOS. This means that when you boot the system into partition A, updates are installed to partition B. Then, when partition B boots, updates are installed into partition A. This gives the system the ability to go back to the previous partition if an update doesn’t work. In other words, if Valve makes an update that renders your Steam Deck unbootable, the Deck will shrug it off and go back to the older, known good version. This gives you a user experience similar to what you get with NixOS or FreeBSD with ZFS boot environments enabled without having to use either of those OSes.
However, when we crack open the SteamOS readonly seal, we edit one of the fungible OS partitions directly. If we make changes to the A partition, those changes will not apply to the B partition when an update is installed. So when you reboot into the B partition after an update, your changes appear to be gone. They are still there, however; they’re just inaccessible on the A partition. Those changes will then get wiped out of existence when an update is downloaded to the A partition.
This means that if you go through that process to install Tailscale on the Steam Deck running SteamOS with the native package manager, you basically create a time bomb where the Deck will randomly stop working once an update is applied to the system. This is very much not what we want here. Tailscale has a bit of a reputation for being “magic.” Tailscale is “the secure network that just works,” so it’s probably a very bad idea for you to set up Tailscale in a way that will randomly break in the future. This makes Tailscale not seem magic, which is the absolute opposite of what you want.
Drawing inside the lines
Drawing outside the lines won’t work reliably. Let’s draw inside the lines instead. In the terminal, you can use the mount command to list all the places on the disk that you do have access to write files into. In my own setup, I also passed it through a few grep invocations to filter down the output to what we really care about. (In the past years, there have been more and more pseudo-filesystems added to Linux systems, and they will make it harder to notice the things you care about here.) The end result is that you have these folders we can write to:
$ mount | grep nvme | grep rw
/dev/nvme0n1p6 on /var type ext4 (rw,relatime)
/dev/nvme0n1p8 on /home type ext4 (rw,relatime,x-systemd.growfs)
/dev/nvme0n1p8 on /opt type ext4 (rw,relatime)
/dev/nvme0n1p8 on /root type ext4 (rw,relatime)
/dev/nvme0n1p8 on /srv type ext4 (rw,relatime)
/dev/nvme0n1p8 on /var/cache/pacman type ext4 (rw,relatime)
/dev/nvme0n1p8 on /var/lib/docker type ext4 (rw,relatime)
/dev/nvme0n1p8 on /var/lib/flatpak type ext4 (rw,relatime)
/dev/nvme0n1p8 on /var/lib/systemd/coredump type ext4 (rw,relatime)
/dev/nvme0n1p8 on /var/log type ext4 (rw,relatime)
/dev/nvme0n1p8 on /var/tmp type ext4 (rw,relatime)
Given that we have access to these folders, let’s arbitrarily pick /home. Tailscale ships static binaries that you can use to install Tailscale on systems that aren’t otherwise able to run it. This looks like a good fit here because we don’t have to care about the forest of doom that is ABI incompatibility. You can make a folder in ~/.local/share, then go into it to download Tailscale:
$ mkdir -p ~/.local/tailscale/steamos
$ cd ~/.local/tailscale/steamos
$ wget https://pkgs.tailscale.com/stable/tailscale_1.24.2_amd64.tgz
$ tar xzf tailscale_1.24.2_amd64.tgz
$ cd tailscale_1.24.2_amd64
From here we can run tailscale version to test whether the binary can run at all:
$ ./tailscale version
1.24.2
  tailscale commit: 9d6867fb0ab30a33cbdfc8e583f5d39169dbb2e6
  other commit: 2d0f7ddc35aa4149e67e27d11ea317669cccdd94
  go version: go1.18.1-ts710a0d8610
Hooray! We have the Tailscale CLI working! This means that all we need to worry about is getting the node agent tailscaled running. There are several ways to do this, but I prefer running programs in an environment that is as close to its default environment as possible.
If it were possible, I would love to distribute this as a Flatpak. But it’s not possible: Tailscale uses some low-level kernel networking primitives, and the Flatpak sandbox understandably blocks us from using them. Even if we could use those primitives, Tailscale is a system service on Linux and not a GUI application (even on platforms where Tailscale has a GUI application, there’s still the system service running in the background). Flatpak doesn’t allow you to run system services.
So, you have to get more clever. Let’s step back a moment and think about the OS the Steam Deck is using. SteamOS is a fork of Arch Linux, a Linux distribution that is well known for its use of systemd. Arch makes use of every component of systemd to a degree that other distributions would find ludicrous. Some people have accused systemd of having a lot of “bloat” (read: unnecessary extras), but in cases like this, that “bloat” very much comes in handy, especially since each Steam Deck is going to have the same set of systemd components. This makes writing documentation/engineering logs like this a lot easier. After doing some extensive research and experimentation, I have identified two things we can try to run Tailscale on the Steam Deck.
As an aside, it may be tempting to wonder things like:
Why are there two ways to run a service like this? That seems like wasted effort on the systemd project. They should just have one way to run services and you should just use that.
Each of these things was created for different reasons and they all do different things, even though they might appear to have similar goals. I’m not judging! I’m just pointing out that in cases like the one we find ourselves in with the Deck, this becomes very convenient.
Most of the time when you have normal Linux machines, you have a lot of power over what they can do and how they can do it. This is very different than the situation with the Deck, which is closer to a game console than a normal PC. We can’t easily erase the limitations of the default OS image and draw our own path. We have to draw inside the lines. This is what comes with drawing inside the lines.
At a high level, we have two options for running Tailscale through systemd:
- Launching the
tailscaledprocess into the background usingsystemd-run - Creating a system extension image and layering that into SteamOS, then using systemd to manage
tailscaledas normal
Let’s go over each of these options in their own little sections on how to use them and what the advantages and drawbacks of these approaches are.
tailscaled run in kernel networking mode. Portable services have additional constraints similar to Flatpak that make it unviable for use on the Steam Deck. You certainly don’t want to configure everything on your gaming console to use a SOCKS proxy server!systemd-run
The easiest way to hoist this service into systemd would be to use systemd-run. systemd-run lets you create one-off systemd jobs using systemd’s DBus API. This basically lets you spawn off services, socket-activated services, and timer jobs (think spicy cronjobs) at will. They will keep running after you lock your screen or disconnect from SSH. This lets your one-off jobs have all the advantages of being a systemd service, including memory limits, isolation from the system, detailed logging with the journal, and management of services using control groups.
As an example, we can run systemd-run -S to spawn into a shell session managed by systemd:
(deck@taildeck ~)$ sudo systemd-run -S
[sudo] password for deck:
Running as unit: run-u97.service
Press ^] three times within 1s to disconnect TTY.
(A+)(root@taildeck deck)#
We can then use systemctl status in another terminal window to see information about this transient shell session:
(A+)(root@taildeck deck)# systemctl status run-u97.service
● run-u97.service - /bin/bash
     Loaded: loaded (/run/systemd/transient/run-u97.service; transient)
  Transient: yes
     Active: active (running) since Tue 2022-05-03 13:28:31 EDT; 50s ago
   Main PID: 8274 (bash)
      Tasks: 3 (limit: 17718)
     Memory: 3.6M
        CPU: 58ms
     CGroup: /system.slice/run-u97.service
             ├─8274 /bin/bash
             ├─8290 systemctl status run-u97.service
             └─8291 less

May 03 13:28:31 taildeck systemd[1]: Starting /bin/bash...
May 03 13:28:31 taildeck systemd[1]: Started /bin/bash.
This is one way to manage tailscaled in systemd. Reading through the manpage and tailscaled.service, you could end up with a systemd-run command that looks like this:
sudo systemd-run \
    --service-type=notify \
    --description="Tailscale node agent" \
    -u tailscaled.service \
    -p ExecStartPre="/home/deck/.local/share/tailscale/steamos/tailscale_1.24.2_amd64/tailscaled --cleanup" \
    -p ExecStopPost="/home/deck/.local/share/tailscale/steamos/tailscale_1.24.2_amd64/tailscaled --cleanup" \
    -p Restart=on-failure \
    -p RuntimeDirectory=tailscale \
    -p RuntimeDirectoryMode=0755 \
    -p StateDirectory=tailscale \
    -p StateDirectoryMode=0700 \
    -p CacheDirectory=tailscale \
    -p CacheDirectoryMode=0750 \
    "/home/deck/.local/share/tailscale/steamos/tailscale_1.24.2_amd64/tailscaled" \
    "--state=/var/lib/tailscale/tailscaled.state" \
    "--socket=/run/tailscale/tailscaled.sock"
Running this command will make tailscaled start up and then you can log in with this command:
$ sudo /home/deck/.local/share/tailscale/steamos/tailscale_1.24.2_amd64/tailscale up --operator=deck --qr
You can then scan the QR code with your phone and log into your tailnet and do all the computer things you want.
systemd-run to super-daemonize one-off tasks. This is incredibly useful for handling things like package upgrades when you don’t want to risk it randomly dying when your shell session gets interrupted.Doing this has many advantages when compared to cracking the readonly seal: It installs Tailscale without needing to modify the system image, and the relevant state, cache, and runtime directories for Tailscale are automatically created by systemd into writable folders when tailscaled.service starts. This allows you to update your Steam Deck freely without worrying about updates randomly breaking your VPN.
However, the main drawback to this approach is that Tailscale won’t automatically start on boot. There are ways around this (namely, by either editing systemd/tailscaled.service to point to the tailscaled location in /home/deck/.local/share/tailscale/steamos or by using systemctl cat tailscaled.service after running that above systemd-run command and putting that in /etc/systemd/system), but in general starting Tailscale once like this won’t integrate it into the system.
$PATH, but just having the tailscale command in /usr/bin would make life a lot easier.This setup will work, and in most cases it should do just about everything you need. However, there is a much more ergonomic option: system extensions.
systemd-sysext
The systemd project has recently introduced the concept of system extension images. These allow you to add arbitrary extra files to a system at runtime, much like you would by installing a package to the system. However, the main difference is that a system extension is overlaid on top of the underlying system partitions, so you don’t need to have write access to the system partition to install packages into it. This is likely the big reason why they spearheaded the migration of everything in Linux-land to be in /usr with compatibility symlinks to accommodate older workflows. For more information about how to use system extension images, see this blog post by Lennard Pottering.
These are super convenient for our use case because they allow us to install Tailscale into the Steam Deck as if we installed it from pacman, but without breaking the readonly seal and leaving a landmine to be triggered the next time a system update is installed. This also allows us to run the tailscale command like any other command on the system, which will make debugging a lot easier.
The static binary tarballs that Tailscale ships are very close to a system extension image already; the main differences are that we need to do the following in a temporary directory:
- Put the binaries in
usr/bin/tailscaleandusr/sbin/tailscaled - Put the systemd unit in
usr/lib/systemd/system/tailscaled.service - Add an
extension-releasefile that defines the OS that the extension is compatible with - If you are making your own extension images at home, do not forget to do this step. Without this step, the extension image will not be recognized.
To do this we can run a shell script like the following:
#!/usr/bin/env bash

set -euo pipefail

dir="$(mktemp -d)"
pushd .
cd "${dir}"

tarball="$(curl 'https://pkgs.tailscale.com/stable/?mode=json' | jq -r .Tarballs.amd64)"
version="$(echo ${tarball} | cut -d_ -f2)"

curl "https://pkgs.tailscale.com/stable/${tarball}" -o tailscale.tgz

mkdir -p tailscale/usr/{bin,sbin,lib/{systemd/system,extension-release.d}}
tar xzf tailscale.tgz

cp -vrf "tailscale_${version}_amd64"/tailscale tailscale/usr/bin/tailscale
cp -vrf "tailscale_${version}_amd64"/tailscaled tailscale/usr/sbin/tailscaled
cp -vrf "tailscale_${version}_amd64"/systemd/tailscaled.service tailscale/usr/lib/systemd/system/tailscaled.service

sed -i 's/--port.*//g' tailscale/usr/lib/systemd/system/tailscaled.service

source /etc/os-release
echo -e "SYSEXT_LEVEL=1.0\nID=steamos\nVERSION_ID=${VERSION_ID}" >> tailscale/usr/lib/extension-release.d/extension-release.tailscale

mkdir -p /var/lib/extensions
rm -rf /var/lib/extensions/tailscale
cp -vrf tailscale /var/lib/extensions/

mkdir -p /etc/default
touch /etc/default/tailscaled

popd
rm -rf "${dir}"
We can then copy this to the Steam Deck, then run it:
$ sudo bash ./tailscale.sh
When this is done running, we can run the following command to merge in the system extension:
$ sudo systemd-sysext merge
This will add Tailscale to the Deck’s filesystem so you can start tailscaled as normal and log in:
$ systemctl start tailscaled.service
$ sudo tailscale up --qr --operator=deck --ssh
This will make a rather large QR code show up on your Deck. When you scan it and log in with your phone, you will be authenticated to Tailscale and you can use all your tailnet features as normal.
Steam Deck plugin sneak peek
This can be made a lot simpler with the Steam Deck Plugin UI. I have been working on a Steam Deck plugin to automate this setup away from you. It isn’t in a state where I feel comfortable releasing it yet, but here’s a sneak preview of what the plugin looks like:
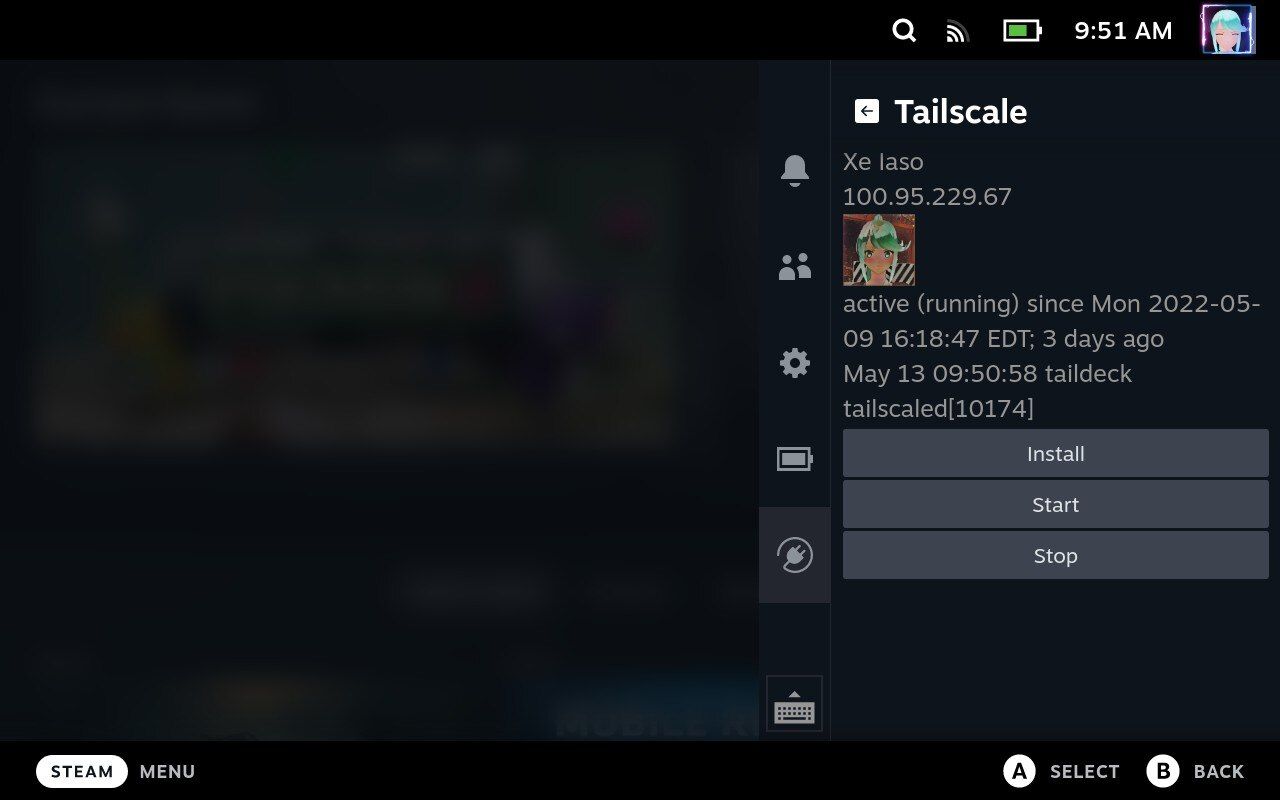
More details to come as soon as I can get them nailed down.
Fun things you can do
I did a lot of experimenting, and here are some things that I got working that you may find inspiring. The big one was remote-mounting my NAS over Tailscale and playing games stored on my NAS. This was stable enough to let me play more simple games on the Steam Deck in Montreal even though my NAS with the actual game files was in Ottawa. I was able to play it all day without any issues, save slightly higher load times. Other games may not have the same experience, but games released around 2005 and earlier usually fare better in this regard. With the Deck’s Wi-Fi card in a perfectly spherical test environment, loading things over the network will be faster than reading data from a DVD drive, even with the multiple layers of overhead involved.
This will require testing. Some games tolerate higher latency to storage better than others. Games like Dead Space 2 will fare worse than others due to Dead Space 2 constantly streaming in assets from the disk to create the world around you as you move forward.
Generally, the simpler the game, the more likely it will just work.
Games with dedicated servers
In my testing, nearly every game that has a self-hostable dedicated server worked over Tailscale. Here are some of the games that I tested:
- Factorio
- Minecraft
- Valheim
- Starbound
- Terraria
The only hiccup came when I was trying to play Assetto Corsa Competizione (a racing simulator) because its dedicated server discovery process relies on broadcast/multicast packets (which Tailscale doesn’t support at time of publication). Everything else was seamless, just as if I were hosting the server over a local network or the public internet. I was able to share servers with node sharing, and my friends were able to join without any issues.
Moonlight game streaming
The Steam Deck has a game streaming service by default; however, it can have issues with double-NAT and other network situations that Tailscale can tolerate without blinking. Moonlight is an open source game streaming protocol that lets you run your games on your gaming tower and send the video stream to another device that can’t run them, such as the Steam Deck. Moonlight is available from the Discover store in the KDE desktop mode available in the Steam button menu.
I was not able to get this working due to the hardware of my gaming machine being incompatible (I use an AMD card instead of an NVIDIA card), but there are reports of it working seamlessly for people with compatible machines.
What games do you like to play with your friends? Have you gotten your Steam Deck in yet? What games would you like to host your own servers for if you didn’t have to worry about securing the servers down, DDoS attacks, and griefers? Reach out to us @Tailscale or join our forums to talk about your experiences.


